

- Azure endpoints — services running in your Azure subscription (App Services, Cloud Services, Public IPs).
- External endpoints — services outside Azure (on-premises or other clouds), referenced by IP (IPv4/IPv6) or FQDN.
- Nested endpoints — references to other Traffic Manager profiles (useful for hierarchical routing and large-scale deployments).
Azure Traffic Manager is DNS-based: it returns one or more IPs/FQDNs to the client according to the selected routing method (performance, priority, weighted, geographic, multivalue, subnet).
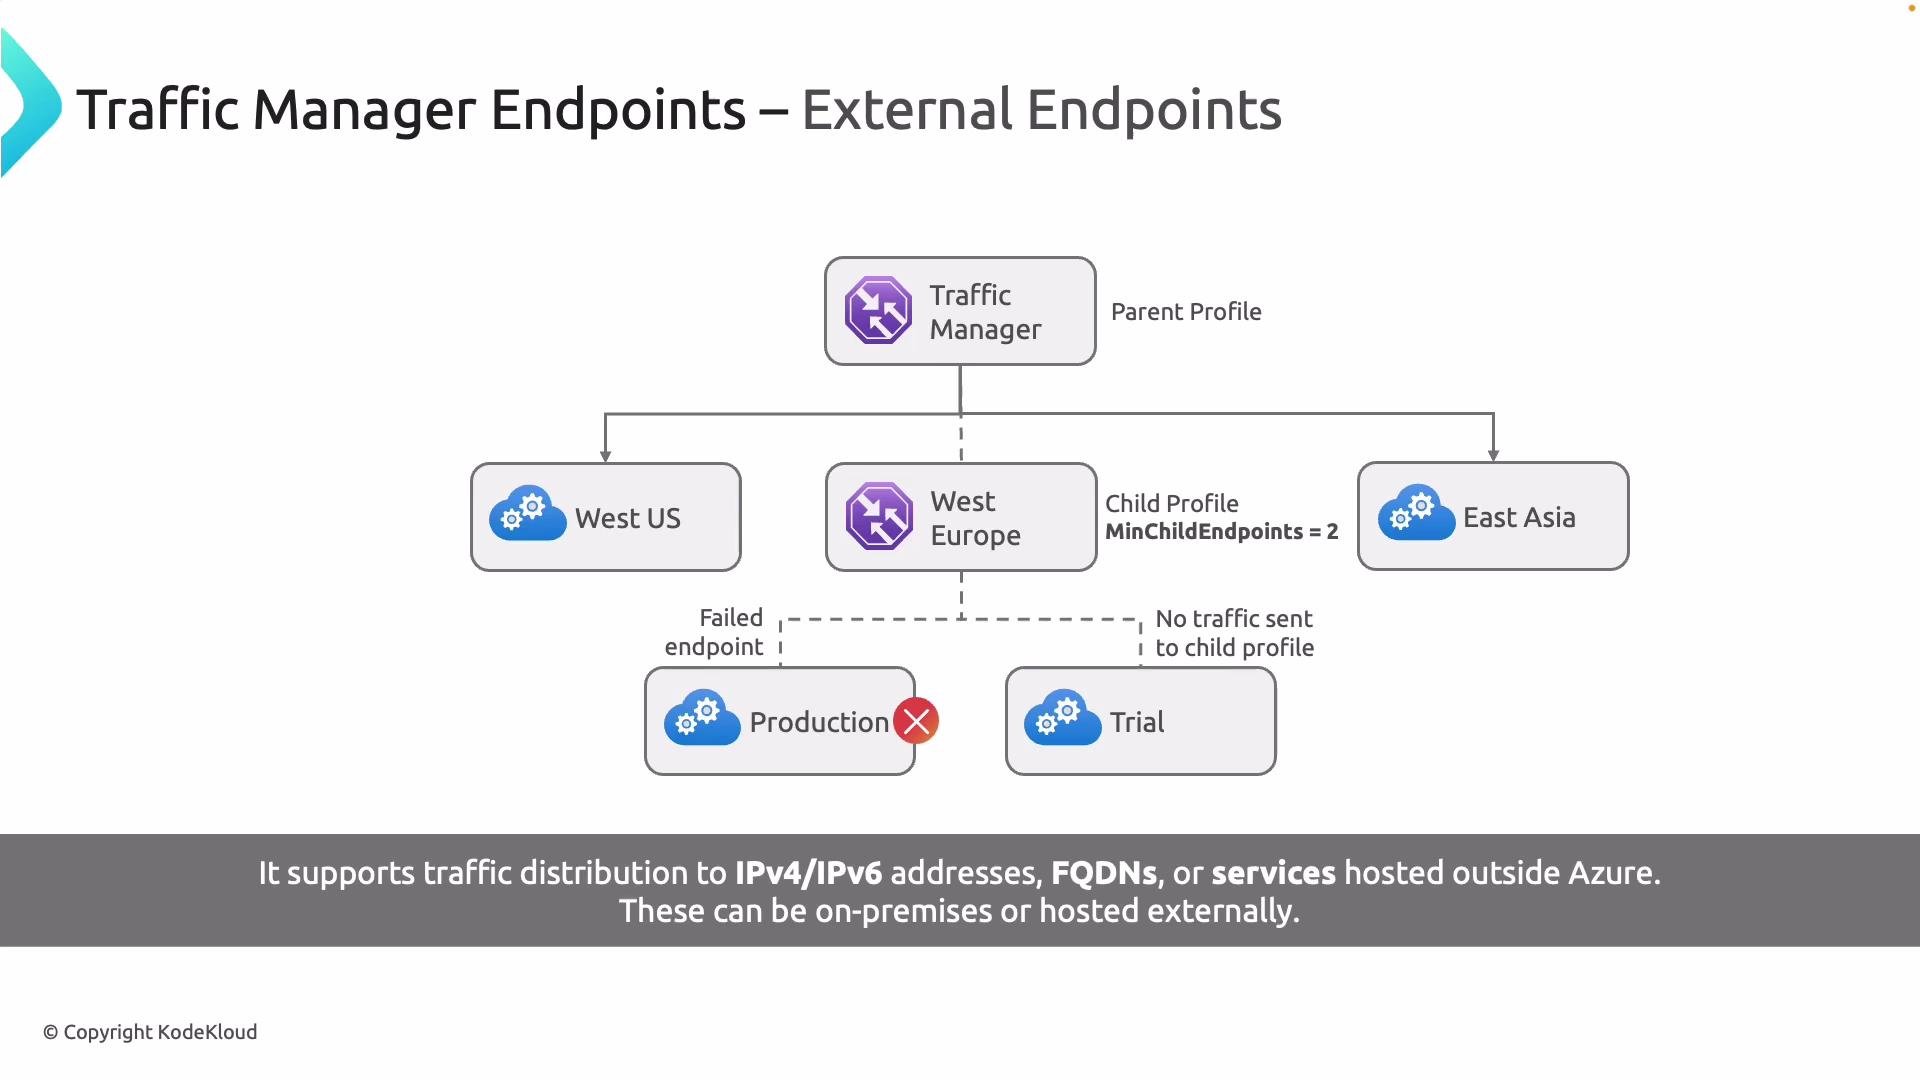
Nested profiles
Nested profiles let the parent profile reference other Traffic Manager profiles. The parent profile has its routing method (for example, latency), and each nested profile can use a different routing method (for example, priority). Use nested profiles to aggregate regions or implement conditional failover across multiple child profiles.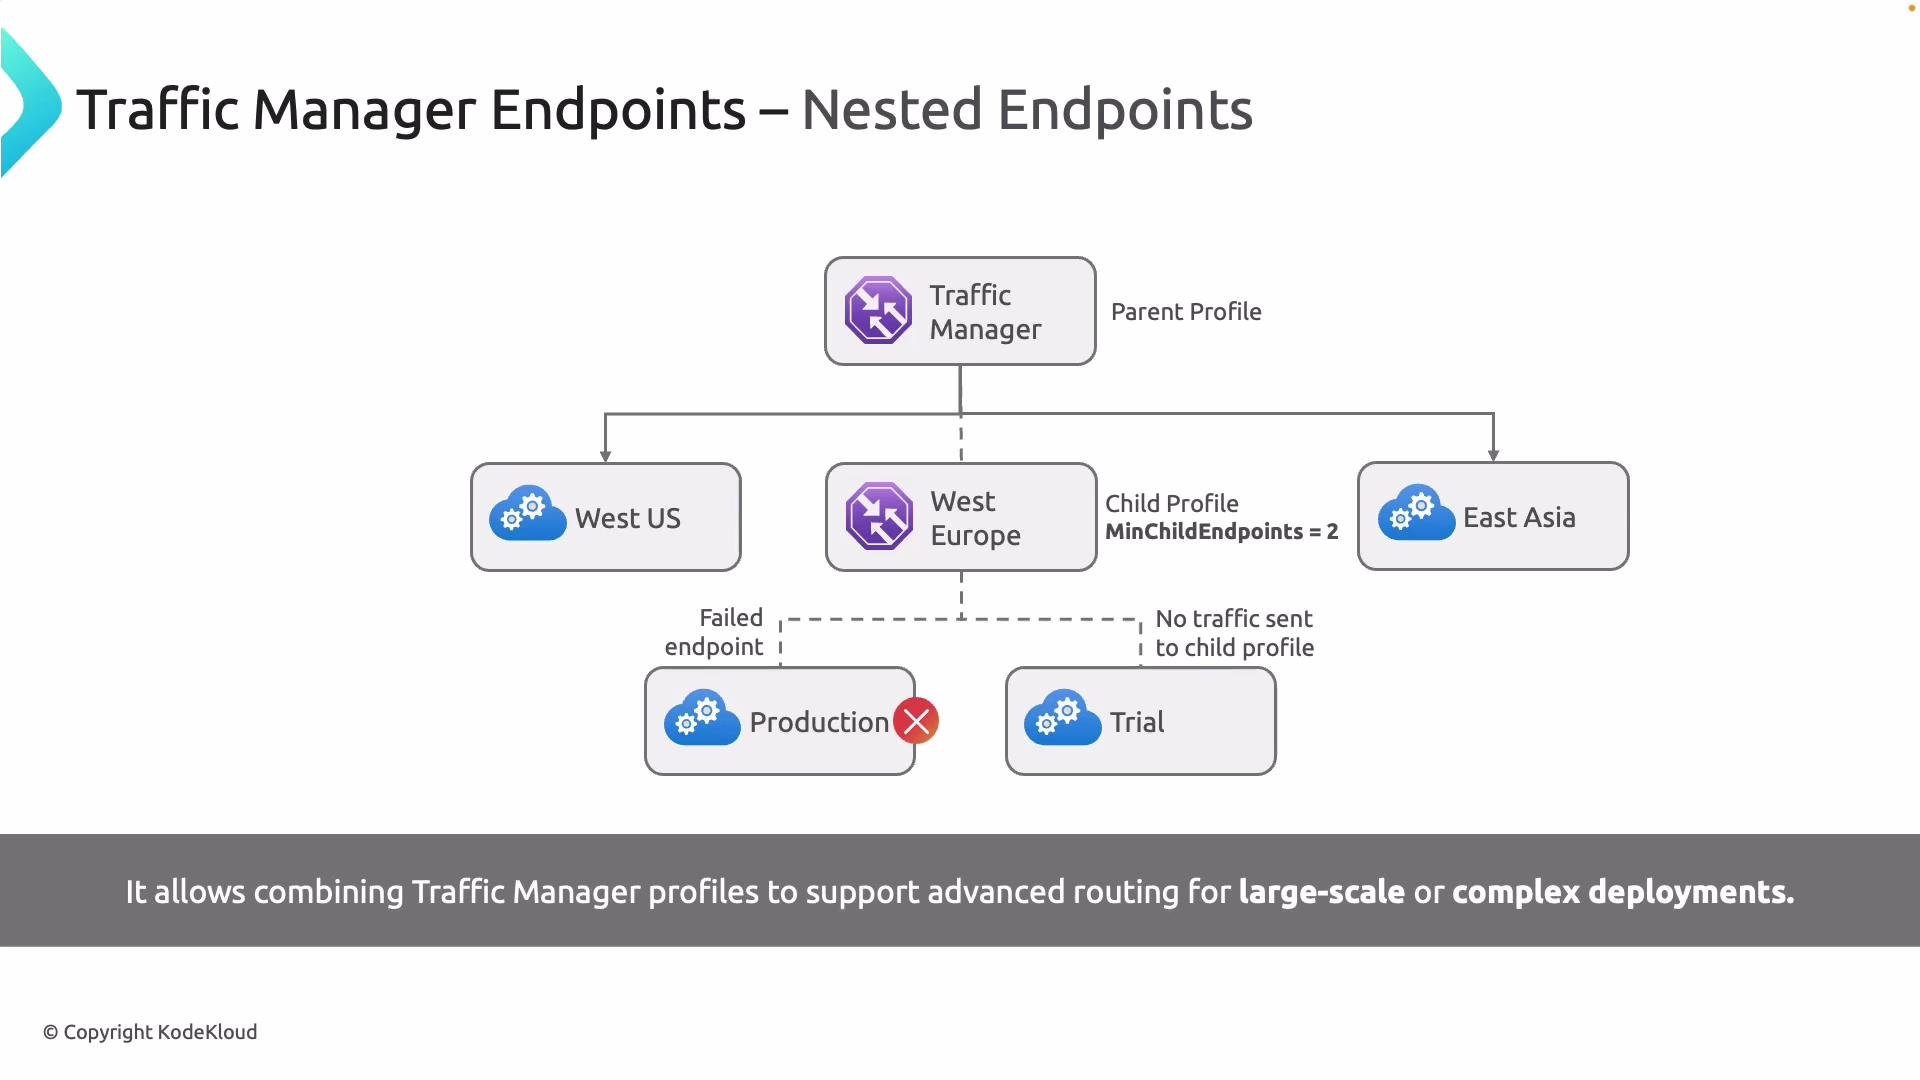
- The
min child endpointsoption enforces how many healthy child endpoints must exist before the nested profile accepts traffic. For example, ifmin child endpoints = 2, the nested profile will only be considered healthy when at least two child endpoints are healthy. If the primary endpoint fails and the nested profile does not meet its minimum healthy child requirement, Traffic Manager will not route traffic to that nested profile.
Portal workflow — create and configure a Traffic Manager profile
Follow these steps in the Azure portal to create a Traffic Manager profile and prepare endpoints.-
Create a Traffic Manager profile
- Choose a globally unique name — this forms the FQDN:
your-profile-name.trafficmanager.net. - Select a routing method:
- Performance, Weighted, Priority, Geographic, Multivalue, Subnet
- Notes:
- Performance/Weighted/Priority/Geographic typically return a single endpoint per DNS response.
- Multivalue can return multiple healthy endpoints in one response.
- Subnet maps client source subnets to specific endpoints.
- Choose the subscription and resource group. (Traffic Manager is a global resource; the region you pick is only for metadata/storage.)
- Click Create to deploy the profile.
- Choose a globally unique name — this forms the FQDN:
-
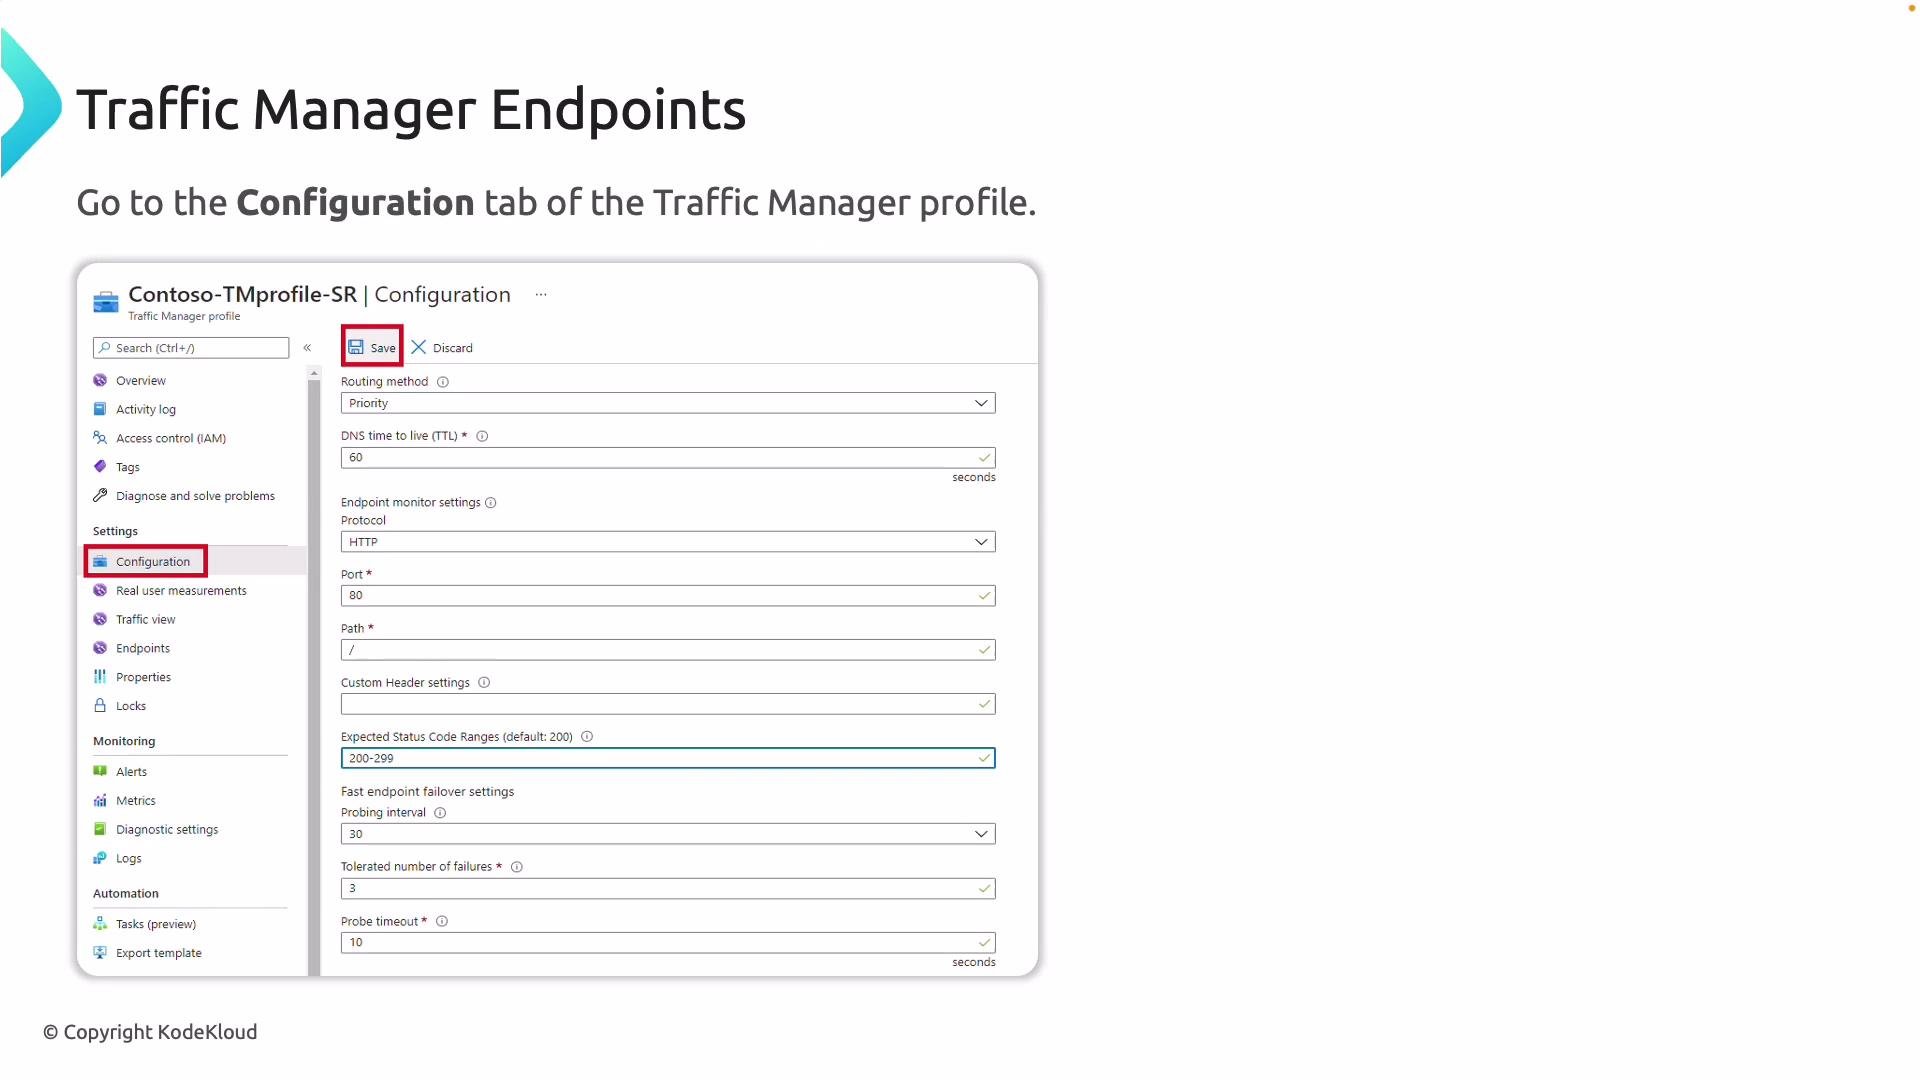
Configure probes and endpoint health checks
- Under the profile’s Configuration tab, set:
- Protocol:
HTTP,HTTPS, orTCP - Port: probe port (e.g.,
80or443) - Path: probe path (e.g.,
/healthor/) - Optional headers and expected status codes
- Probe interval, tolerated failures, probe timeout
- Protocol:
- These probe settings tell Traffic Manager how to determine endpoint health.
- Under the profile’s Configuration tab, set:
- Add endpoints
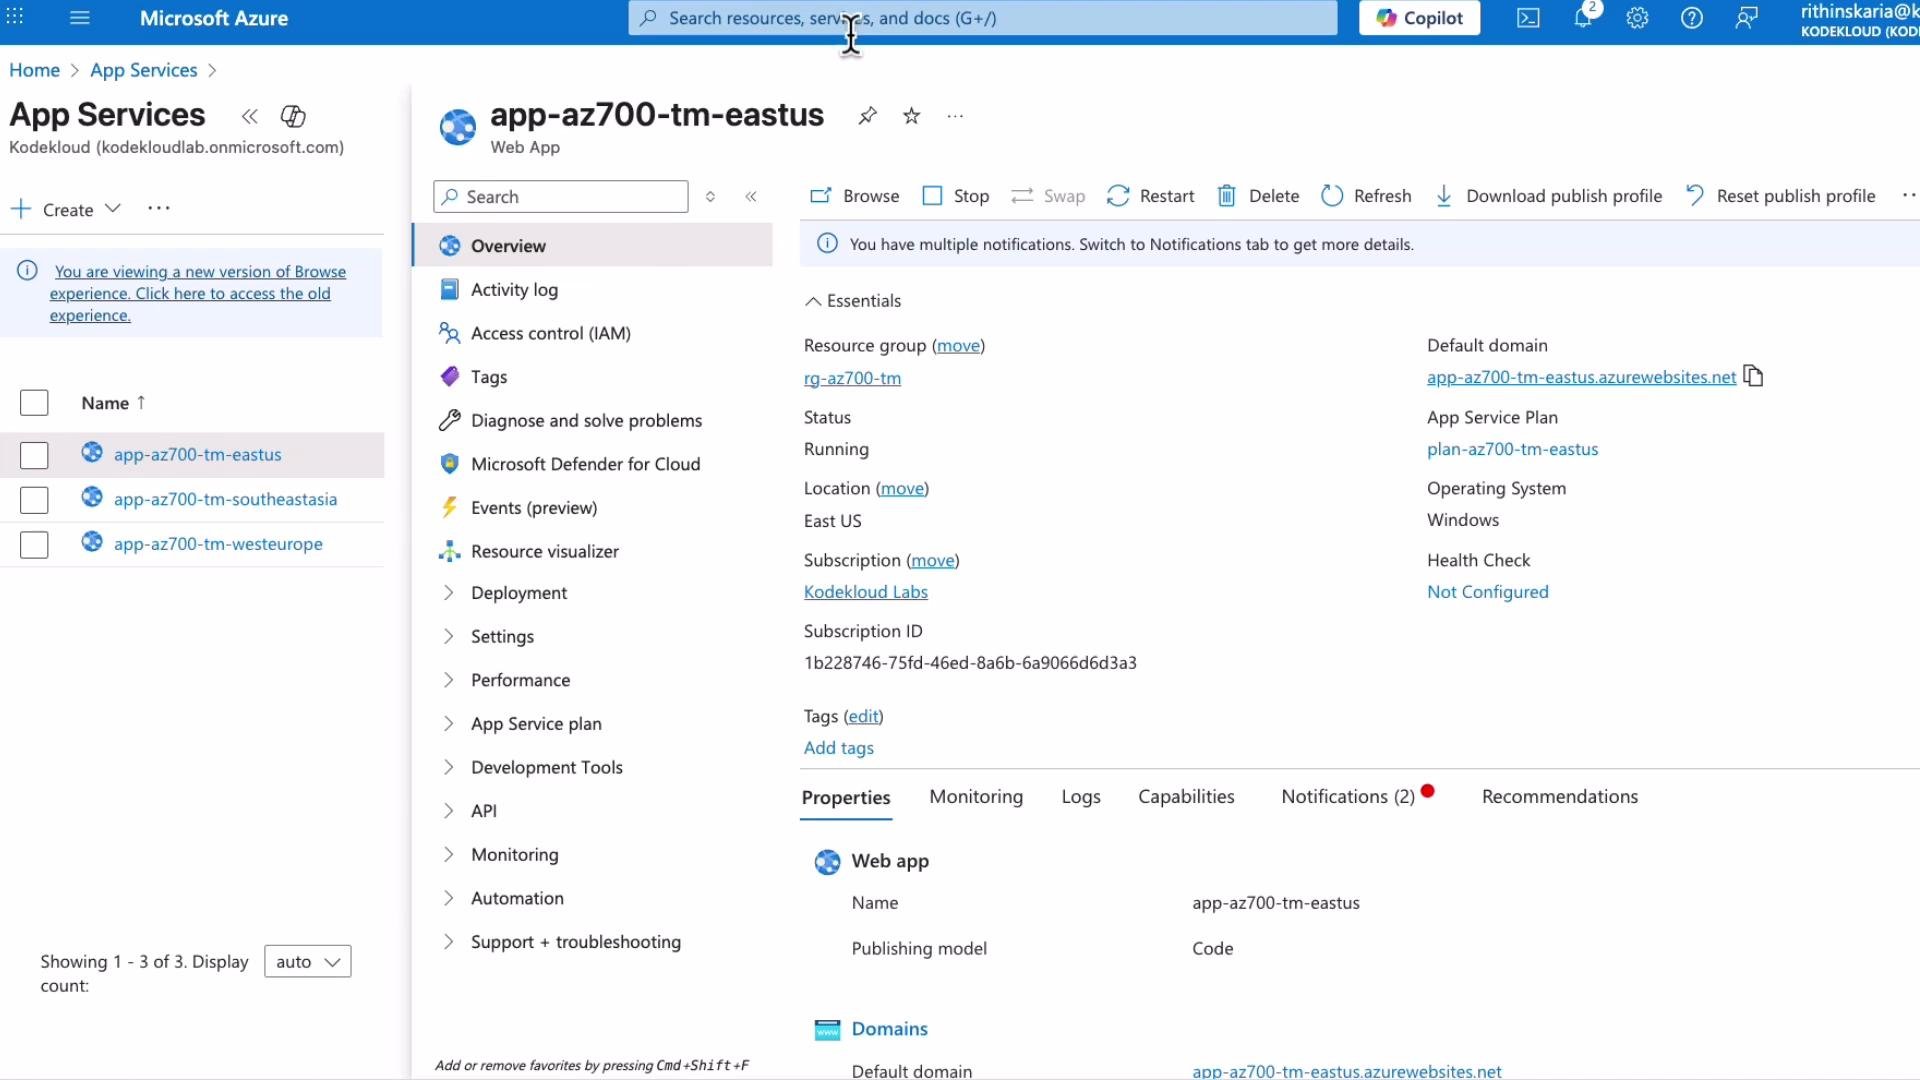
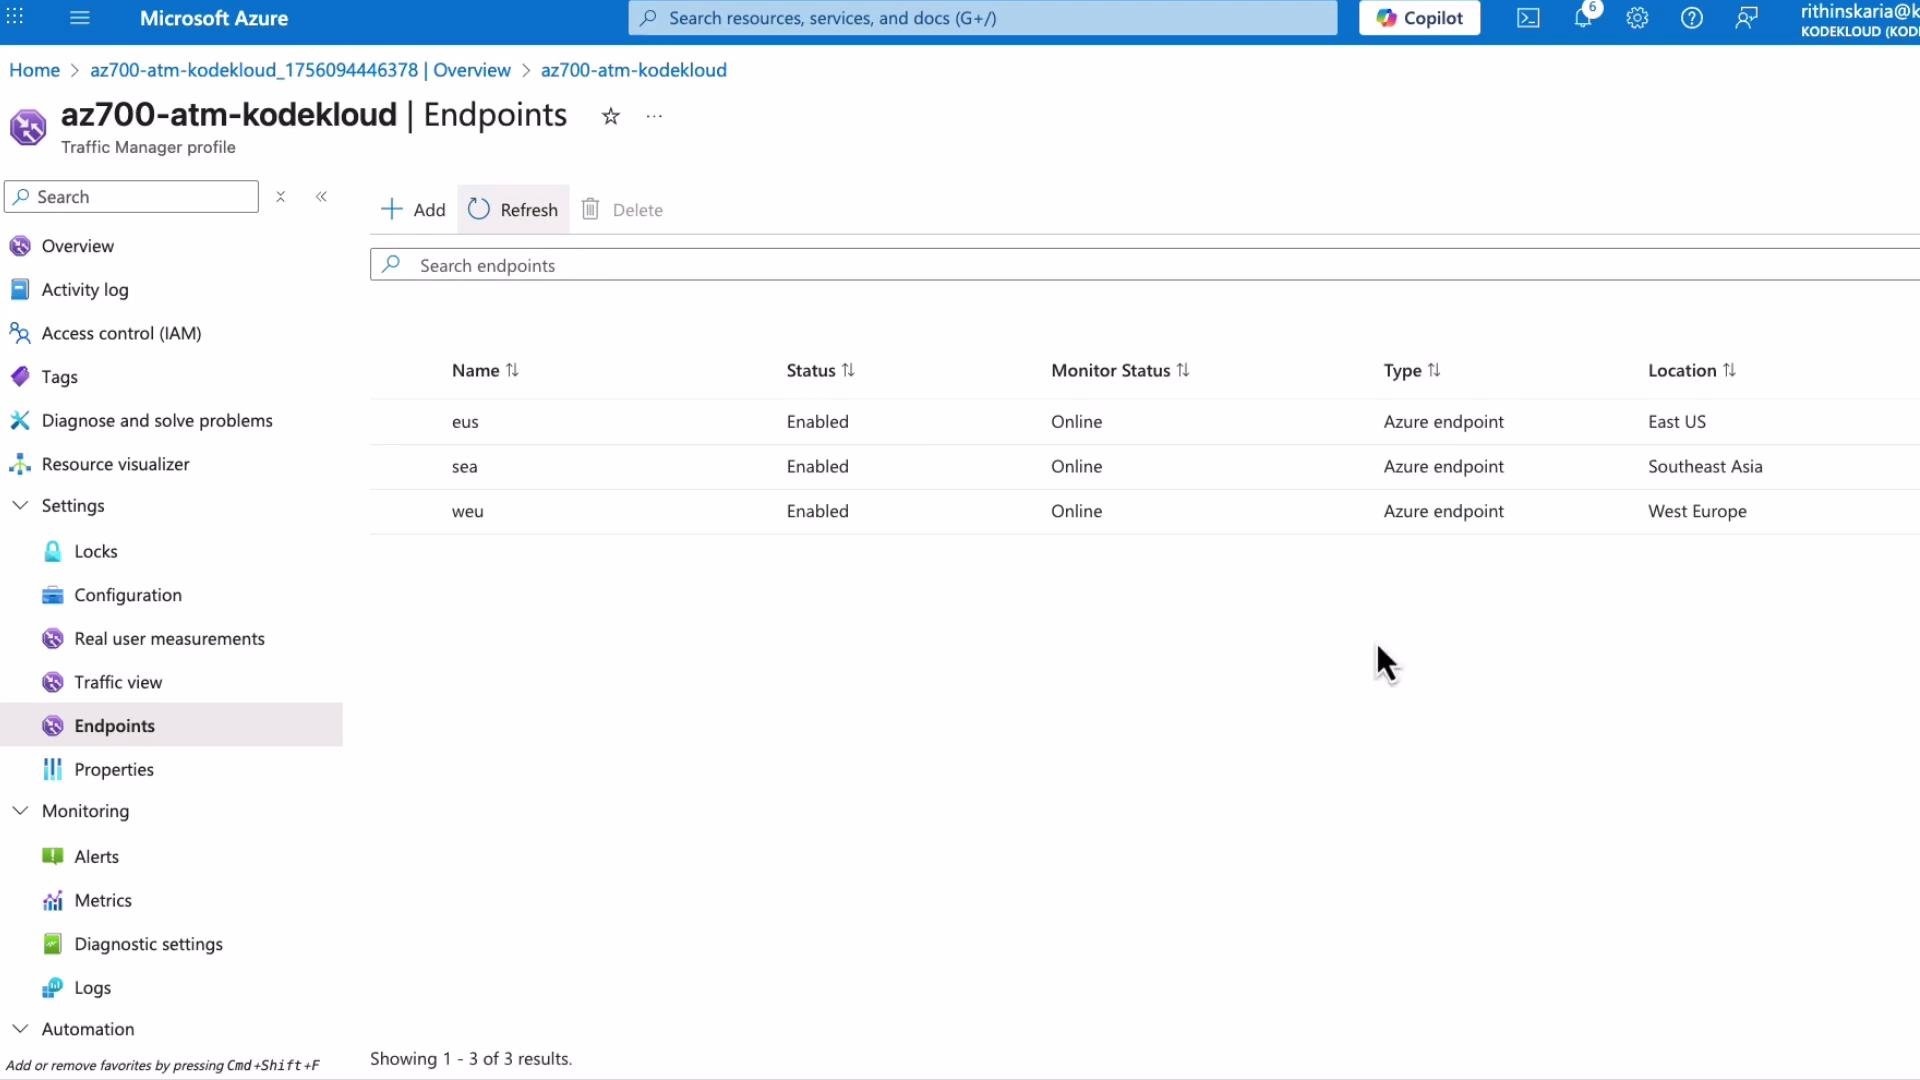
- Azure endpoint: choose target resource type (App Service, Cloud Service, Public IP) and select the resource.
- External endpoint: enter the FQDN or IP address of the non-Azure service.
- Nested endpoint: reference another Traffic Manager profile.
- Example portal flow: Add → Azure endpoint → Name (e.g.,
EUS) → Target App Service in East US → enable health checks. Do not select “Always serve traffic” unless you intentionally want to bypass health probes.
Host header behavior and App Service integration
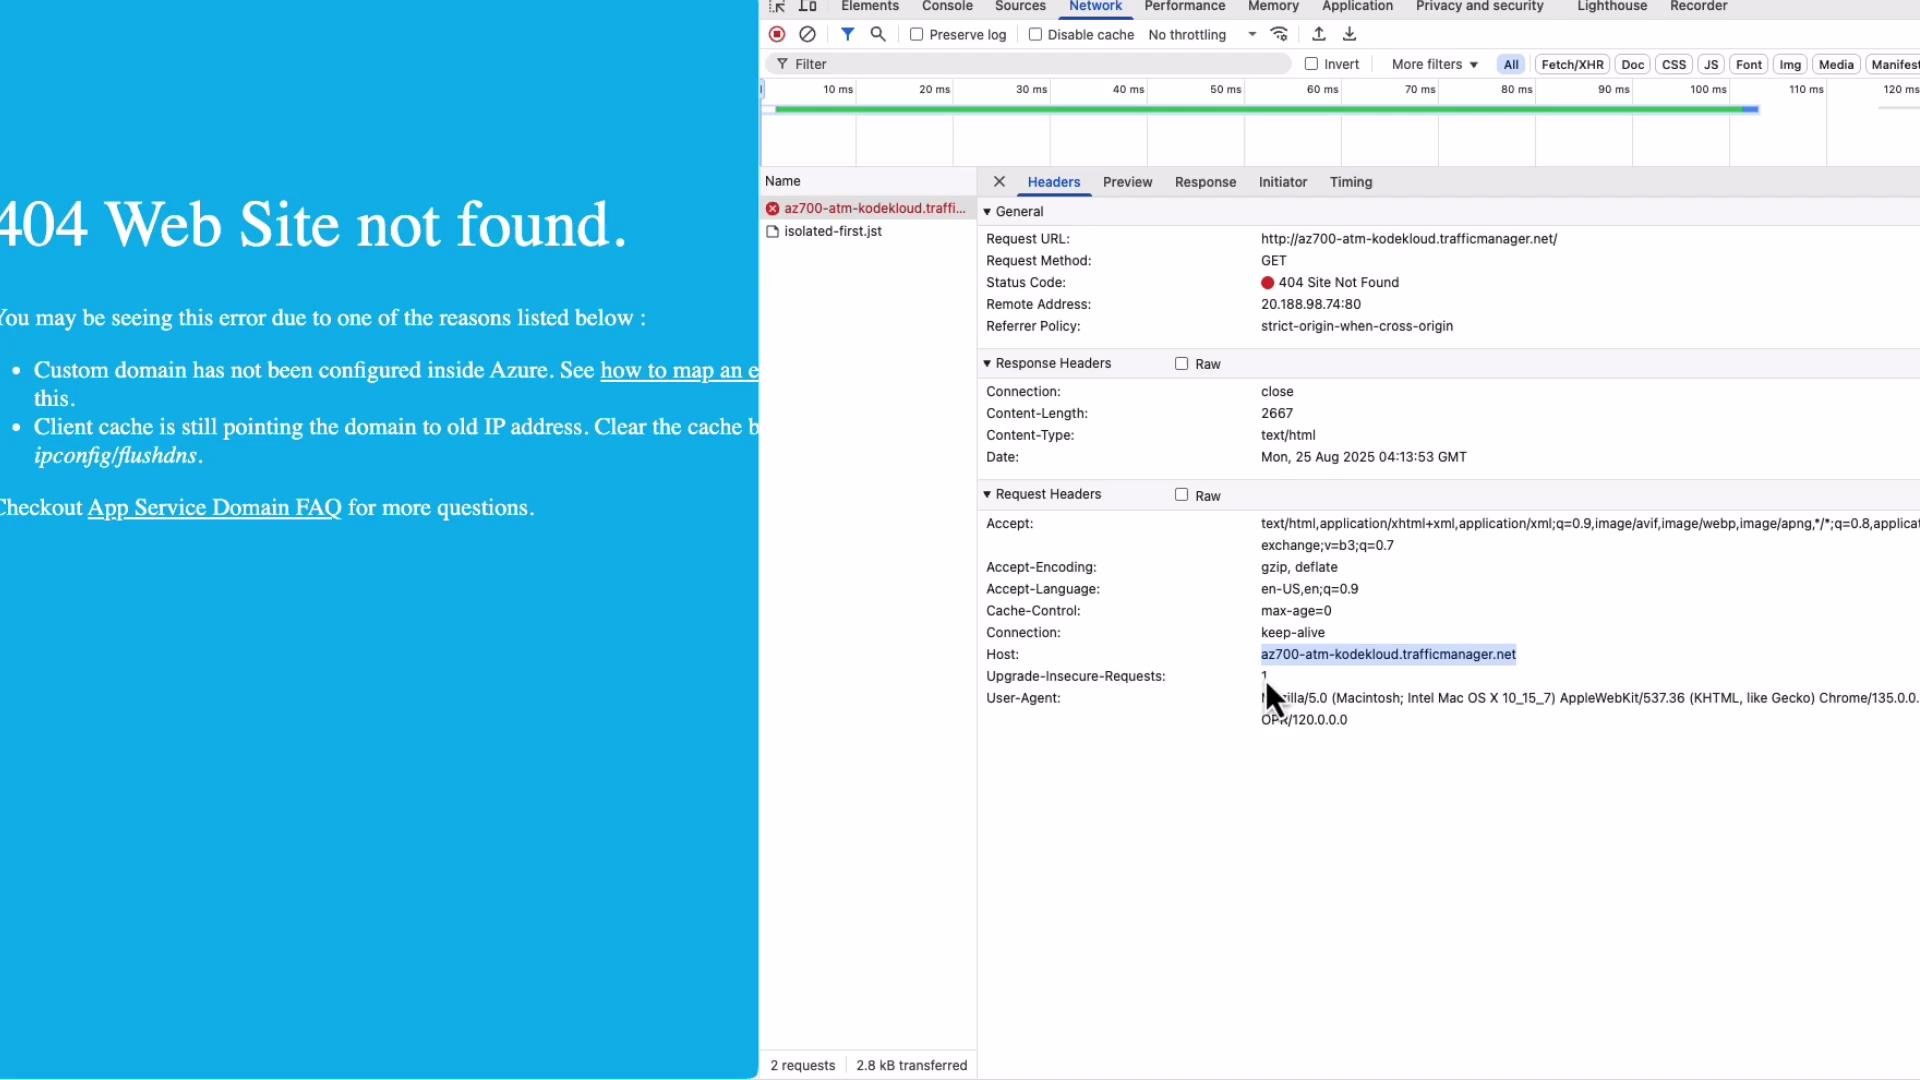
When clients access the Traffic Manager FQDN, understand the Host header implications:- Browsers set the Host header to the domain requested. For example, when requesting
your-profile.trafficmanager.net, the Host header will beyour-profile.trafficmanager.net. - App Service requires the Host header to match one of its configured hostnames (e.g.,
*.azurewebsites.netor a custom domain you mapped). If it does not match, the App Service will return a 404.
- Use a custom domain (for example,
www.kodekloud.com) and map it to Traffic Manager.- In DNS: create a CNAME record from
www.kodekloud.comtoyour-profile.trafficmanager.net. - In each App Service: add the custom domain so the App Service accepts requests with
Host: www.kodekloud.com. This avoids 404s due to host header mismatch.
- In DNS: create a CNAME record from
Accessing the Traffic Manager endpoint directly (without a custom domain mapped to App Service) will result in a mismatched Host header and likely a 404. For realistic testing, map a custom domain or explicitly set the Host header in your test requests.
Diagnostics — DNS resolution and request testing
To validate Traffic Manager behavior and which endpoint is returned, usenslookup and curl.
- Observe the CNAME chain returned by DNS for the Traffic Manager profile:
- If you change your network location (for example, via VPN), Traffic Manager may resolve to a different App Service according to the routing method:
- Test an App Service response by setting the Host header to an App Service hostname returned by DNS:
Quick reference
- Azure Traffic Manager is a DNS-based routing service for distributing client requests across multiple endpoints.
- Choose the right routing method and endpoint types for your architecture (Azure, external, nested).
- Configure health probes carefully to match your application’s health endpoints.
- Use a custom domain (CNAME to
your-profile.trafficmanager.net) and add that custom domain to your App Services for production. - For testing, use
nslookup,curlwith a custom Host header, and flush local DNS caches as needed.