168.63.129.16 when required.
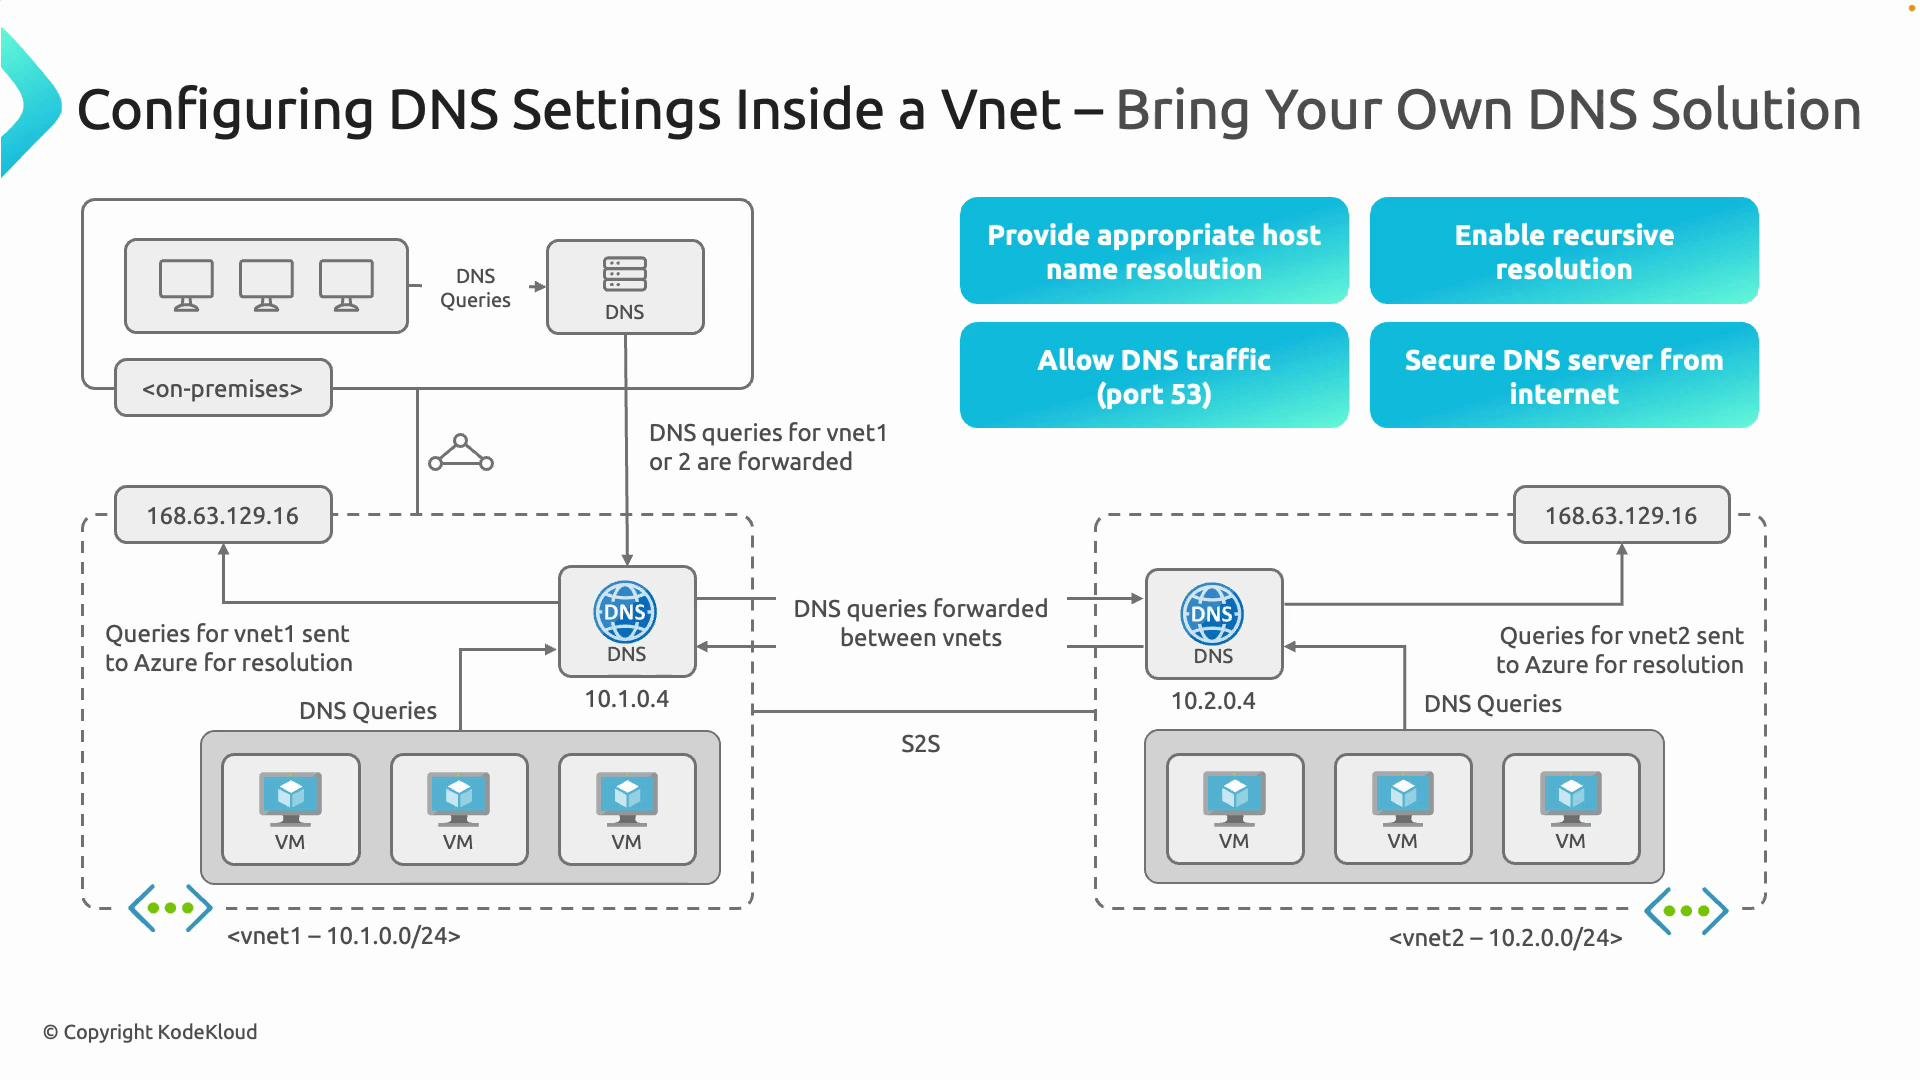
- Each VNet can host its own DNS server (for example
10.1.0.4in VNet1 and10.2.0.4in VNet2). VMs inside that VNet point to the local DNS server for resolution. - If a DNS server cannot resolve a name locally, it forwards queries across peering/site‑to‑site/ExpressRoute links or to Azure’s platform DNS resolver at
168.63.129.16if configured. - Ensure appropriate firewall/NSG rules for DNS (UDP/TCP port
53) and that recursive resolution or forwarders are configured. - Do not expose internal DNS servers directly to the public internet; always place them behind network controls.
Design your DNS for recursive resolution using forwarders or direct recursion. Use hub‑and‑spoke or centralized DNS patterns: place DNS servers in a hub VNet and have spokes forward queries (via peering or conditional forwarders). Link the Private DNS zone to the hub instead of linking every spoke directly.
- DNS servers must have records or forwarders for all relevant zones (private zones, conditional forwarders).
- Allow UDP/TCP port
53between clients, DNS servers, and across networks where resolution must traverse. - Secure internal DNS servers with NSGs, firewalls, or private endpoints — do not publish them to the public internet.
Do not publish internal DNS servers directly to the internet. Restrict access using NSGs, firewalls, or private connectivity and use Azure platform DNS (
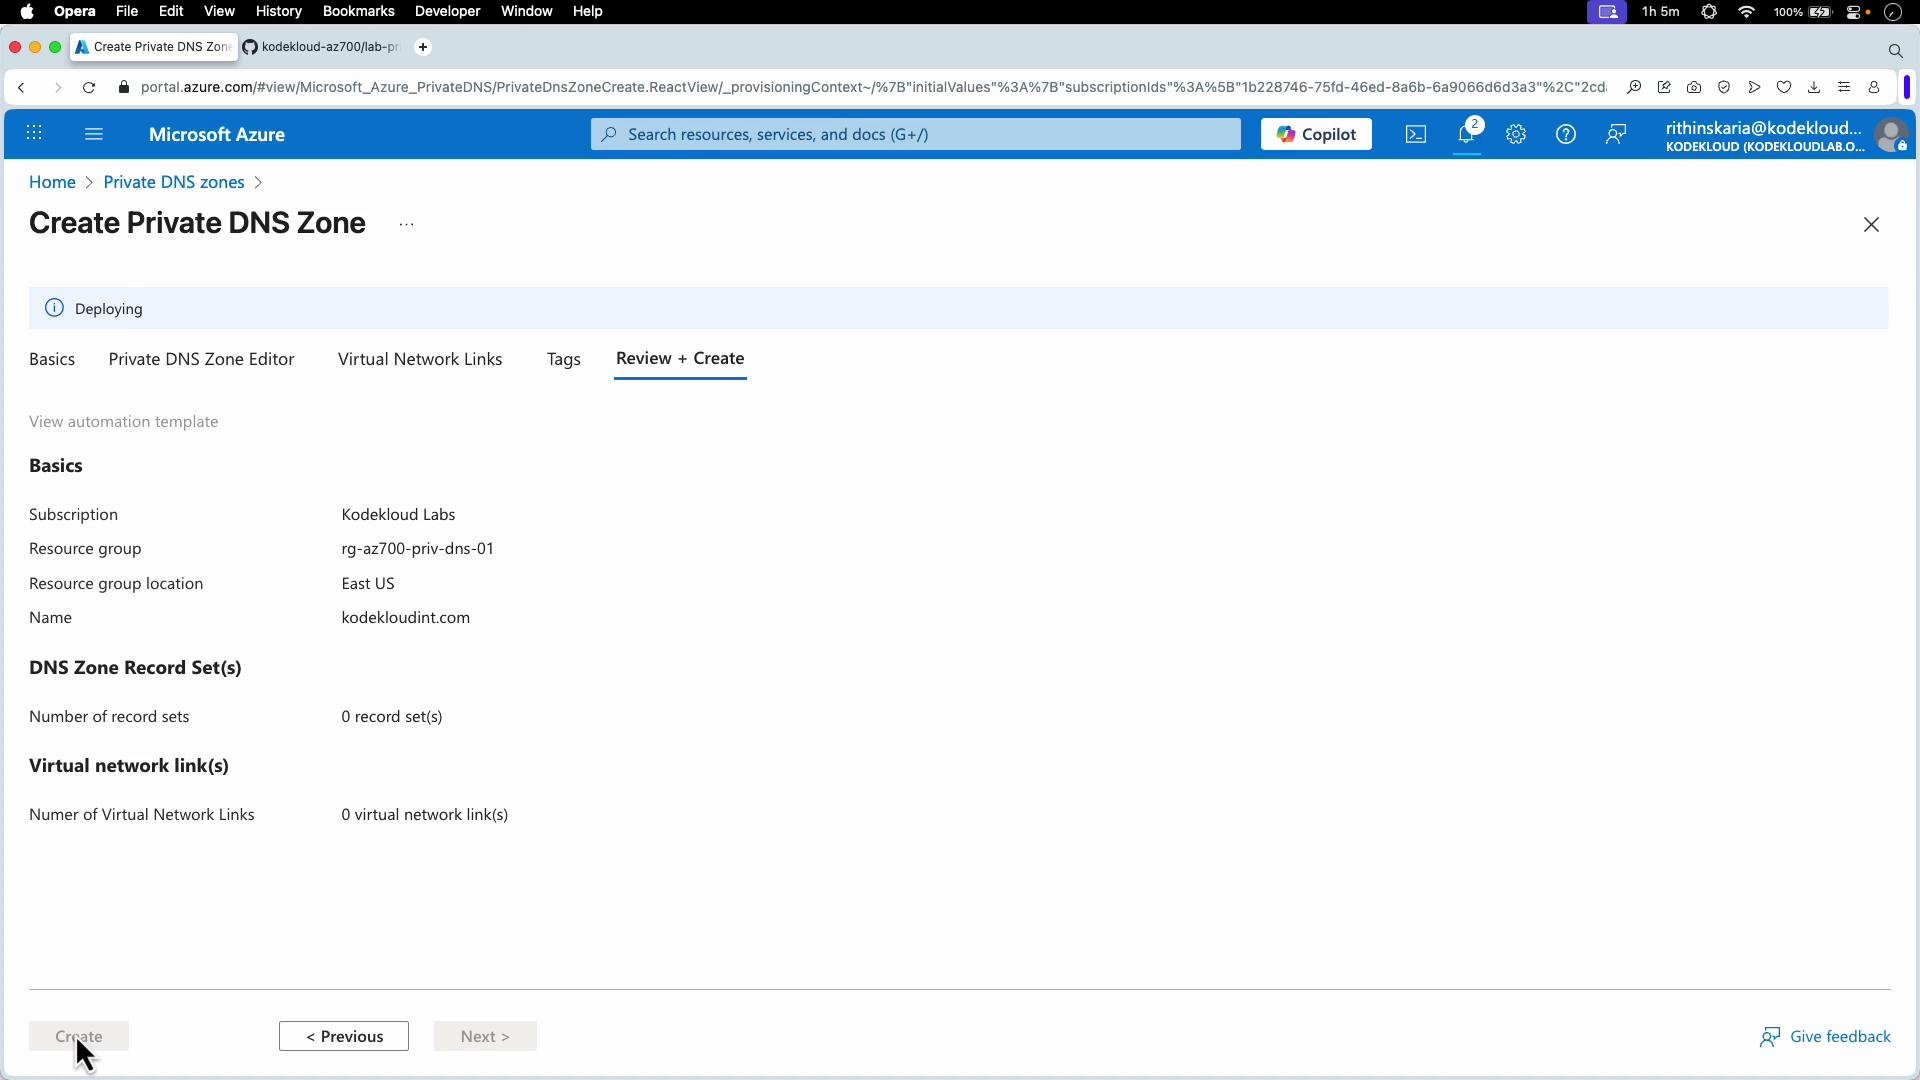
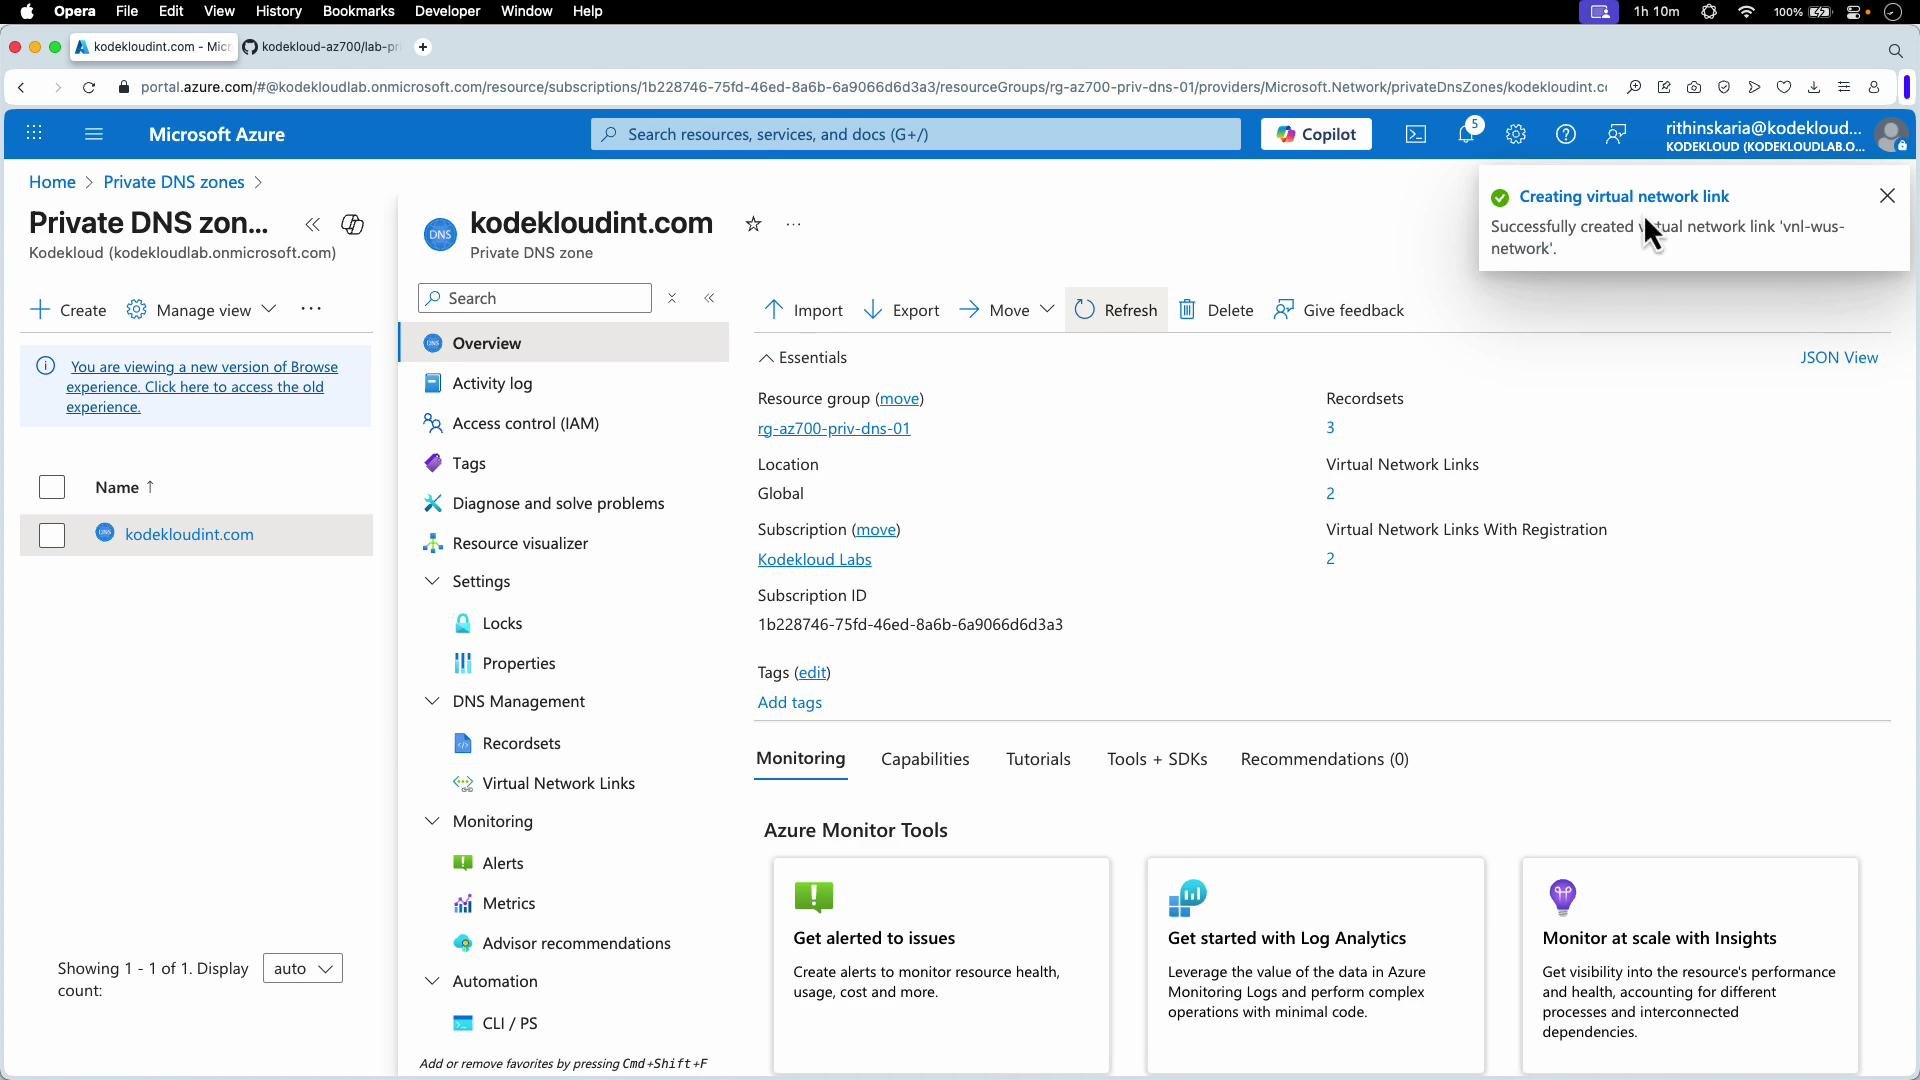
168.63.129.16) where appropriate.- In the Azure portal go to Private DNS zones and create a new zone (example:
kodekloudint.com) in a resource group such asRG-AZ700-PRIV-DNS-01. Private DNS zones are global resources; the resource group location stores metadata only.
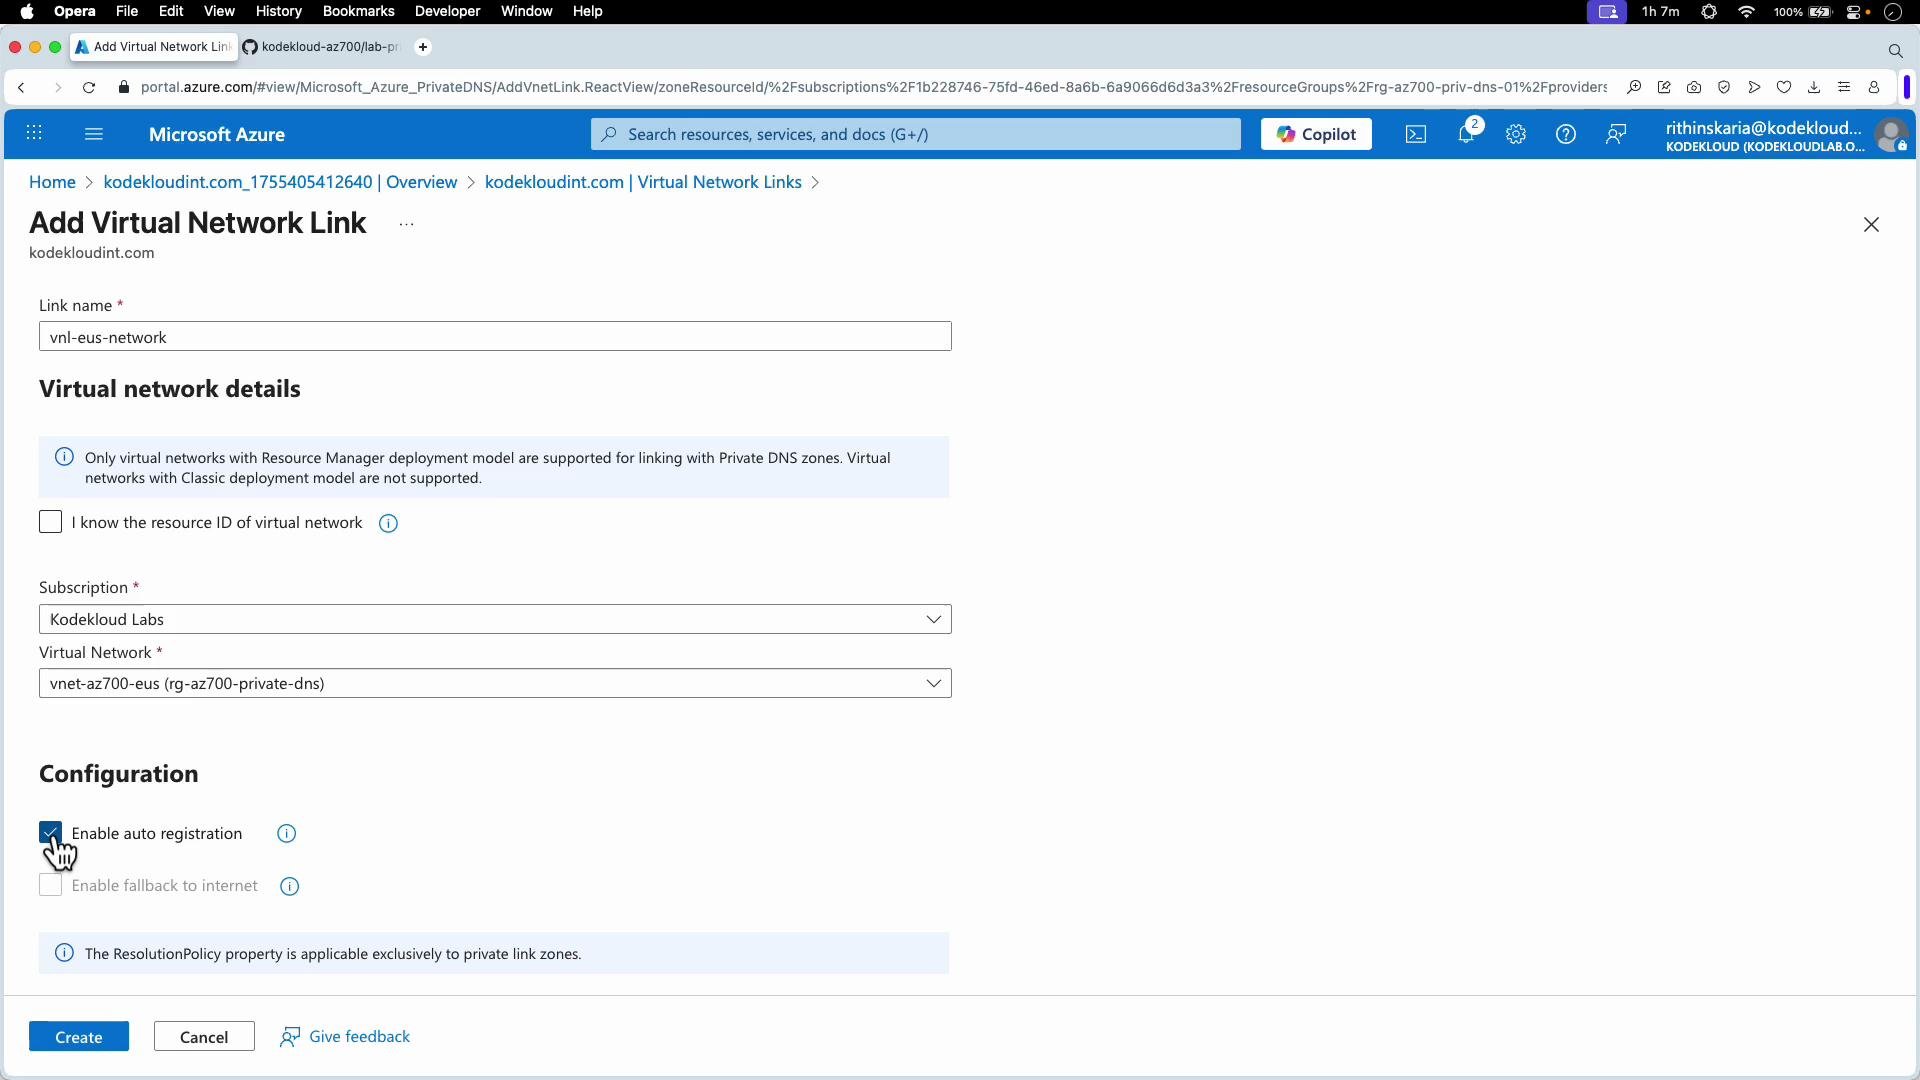
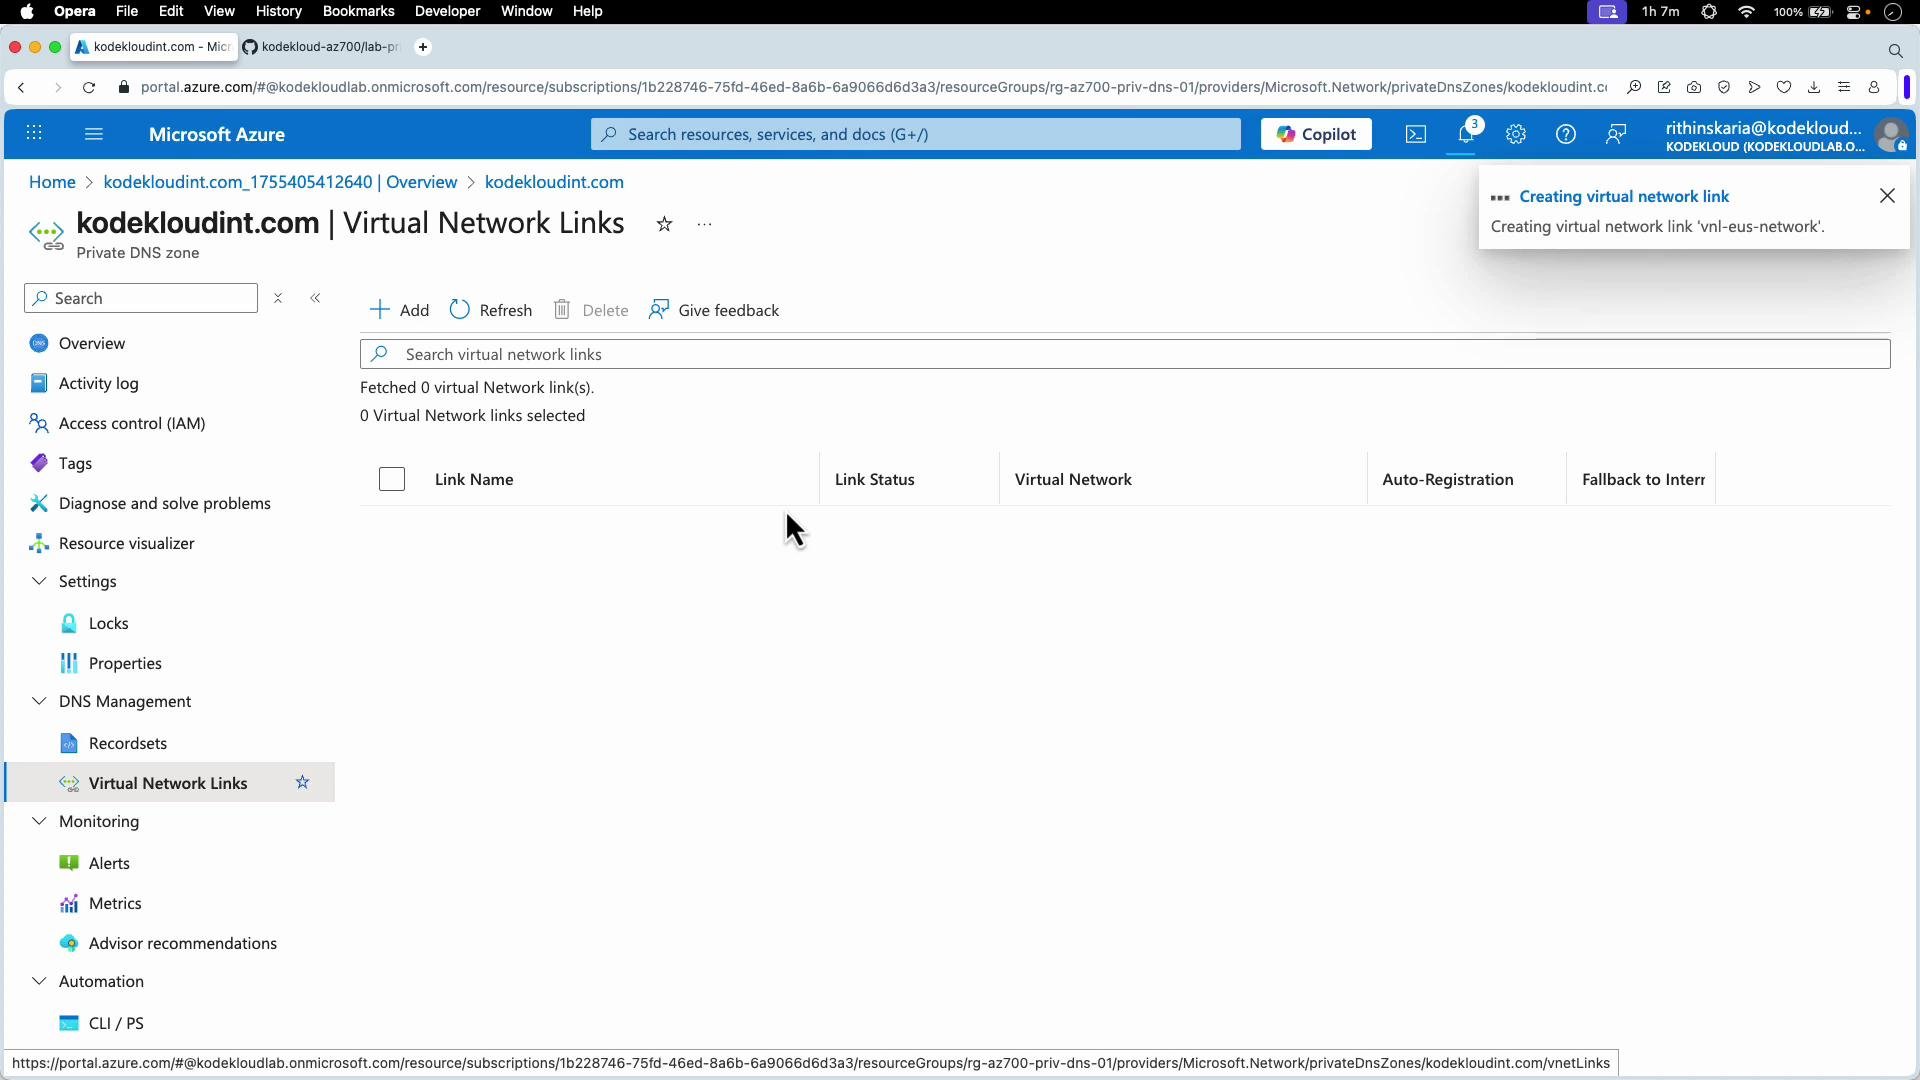
- A Virtual Network Link tells Azure that the zone (for example
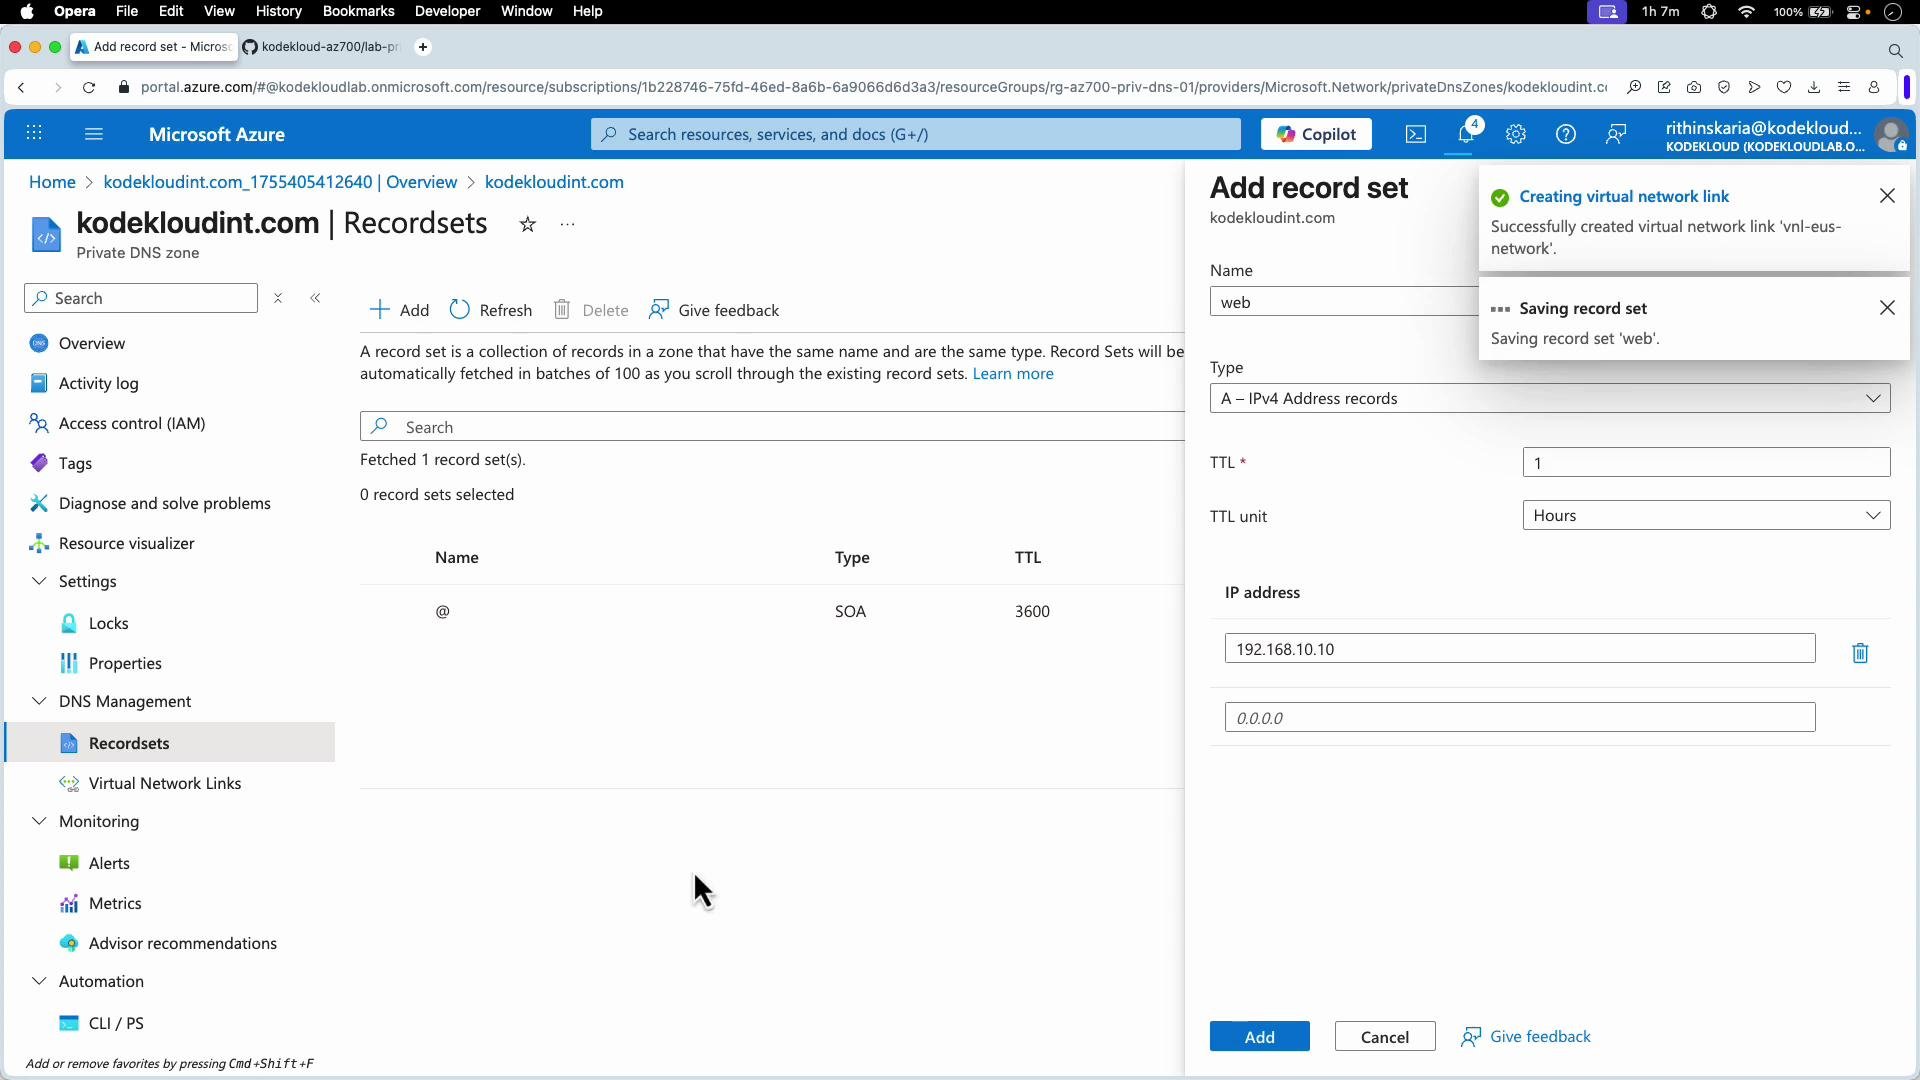
kodekloudint.com) will be used for name resolution by that VNet. - Enable “Auto registration” so that new VMs in the linked VNet automatically register host A records into the private zone.
web.kodekloudint.com pointing to 192.168.10.10.

- If a VM is in a VNet linked to the private DNS zone,
nslookupon the VM should return records from that zone. - If a VM is in a VNet that is not linked, lookups for the private names will return
NXDOMAIN.
web.kodekloudint.com record:
NXDOMAIN:
- Use Azure Private DNS zones for private name resolution and link VNets with Virtual Network Links.
- Enable auto‑registration for dynamic VM record creation in linked VNets.
- For complex environments, use hub‑and‑spoke DNS placement and conditional forwarders to on‑premises DNS to avoid linking every spoke VNet to a zone.
- Secure your DNS servers and network access; do not expose internal DNS servers to the internet.
- Combine DNS configuration with proper network connectivity (peering, VPN, ExpressRoute) to provide both resolution and reachability.
- Azure Private DNS zones: https://learn.microsoft.com/azure/dns/private-dns-overview
- Azure DNS recursive resolver: https://learn.microsoft.com/azure/dns/dns-resolver-overview
- VNet peering: https://learn.microsoft.com/azure/virtual-network/virtual-network-peering