Architecture overview
- Azure VNet:
10.1.0.0/16 - On‑premises network (branch office):
10.0.0.0/24 - Ensure these address ranges do not overlap.
- The tunnel is formed between your on‑premises static public IP and the Azure VPN gateway public IP.
- Authentication: pre-shared key (PSK) or certificates (X.509 preview). The same PSK/certificate must be configured on both endpoints.
Key on-premises device considerations
- Device compatibility
- Confirm your VPN device is supported by Azure. See Azure’s validated device list: https://learn.microsoft.com/azure/vpn-gateway/vpn-gateway-about-vpn-devices
- Route-based vs policy-based
- Azure supports both, but route-based (VTI + typically IKEv2) is recommended for flexibility and compatibility with modern setups: https://learn.microsoft.com/azure/vpn-gateway/vpn-gateway-about-vpn-types
- IPsec / IKE parameters
- Match encryption, integrity/hash algorithms, Diffie–Hellman group, IKE version (IKEv1 vs IKEv2), and SA lifetimes on both sides. See IPsec/IKE policy guidance: https://learn.microsoft.com/azure/vpn-gateway/vpn-gateway-ipsecike-policy
- Reachability
- Your on-prem device must be reachable at a static public IP (or FQDN resolving to a stable address). This IP is entered into the Azure Local Network Gateway.
- Authentication
- Configure the same PSK on both sides, unless using certificate-based authentication (preview in some scenarios).
Make sure the on-premises VPN device is assigned a static public IP (for example,
73.97.x.x). If the address is dynamically assigned by the ISP, the IP can change and break the tunnel unless you use a dynamic DNS-based update mechanism or a device that supports automatic updates.Connection type choices in Azure
- Site-to-site (IPsec): Connects your on-premises network to an Azure VNet via a VPN gateway.
- VNet-to-VNet: Use when connecting VNets in different subscriptions or regions; requires a gateway in each VNet.
- VNet peering: Preferred for same-region, same-subscription connectivity (lower latency/cost), but it does not provide encrypted transit across regions/subscriptions.
- BGP option: Enable BGP for dynamic routing across the tunnel when you need route exchange and automatic path updates: https://learn.microsoft.com/azure/vpn-gateway/vpn-gateway-bgp-overview
- IPsec/IKE policy: Use custom policies for stricter crypto requirements or to satisfy compliance.
Portal walkthrough — prerequisites and limitations
Note: This walkthrough shows the Azure portal steps. To complete a functioning tunnel you must have:- A deployed Azure VPN gateway (Public IP assigned)
- A Local Network Gateway configured with your on‑premises public IP and address prefixes
- A reachable on-premises VPN device configured with the same PSK or certificates
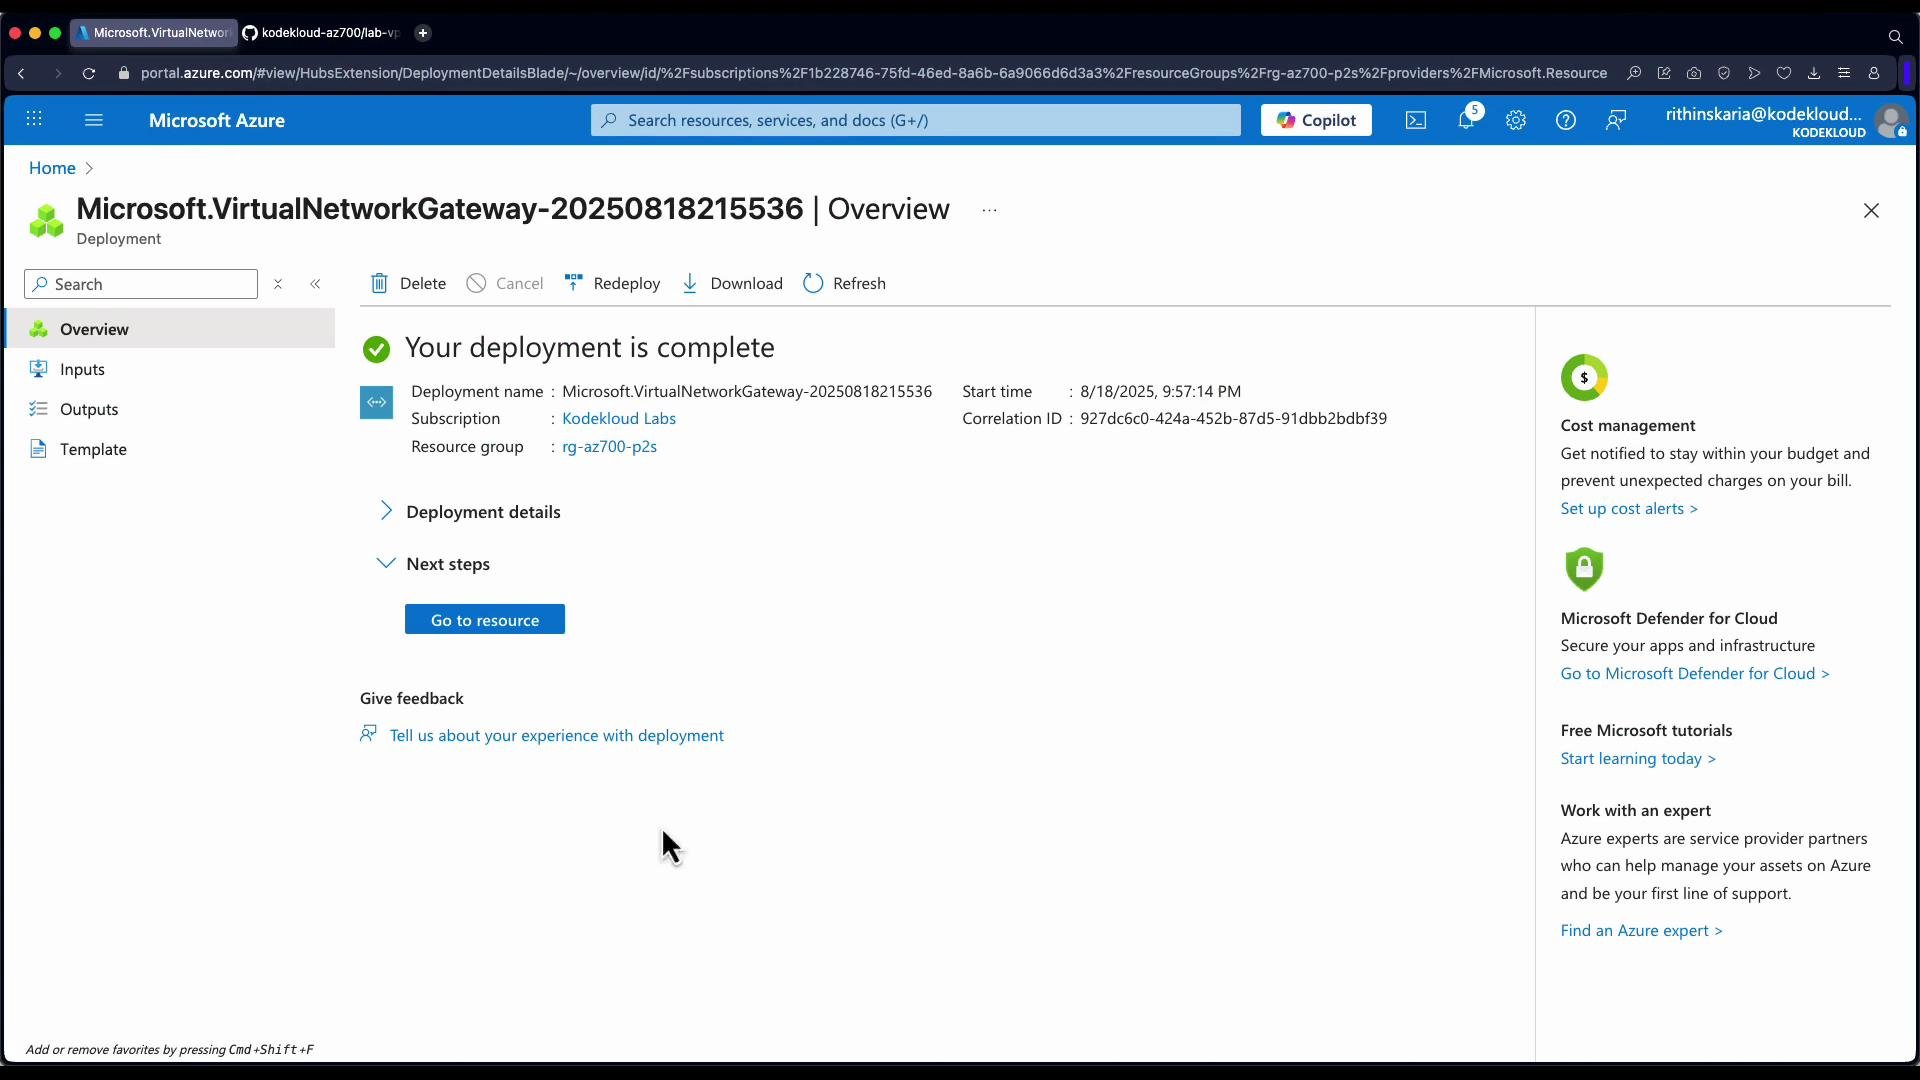
- Open your Virtual Network Gateway resource in the Azure portal and click “Go to resource”.
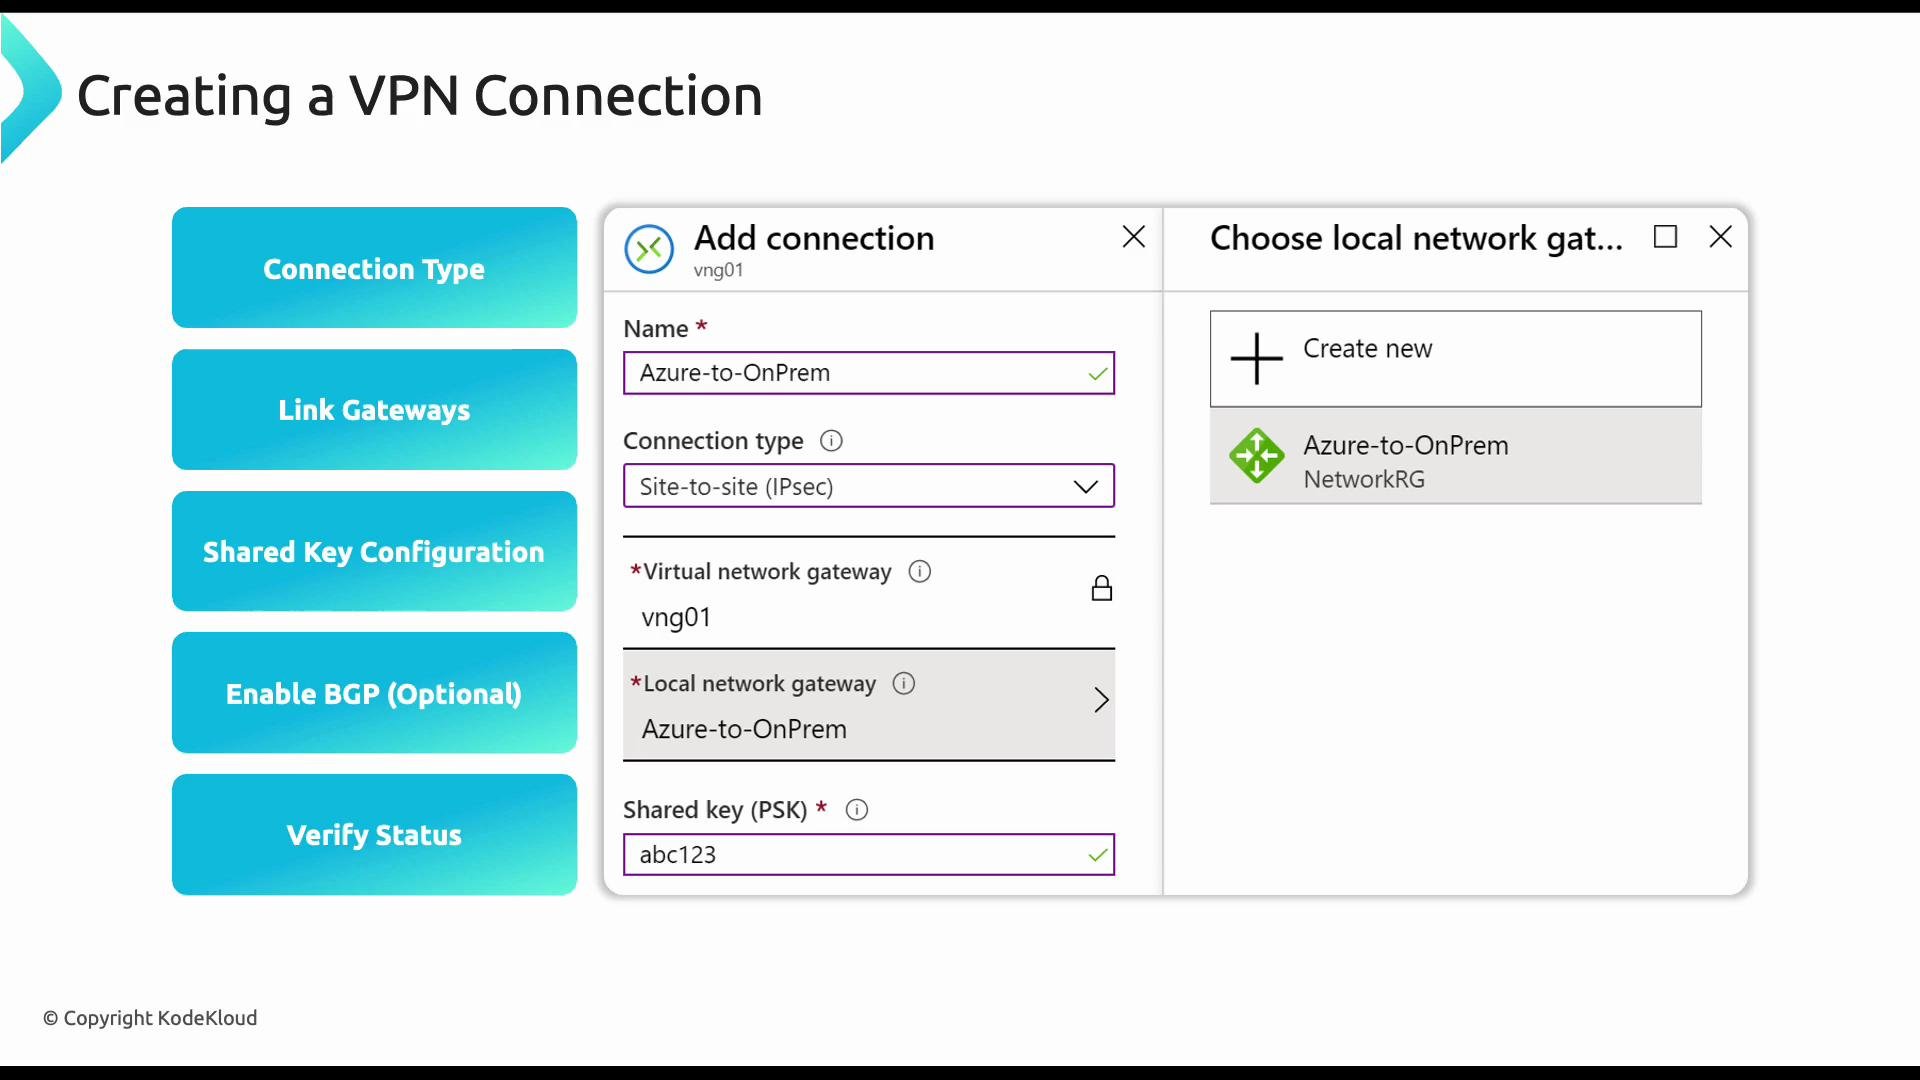
- Expand Settings -> Connections, then click Add.
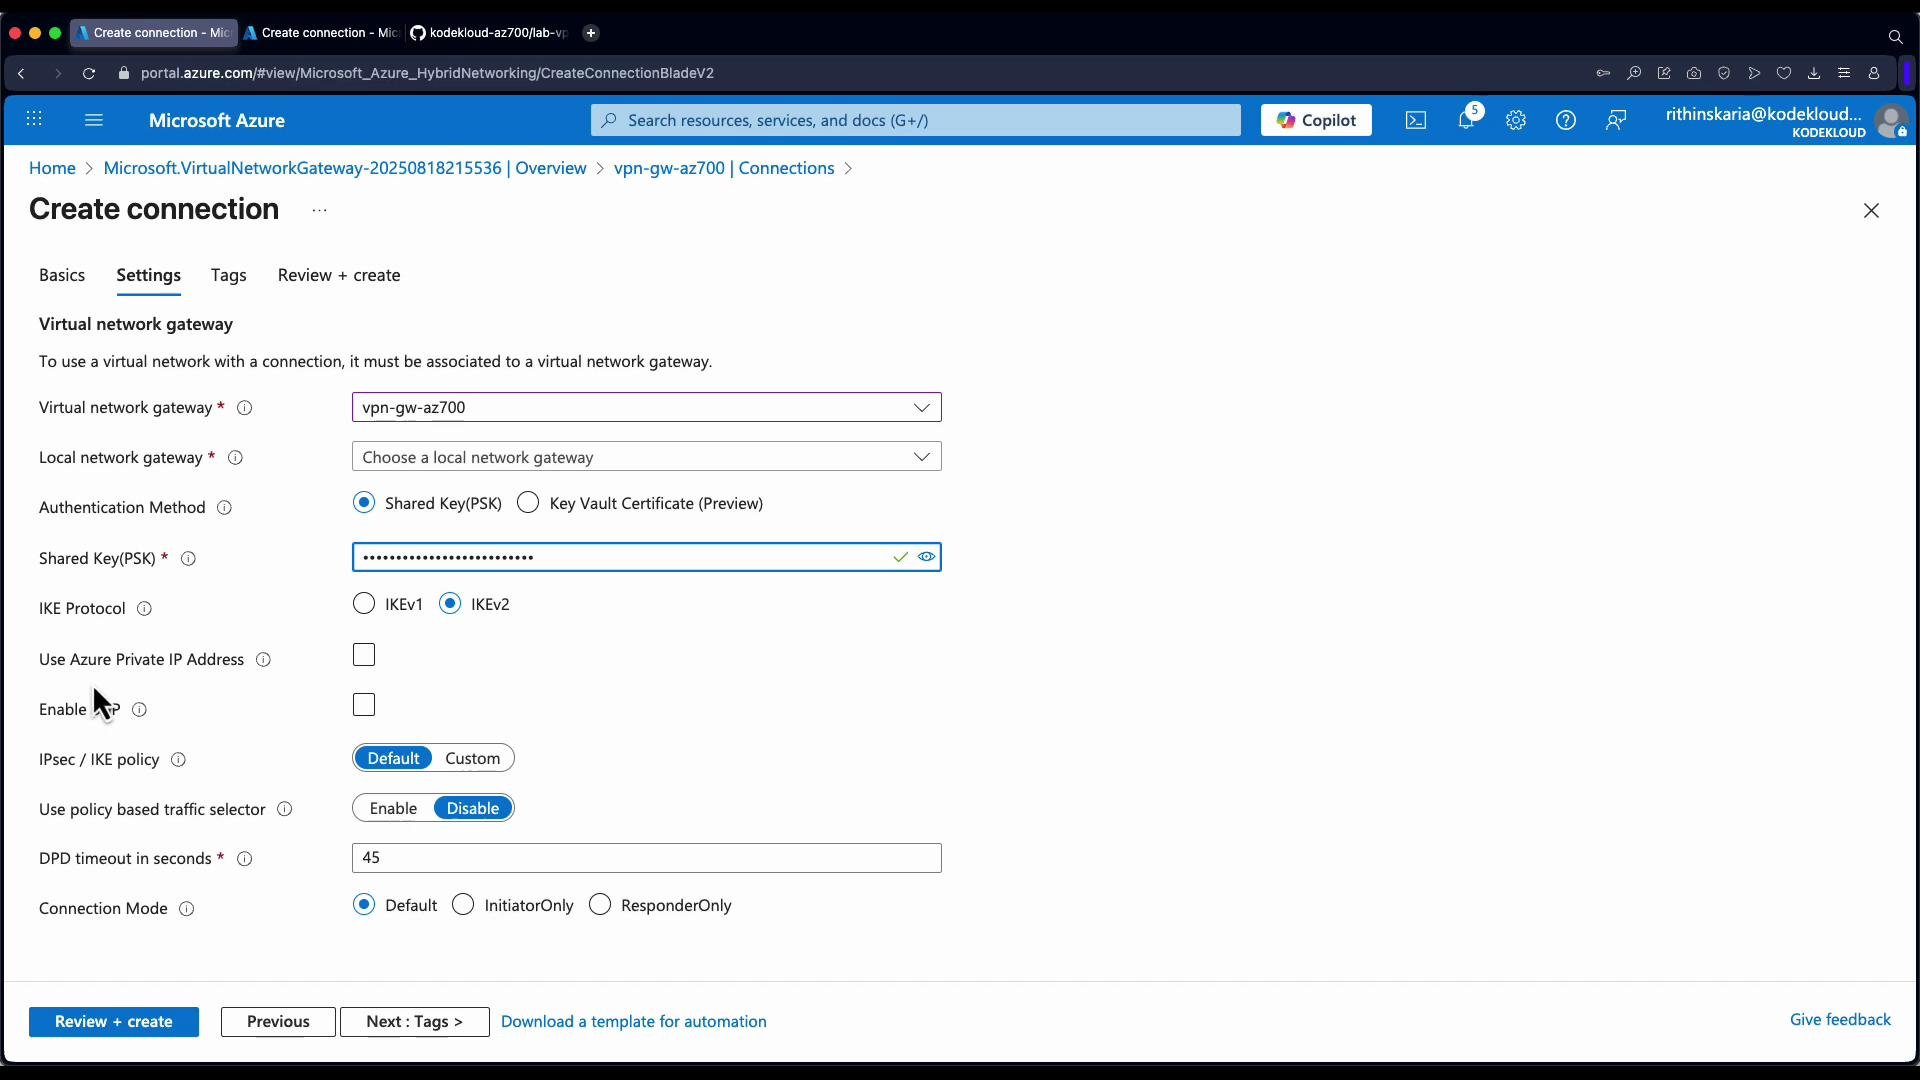
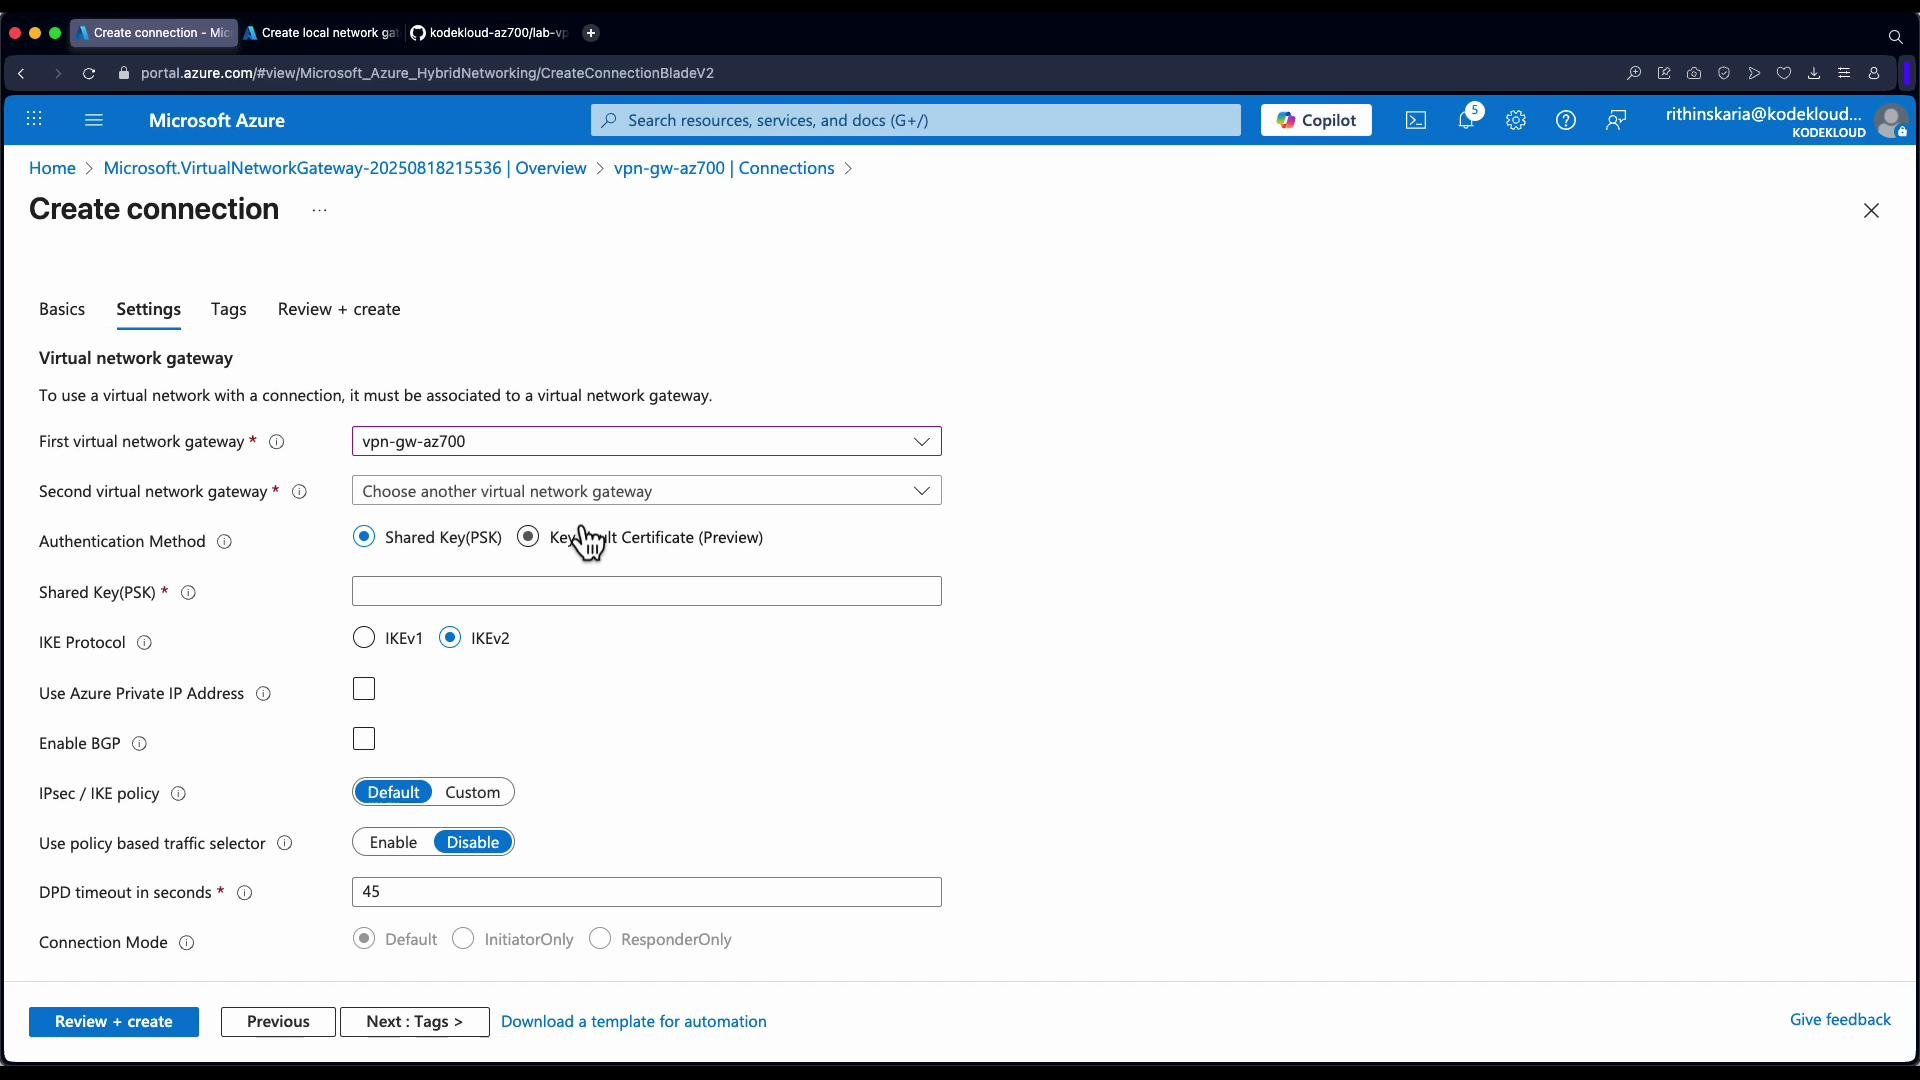
- In the Create connection blade:
- Connection type: select “Site-to-site (IPsec)”.
- Give the connection a descriptive name (e.g.,
site-to-site-Azure-to-NYC). - Virtual network gateway is pre-selected when you start the create operation from the gateway resource.
- Local network gateway: select an existing Local Network Gateway or create a new one (see next section).
- Authentication type: typically
Pre-shared key(PSK). If using certificates, choose X.509 where available. - Enter the same PSK value that is configured on the on-premises device.
- Optionally enable BGP and set a custom IPsec/IKE policy (encryption, hashing, DH group, lifetime).
- Review + create. The new connection will show in the gateway’s Connections list with a Status field that will become Connected once the tunnel is up.
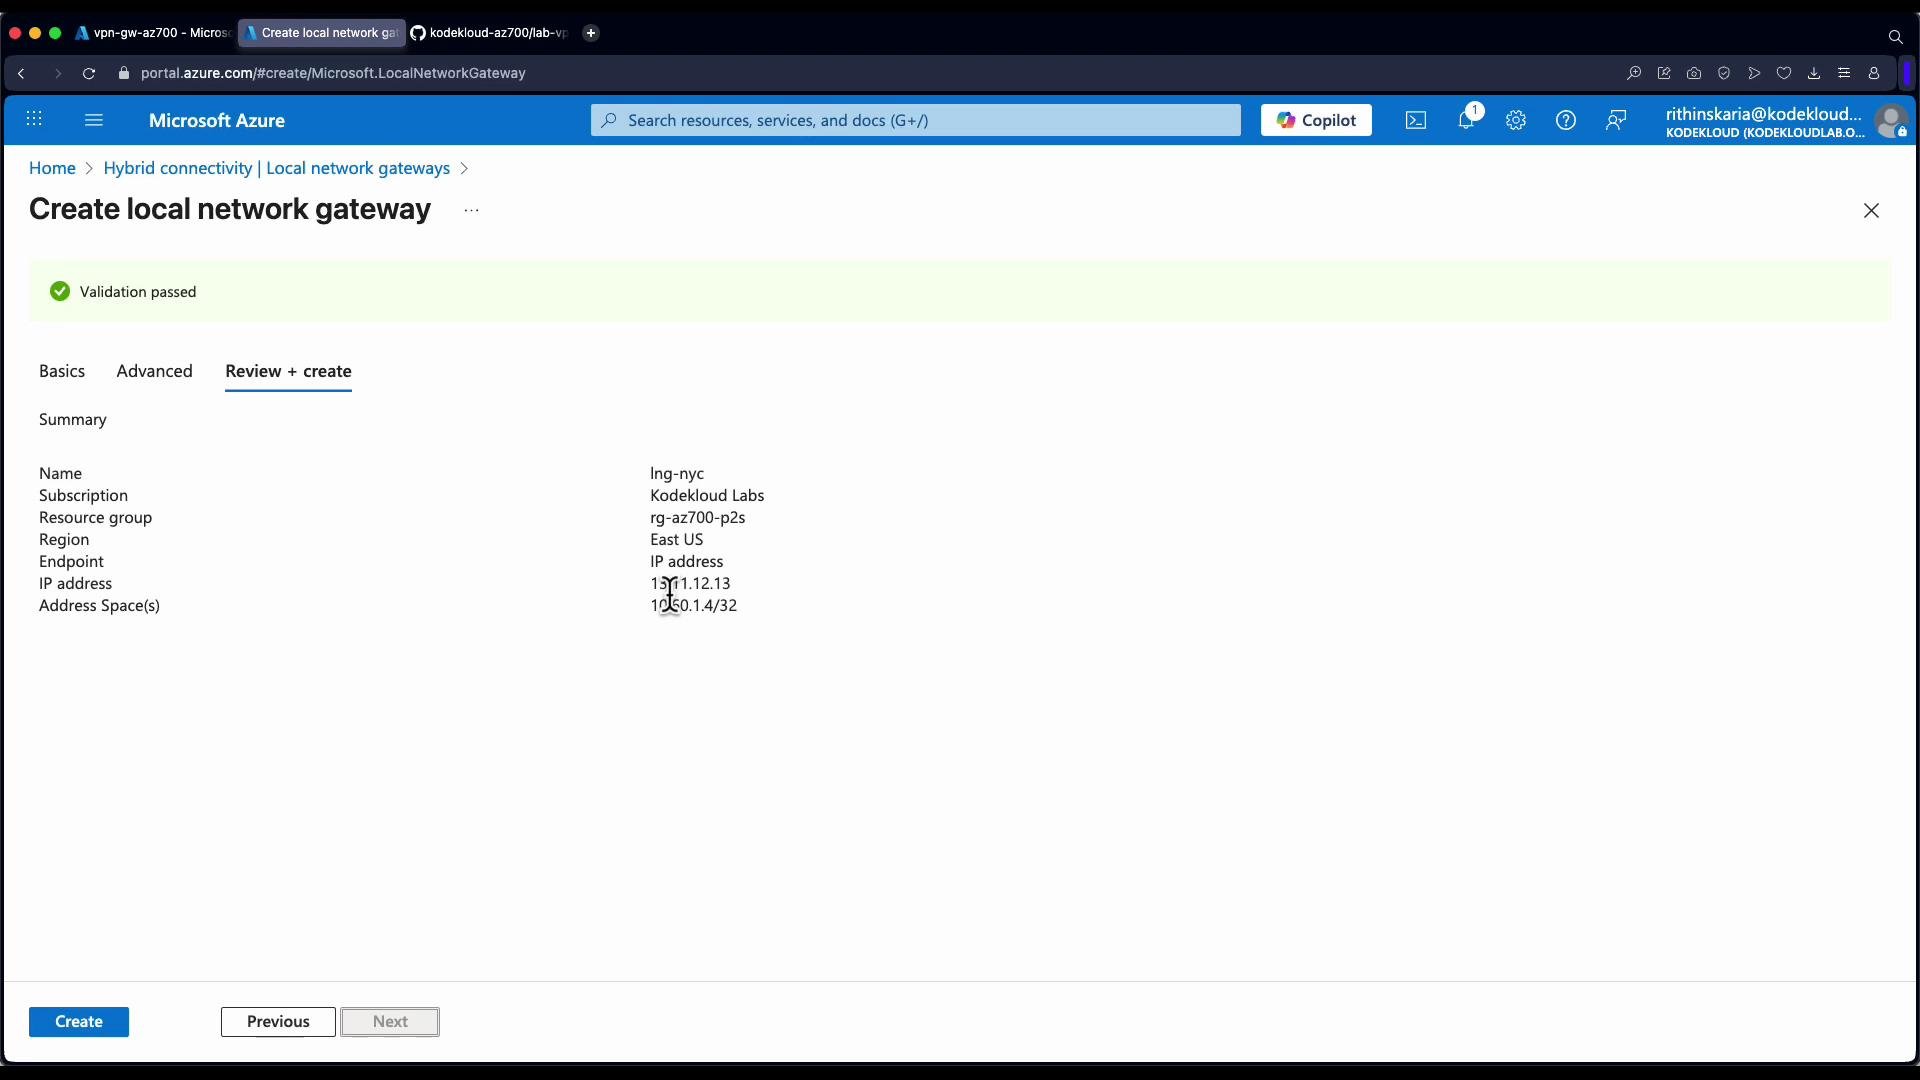
Creating the Local Network Gateway (represents on-premises)
The Local Network Gateway is an Azure metadata object that contains:- The public IP (or FQDN) of your on‑premises VPN device
- The address prefixes behind that device that should be routed to Azure
- Click Create -> Local network gateway.
- Enter:
- Name (e.g.,
local-network-gateway-NYC) - Region (select appropriately)
- IP address or FQDN of the on-premises VPN device (public IP)
- Address space(s) for the on-premises network (e.g.,
10.0.0.0/24)
- Name (e.g.,
- (Optional) Configure BGP settings if using dynamic routing.
- Review + create.
A Local Network Gateway is a reference object only. Azure does not validate the configured public IP at creation — it simply stores the IP/FQDN and prefix information for use when establishing the connection.
Recommended IPsec / IKE policy example
Use Azure’s IPsec/IKE policy to harden the tunnel. Below is a common secure configuration pattern — adjust for your organizational requirements.- IKE version: IKEv2 (preferred)
- Encryption: AES256
- Integrity/hash: SHA256
- DH group: ECP384 (or Group24/2+ depending on compatibility)
- SA lifetime: 28,800 seconds (8 hours) or as required
Validation and troubleshooting
- After the connection is created and the on‑premises device configured, the portal shows the connection Status as Connected when the tunnel is established.
- Basic validation:
- Ping/telnet or access resources across the tunnel from either side, respecting any NSG or firewall rules.
- Check logs on the on‑premises VPN device for IKE/IPsec negotiation errors.
- Ensure PSK, IPsec/IKE parameters, and public IPs match exactly on both ends.
- For dynamic routing issues, validate BGP peering and advertised prefixes.
Additional notes
- VNet-to-VNet connections require a gateway in each VNet and incur gateway charges for each deployment. For same-region, same-subscription connectivity prefer VNet peering for simplicity and cost savings.
- If you enable BGP, ensure autonomous system numbers (ASNs) and BGP peering settings are configured correctly on both sides.
Links and references
- Azure VPN Gateway overview: https://learn.microsoft.com/azure/vpn-gateway/vpn-gateway-about-vpngateways
- Validated VPN devices: https://learn.microsoft.com/azure/vpn-gateway/vpn-gateway-about-vpn-devices
- IPsec/IKE policy configuration: https://learn.microsoft.com/azure/vpn-gateway/vpn-gateway-ipsecike-policy
- BGP overview for VPN gateway: https://learn.microsoft.com/azure/vpn-gateway/vpn-gateway-bgp-overview
- Virtual network peering: https://learn.microsoft.com/azure/virtual-network/virtual-network-peering-overview