- Select the target subscription and the resource group where the firewall will be created.
- Complete the firewall creation form (name, region, SKU, VNet, address space, public IP, etc.) and deploy.
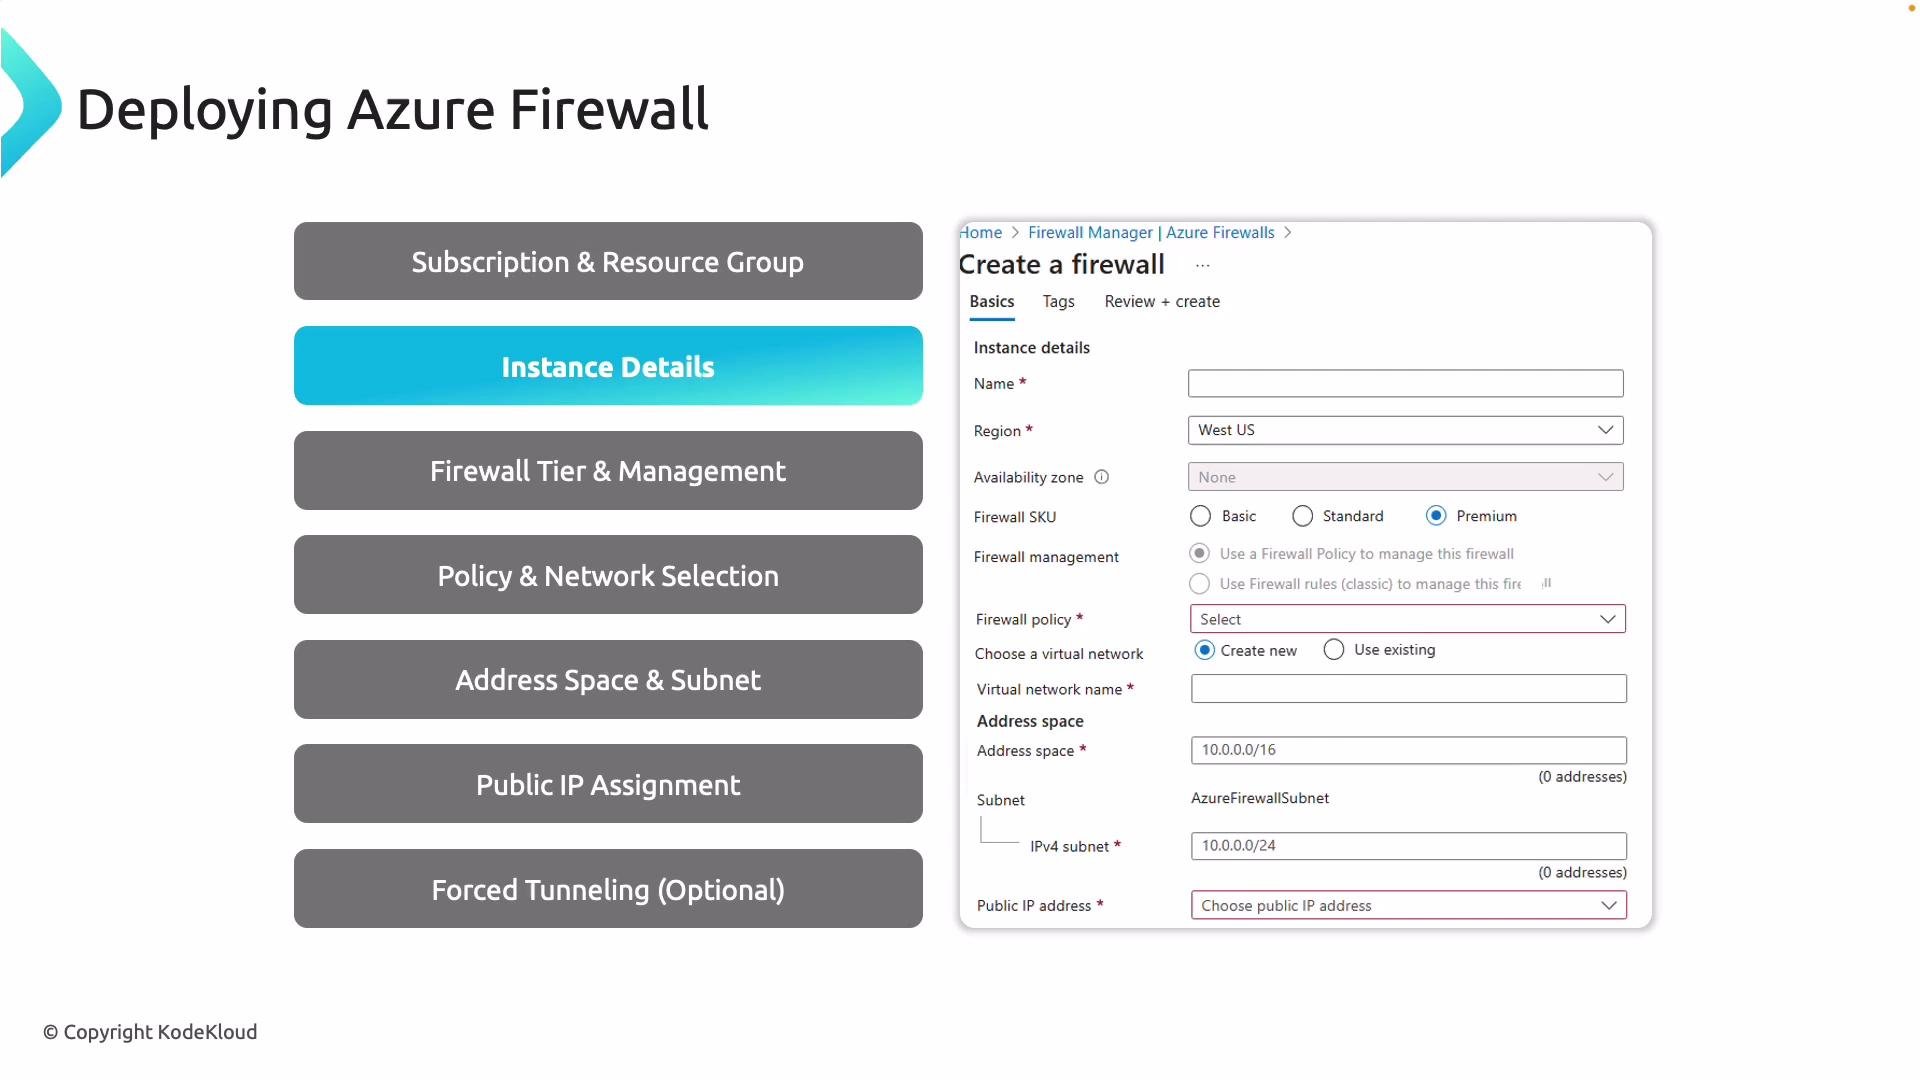
- Firewall name and Azure region.
- SKU selection: Basic, Standard, or Premium (choose based on features required such as TLS inspection and IDPS).
- Management mode: attach a Firewall Policy (recommended) or use legacy rules.
- Virtual network: select the VNet that will host the firewall (typically a hub VNet).
- Address space and a dedicated subnet named
AzureFirewallSubnet(details below). - Public IP assignment: required for DNAT (inbound) and SNAT (outbound) translations as needed.
- Optional forced tunneling configuration if you need to forward outbound traffic to on‑premises appliances using UDRs or Azure Firewall Manager.
The firewall must be deployed in a dedicated subnet named exactly
AzureFirewallSubnet. Ensure the subnet is sized appropriately (typically a /26 or larger) to accommodate firewall scaling and features.Forced tunneling redirects outbound traffic to on‑premises systems and can affect failover, latency, and routing complexity. Validate route priorities and next hops (UDRs) before enabling in production.
- Use forced tunneling when you must inspect or route all outbound traffic through on‑premises firewalls or centralized inspection points.
- Implement forced tunneling via user‑defined routes (UDRs) in spoke route tables or centrally using Azure Firewall Manager to automate route distribution.
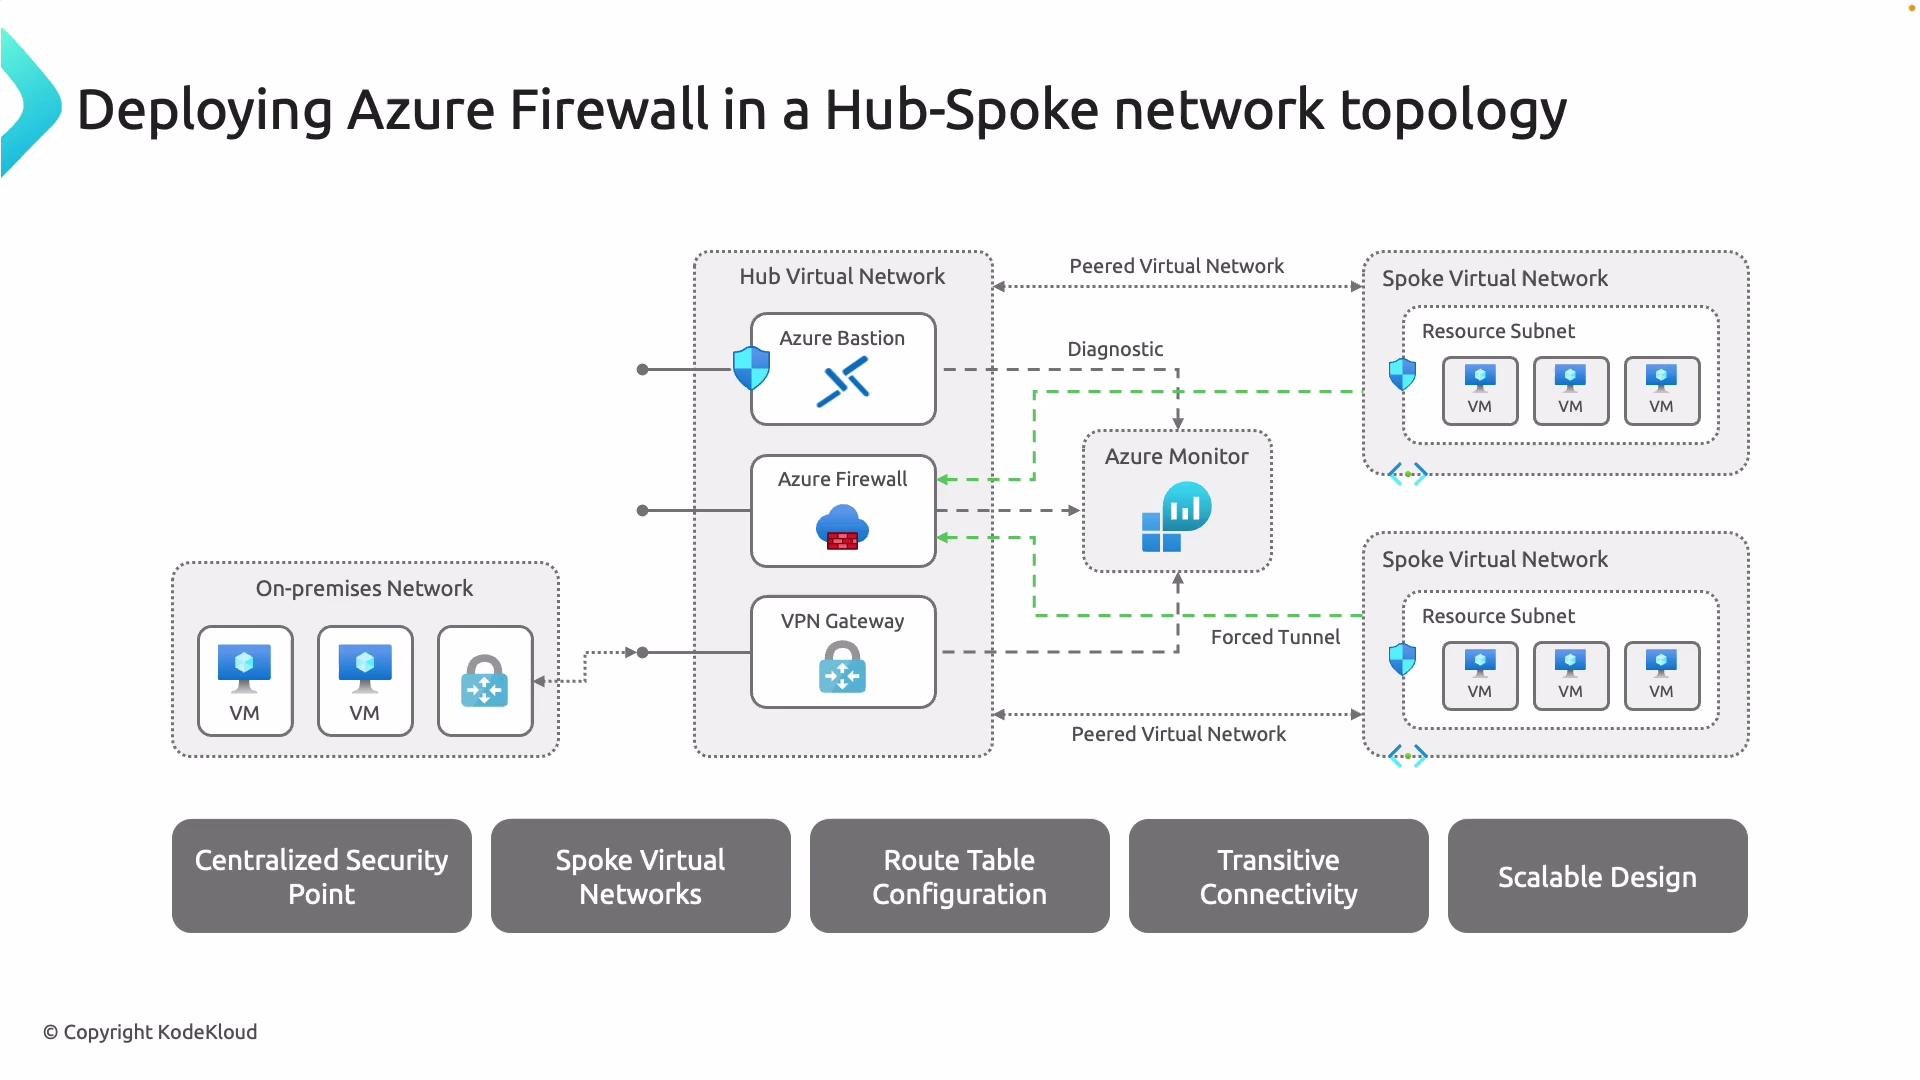
- Azure Firewall runs in the hub VNet and acts as the centralized inspection and policy enforcement point.
- Spoke VNets peer with the hub. Spoke UDRs send internet and cross‑spoke traffic to the firewall’s private IP with next hop set to
Virtual Appliance. The firewall inspects and forwards traffic according to configured rules and policies. - On‑premises connectivity (VPN Gateway or ExpressRoute) terminates in the hub so on‑premises traffic can also be inspected by the firewall.
- Scaling or adding spokes typically requires only peering and UDR updates—no reconfiguration of the firewall core.
Useful links and references
- Azure Firewall documentation: https://learn.microsoft.com/azure/firewall
- Network Security Groups (NSG) documentation: https://learn.microsoft.com/azure/virtual-network/network-security-groups-overview
- Azure Firewall Manager and forced tunneling: https://learn.microsoft.com/azure/firewall-manager

- Deploy Azure Firewall into a hub VNet using a dedicated
AzureFirewallSubnet. - Choose the SKU (Basic, Standard, Premium) based on required features (TLS inspection, IDPS, etc.) and attach a Firewall Policy whenever possible for centralized management.
- Route spoke outbound and cross‑spoke traffic to the firewall via UDRs with next hop type
Virtual Applianceto ensure inspection. - Use NSGs to provide fast, distributed packet‑level filtering at the subnet/NIC level; use Azure Firewall for centralized, application‑aware filtering, NAT, and advanced logging.
- Test routing and policy behavior in a non‑production environment before enabling forced tunneling or complex route designs.
- Review the Azure Firewall quickstart guides and portal walkthroughs: https://learn.microsoft.com/azure/firewall/quick-start
- Plan your hub address space and size
AzureFirewallSubnetto at least/26to allow for scale and resilience.