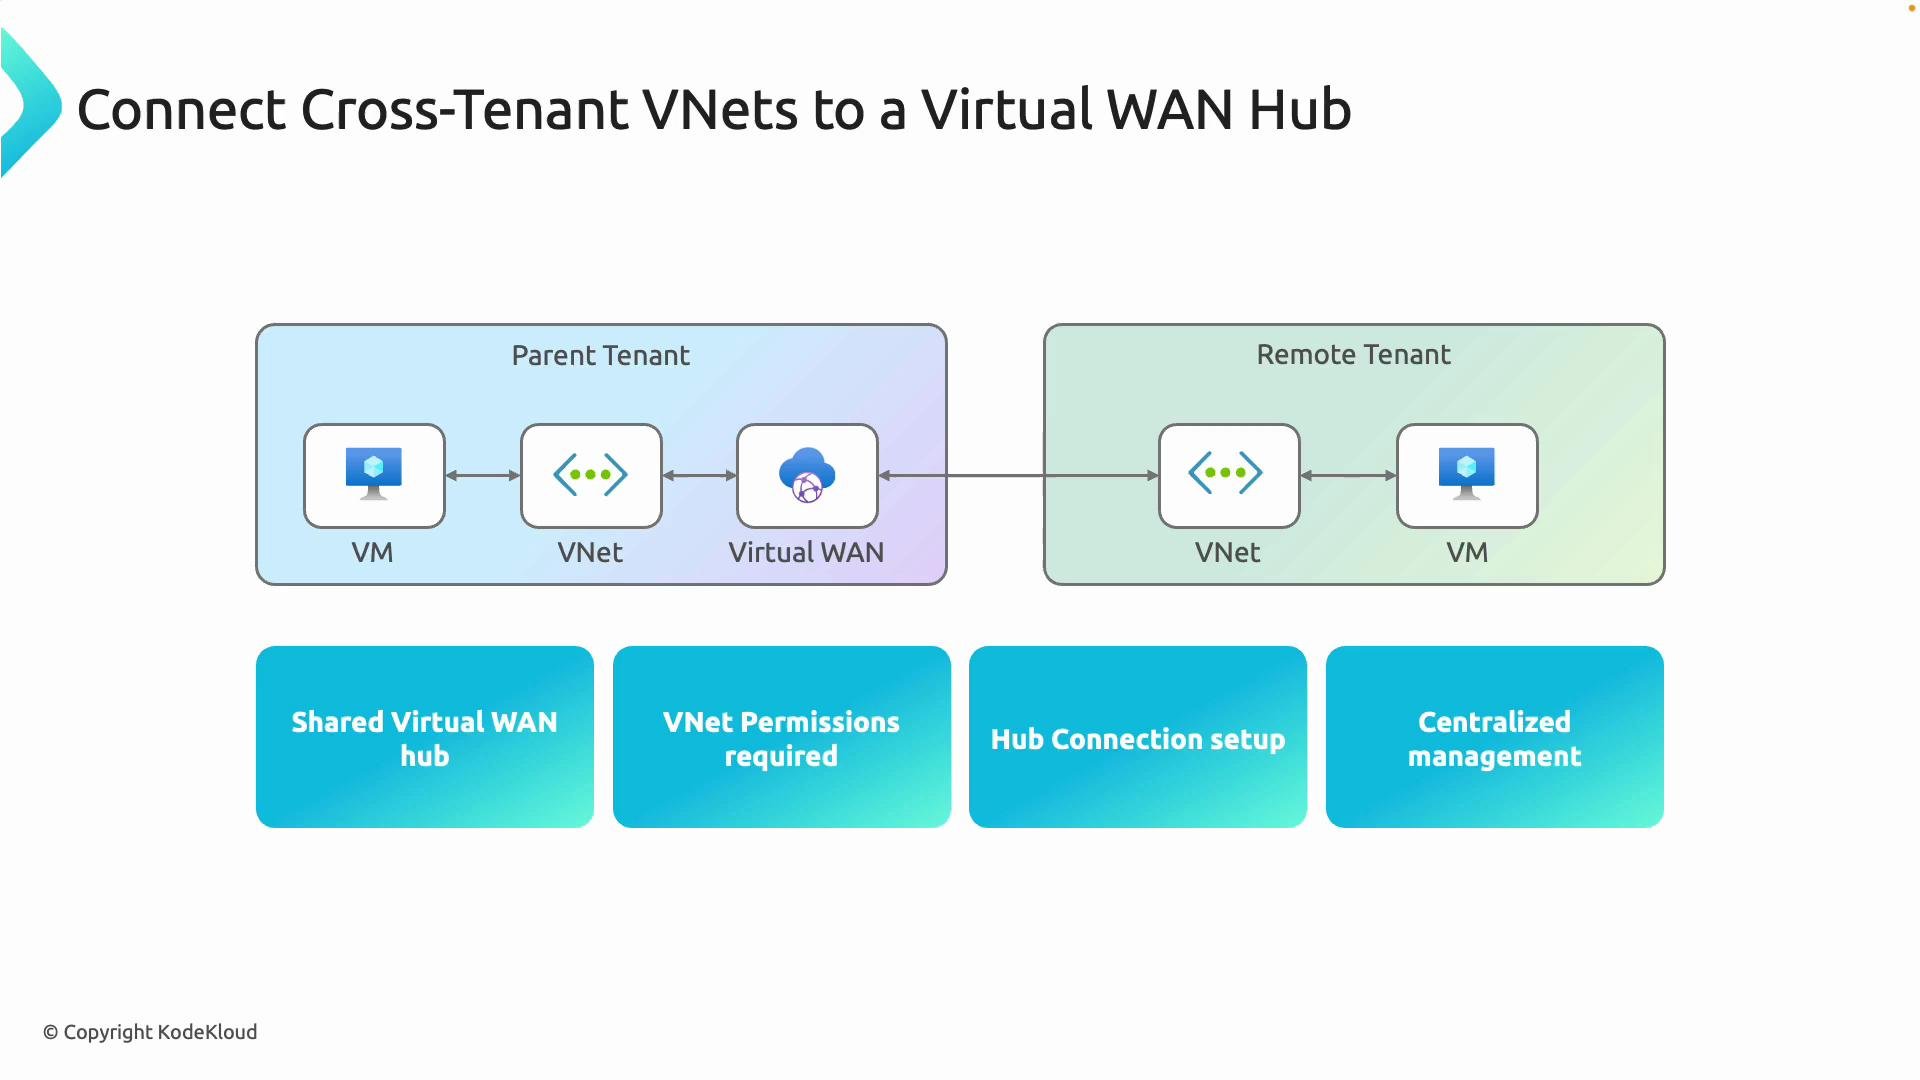
To connect a cross-tenant VNet you must have the appropriate permissions (typically Contributor) on the target VNet. Verify RBAC before attempting to create the hub connection.
Routing in Azure Virtual WAN
Virtual WAN hubs use route tables to control traffic flow between VNets, branch VPN sites, and other attachments. Understanding association, propagation, and labels is crucial to designing predictable traffic flows. Key concepts:- Association — When a connection (VNet, VPN site, ExpressRoute) is associated with a route table, traffic originating from that connection is evaluated against the table’s routes.
- Propagation — Connections can propagate their prefixes into route tables, allowing other attachments to learn those routes (for example, an on-prem VPN site propagating routes to VNets).
- Labels — Labels (e.g.,
Default,Internet,None) allow grouping propagation behavior for multiple attachments, avoiding per-connection route configuration. - Custom route policies — Define granular policies for complex topologies (hub-and-spoke, full mesh, or split tunneling) to control which routes are advertised and accepted.

When VNets and an on-premises VPN gateway are attached to a Virtual WAN hub, each attachment can be associated with a specific route table (for instance, the default table). You combine association and propagation to control which networks learn which prefixes and how traffic is forwarded through the hub. For example, you can prevent two spokes from directly exchanging routes by restricting propagation or by associating them with separate route tables.
Virtual WAN vs Traditional Hub-and-Spoke
Below is a concise comparison to help you choose the right design for your needs.
Note: If your environment requires bespoke packet inspection or custom vendor appliances with specific routing logic, a traditional hub-and-spoke with NVAs may provide finer-grained control at the expense of operational overhead.
Portal walkthrough — Create Virtual WAN, Hub, and Point-to-Site
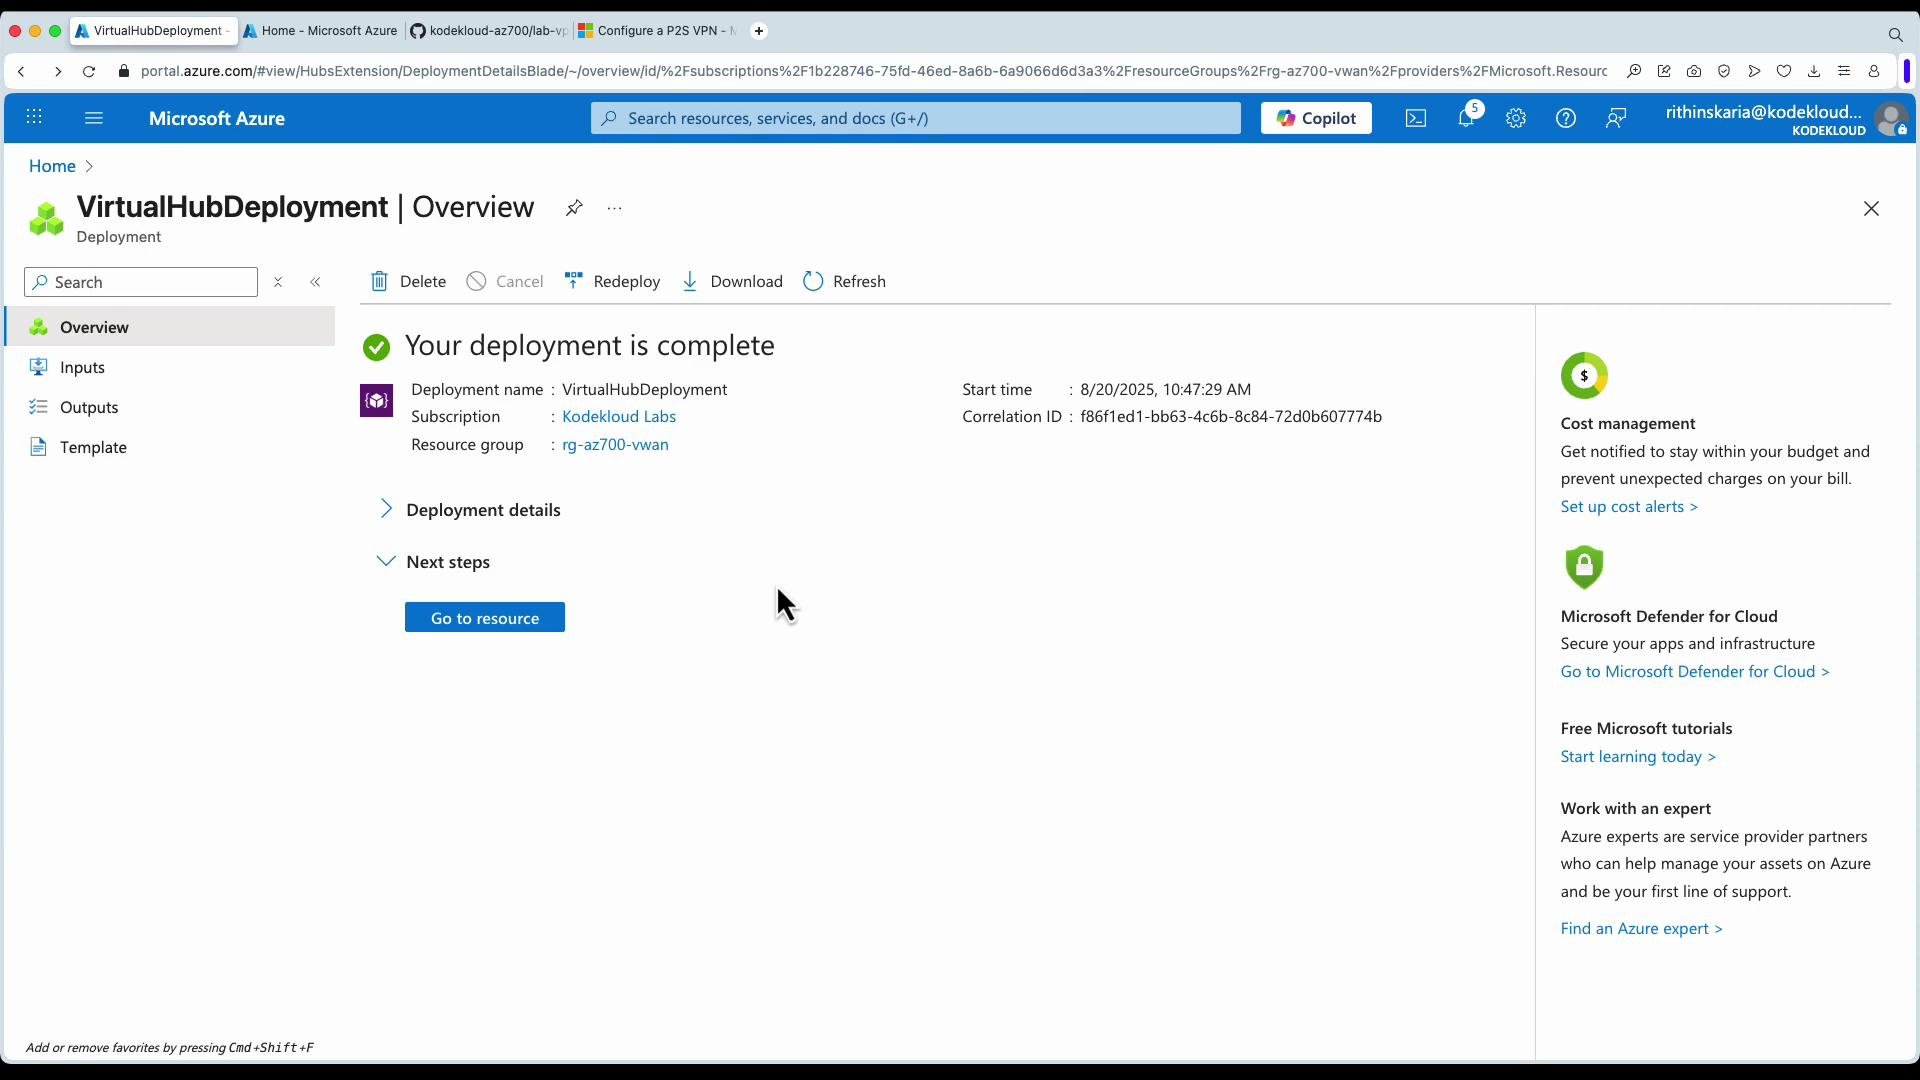
This section summarizes the steps in the Azure portal to create a Virtual WAN, deploy a virtual hub (with gateway), and configure a point-to-site User VPN.-
Create a Virtual WAN resource:
- In the Azure portal, go to Create > Virtual WAN.
- Fill in basics: subscription, resource group, and location.
- Most configuration is done at the hub level, so WAN-level settings are minimal.
-
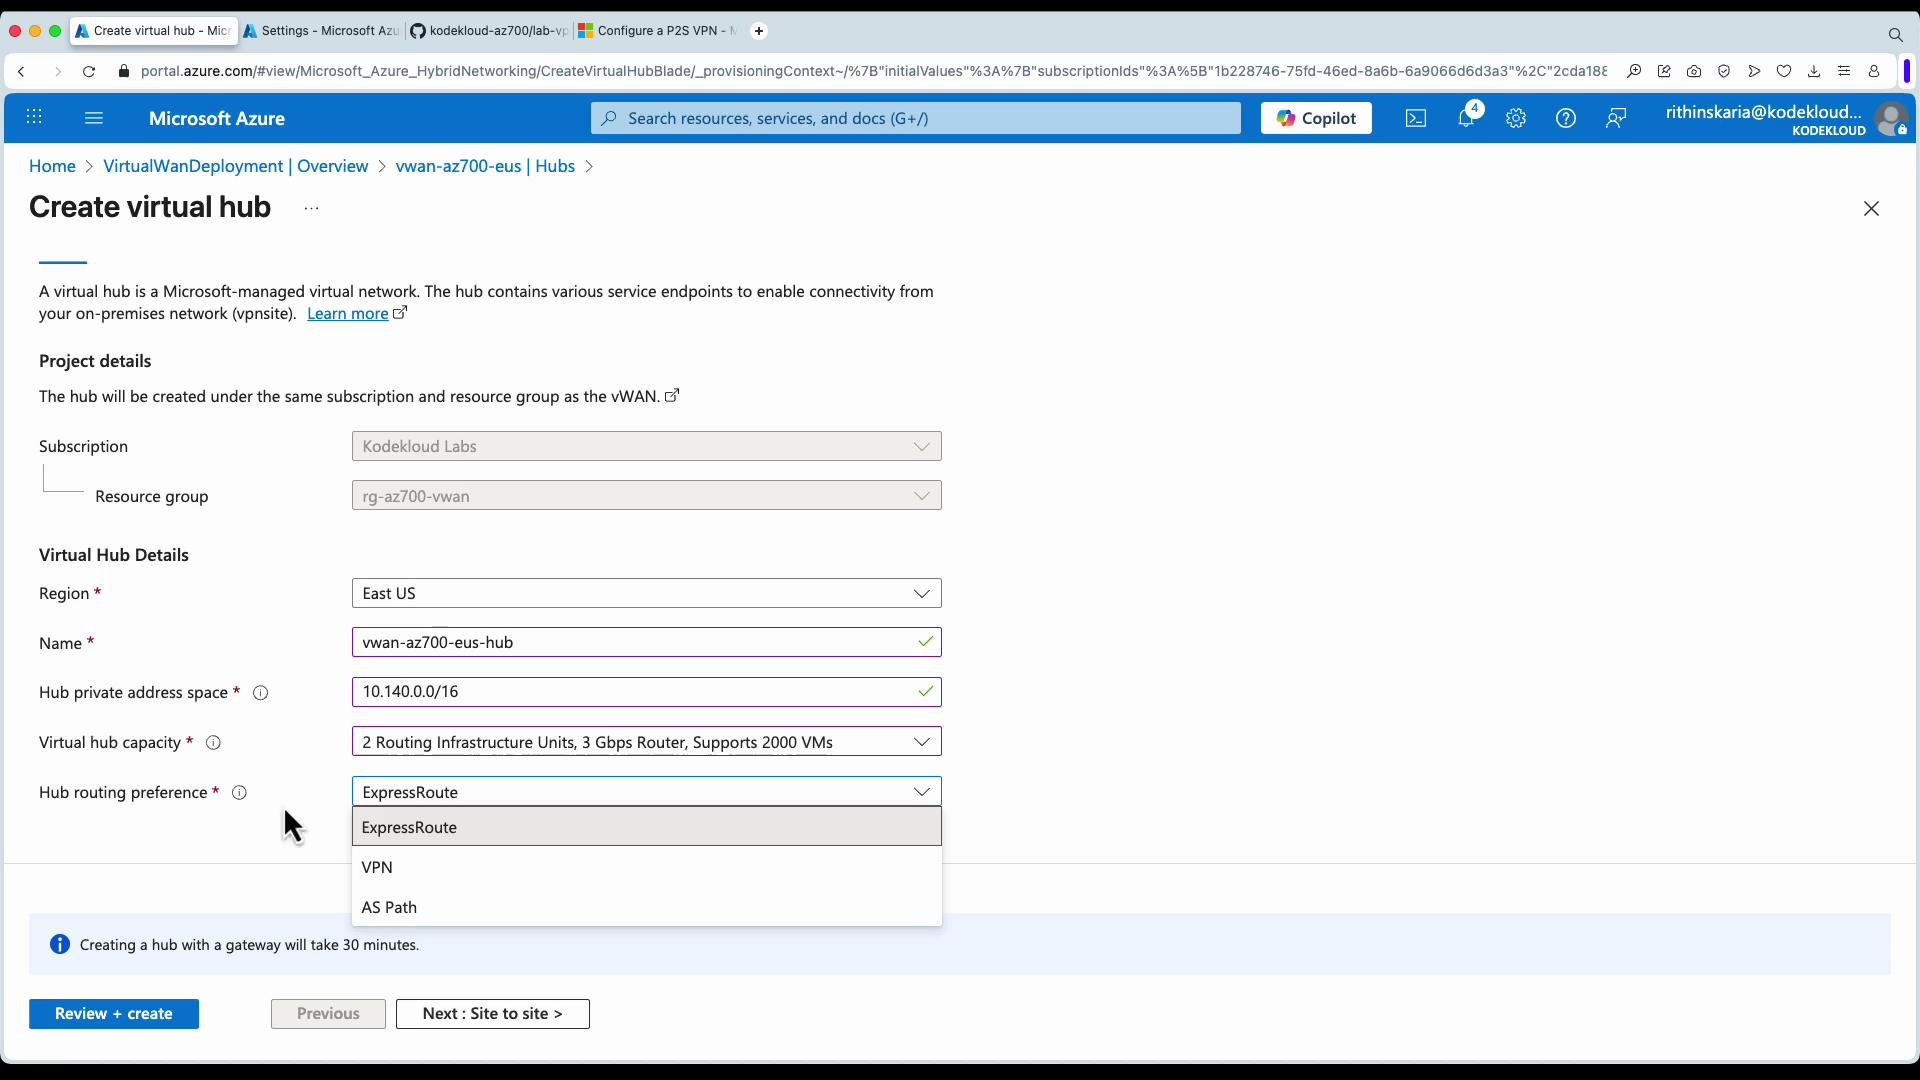
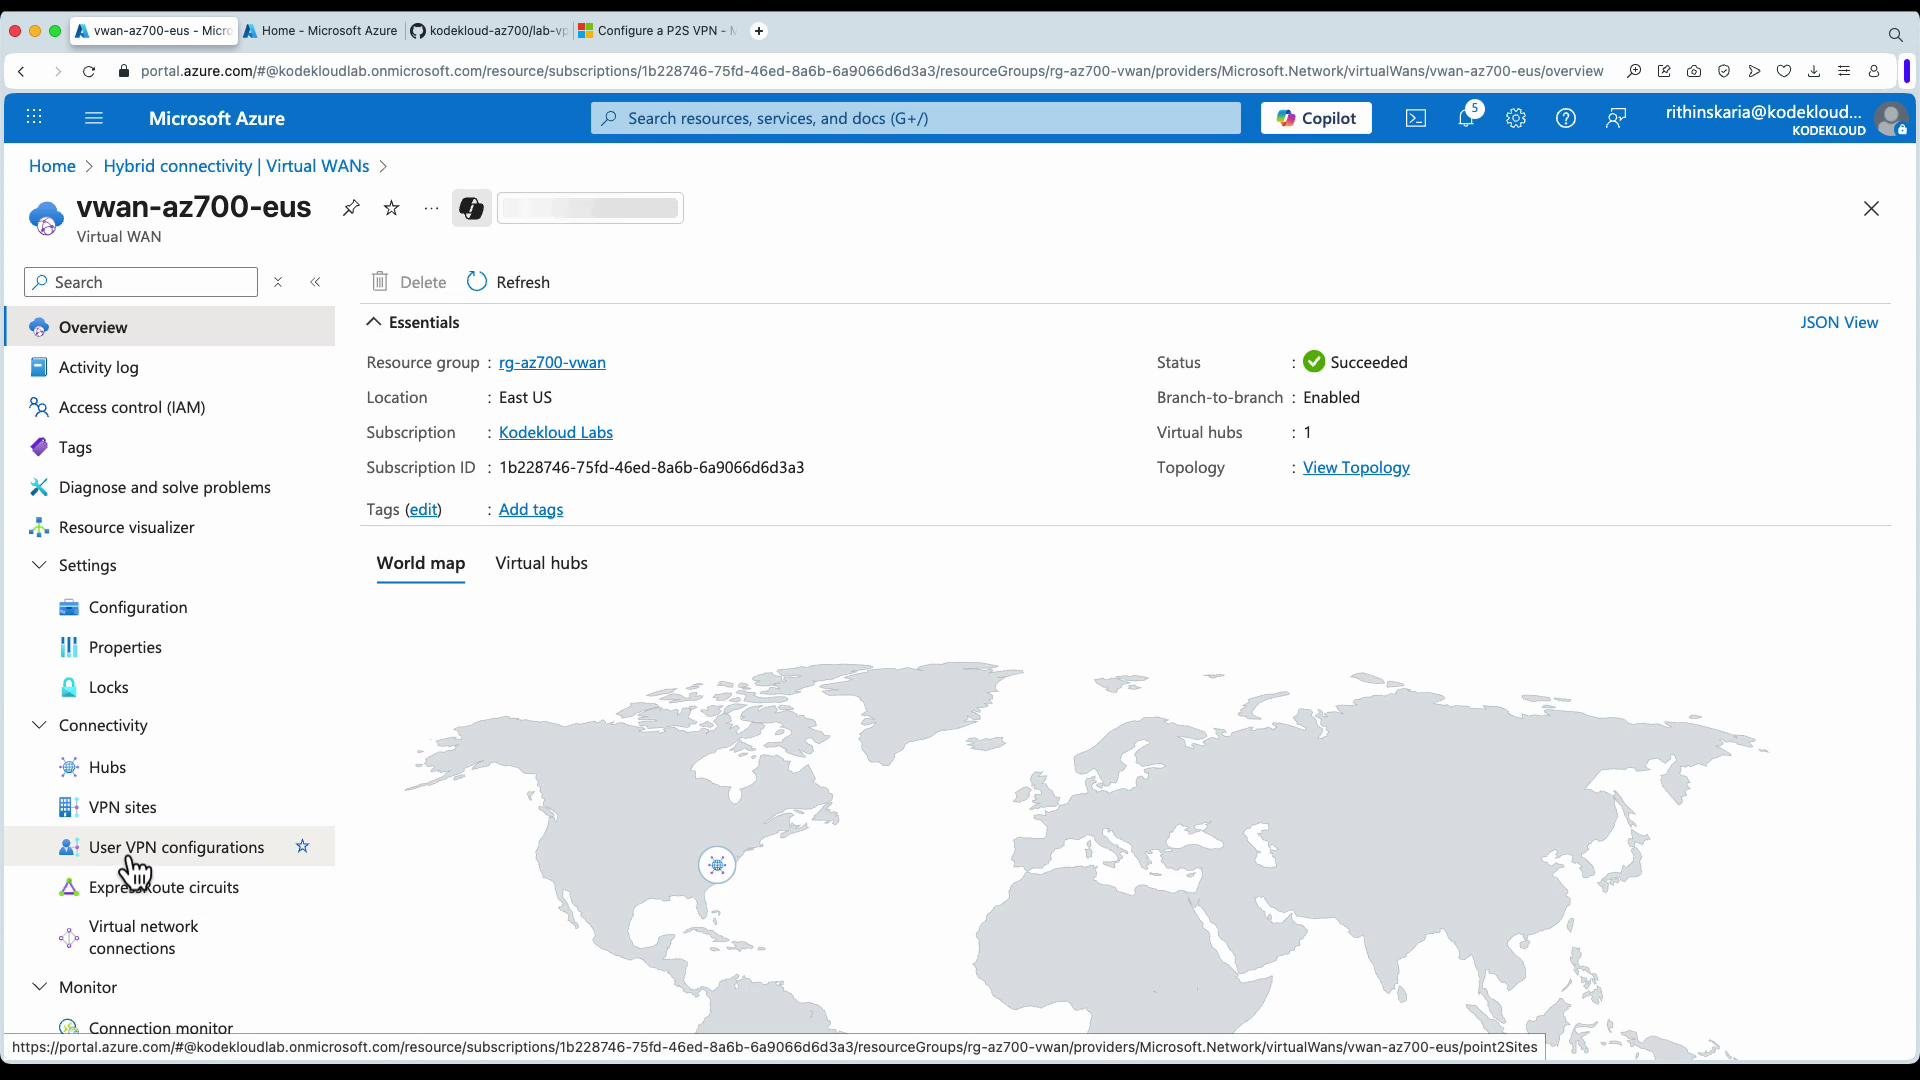
Create a virtual hub:
- From the Virtual WAN blade, click New hub.
- You can deploy a hub with a gateway; expect longer deployment time when a gateway is included.
- Add a Point-to-site (User VPN) configuration inline, or create it separately and attach later.
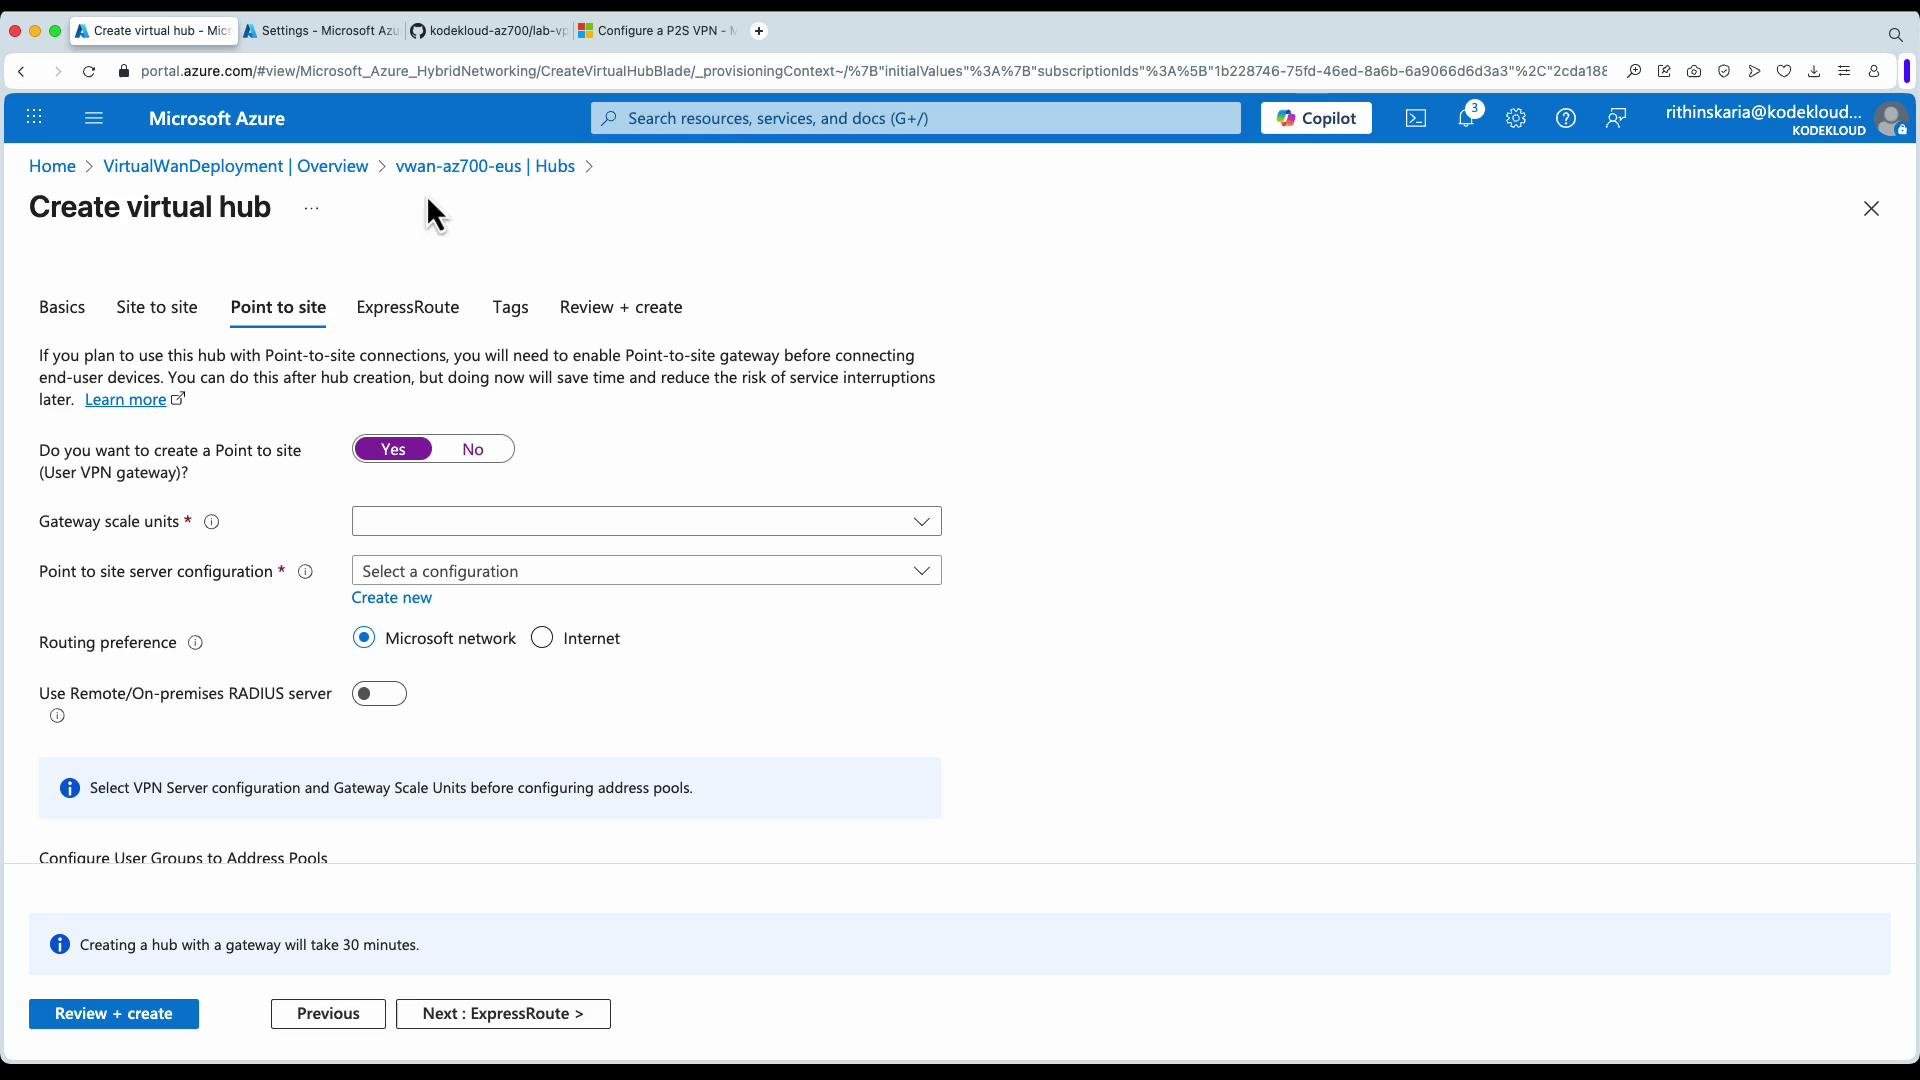
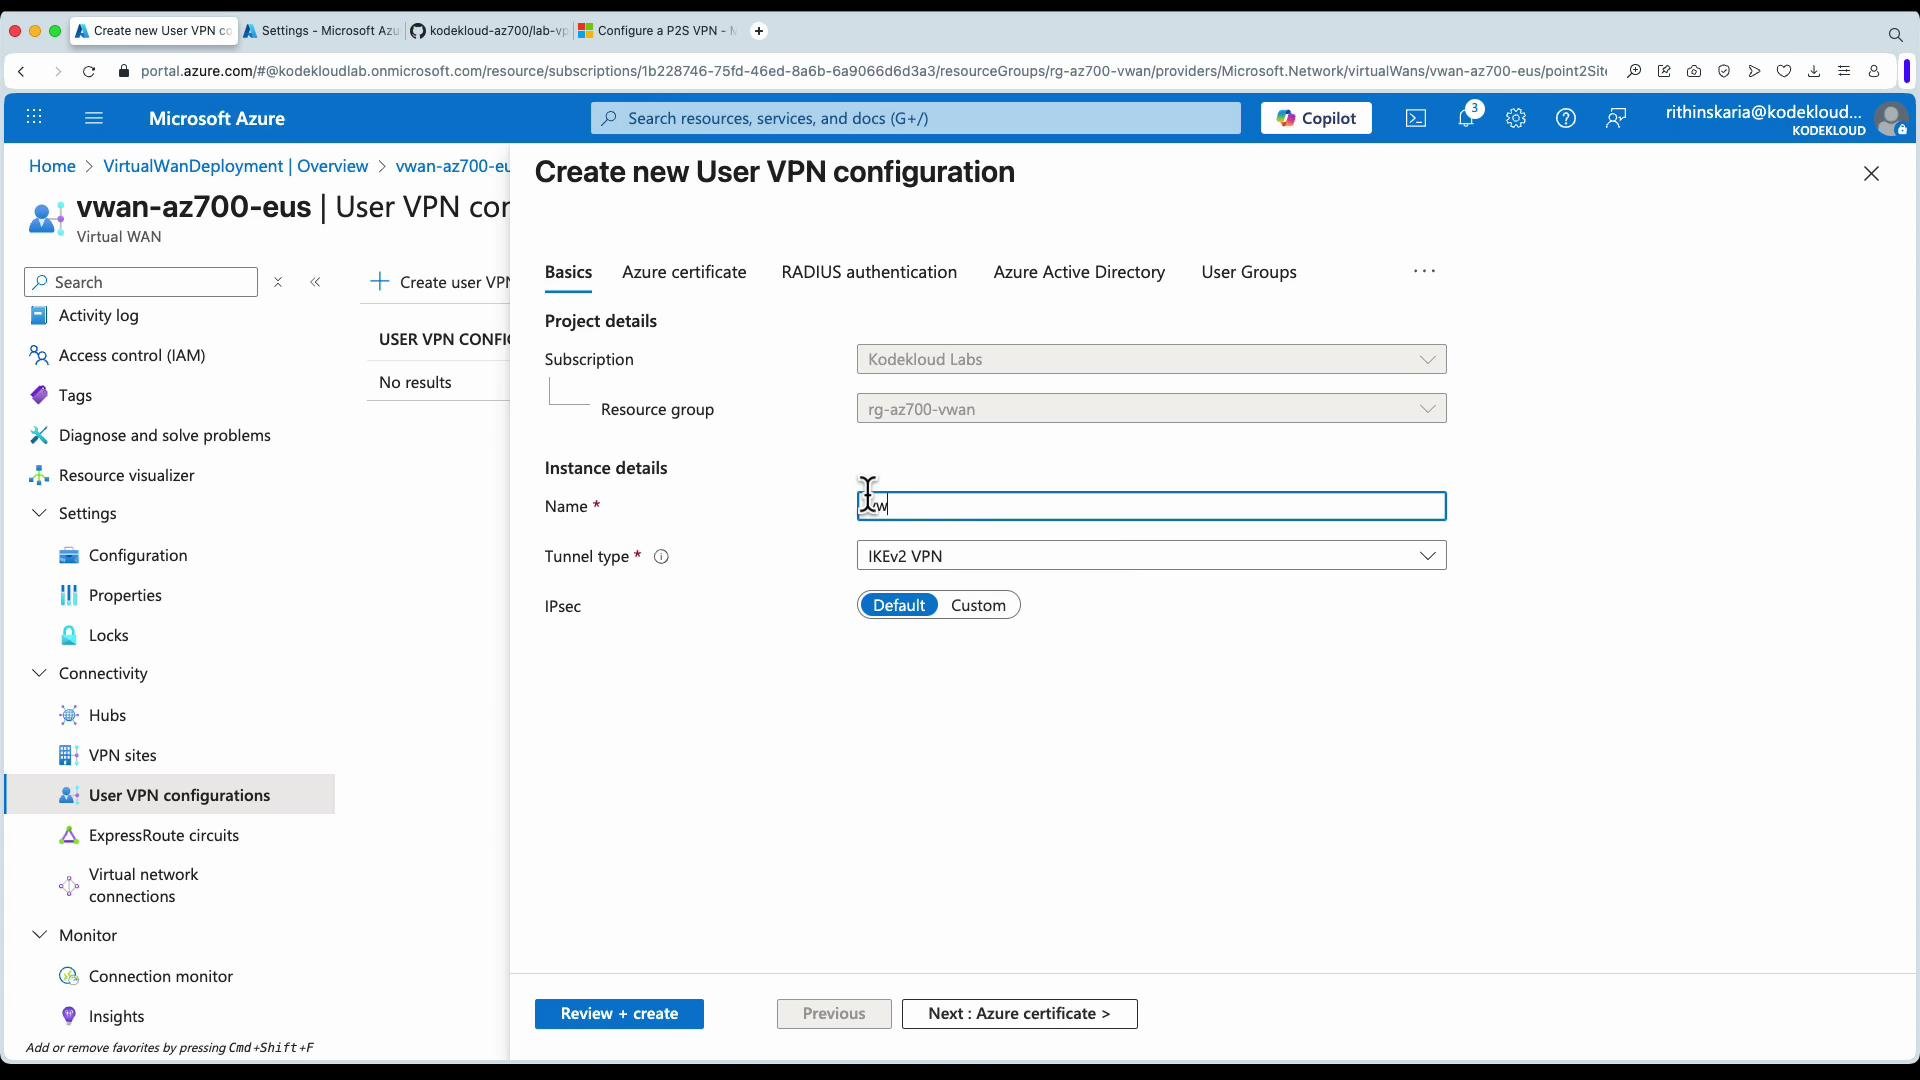
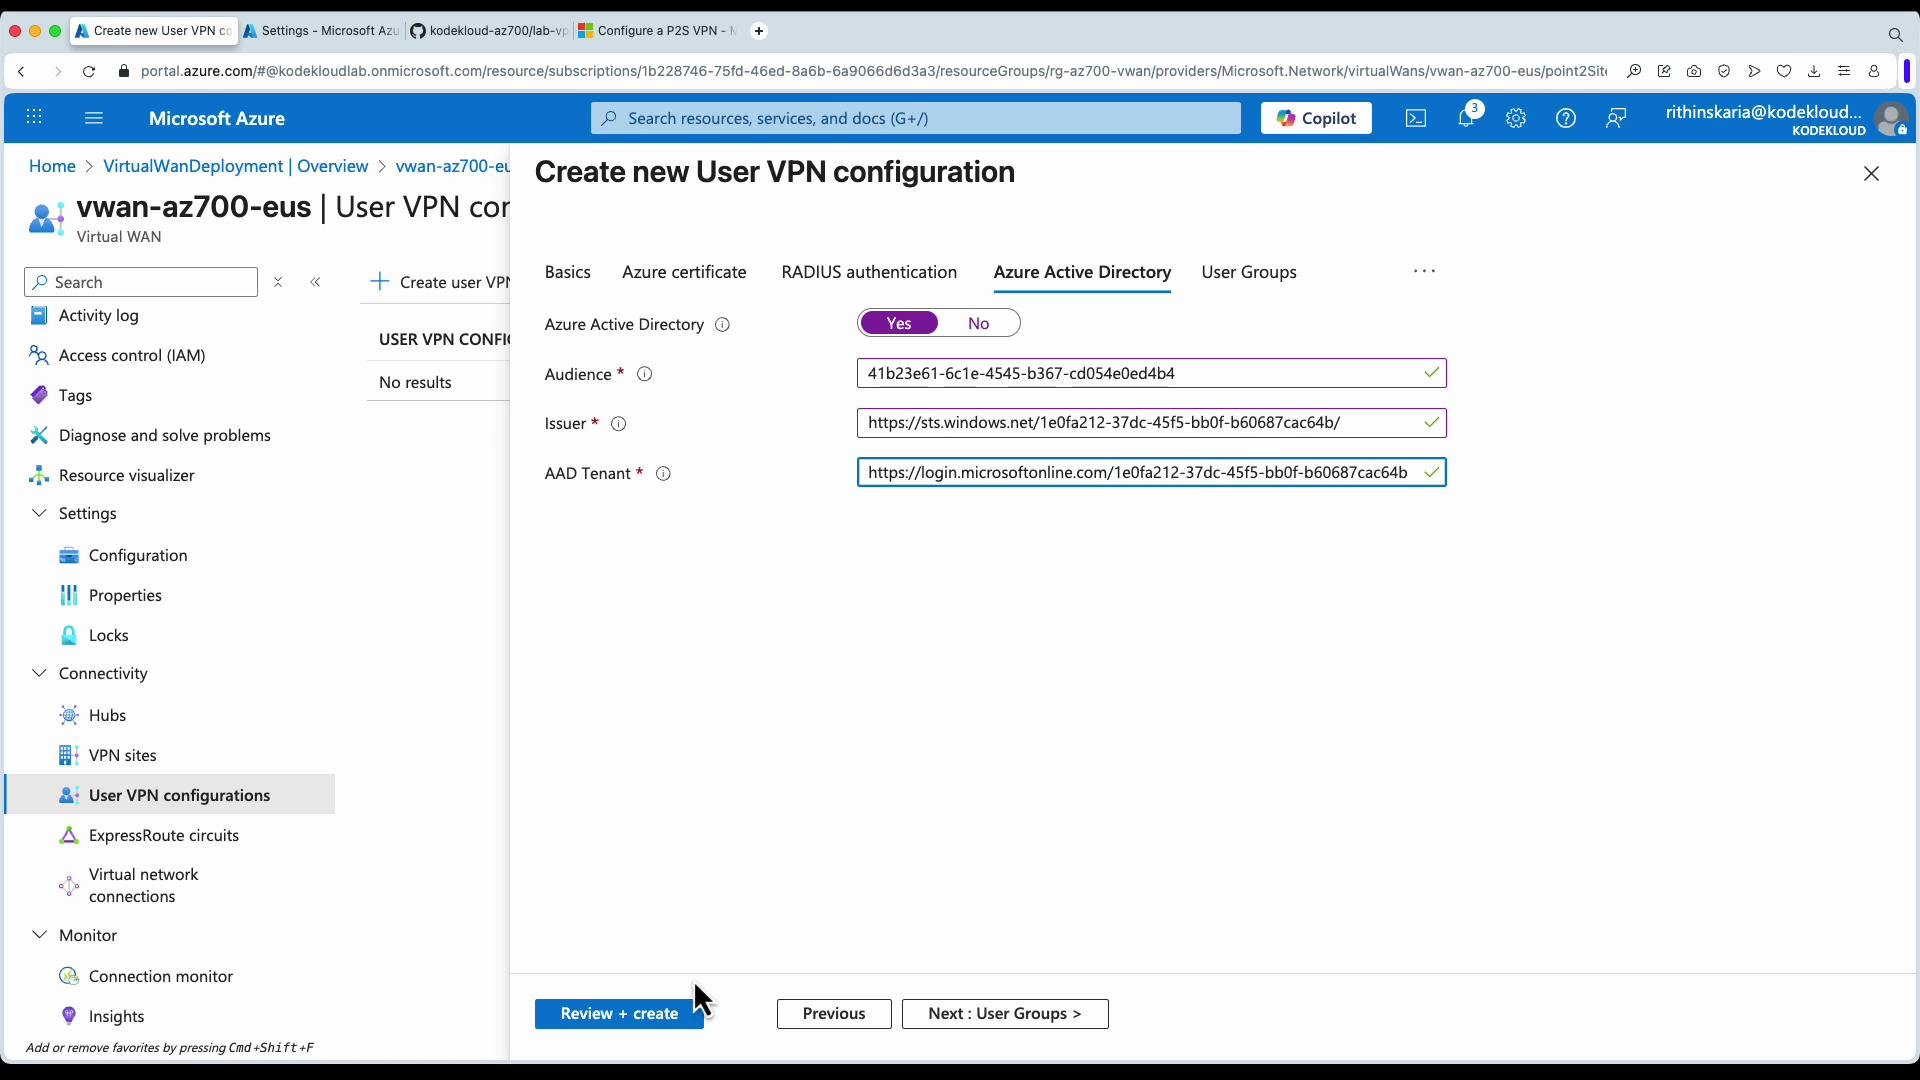
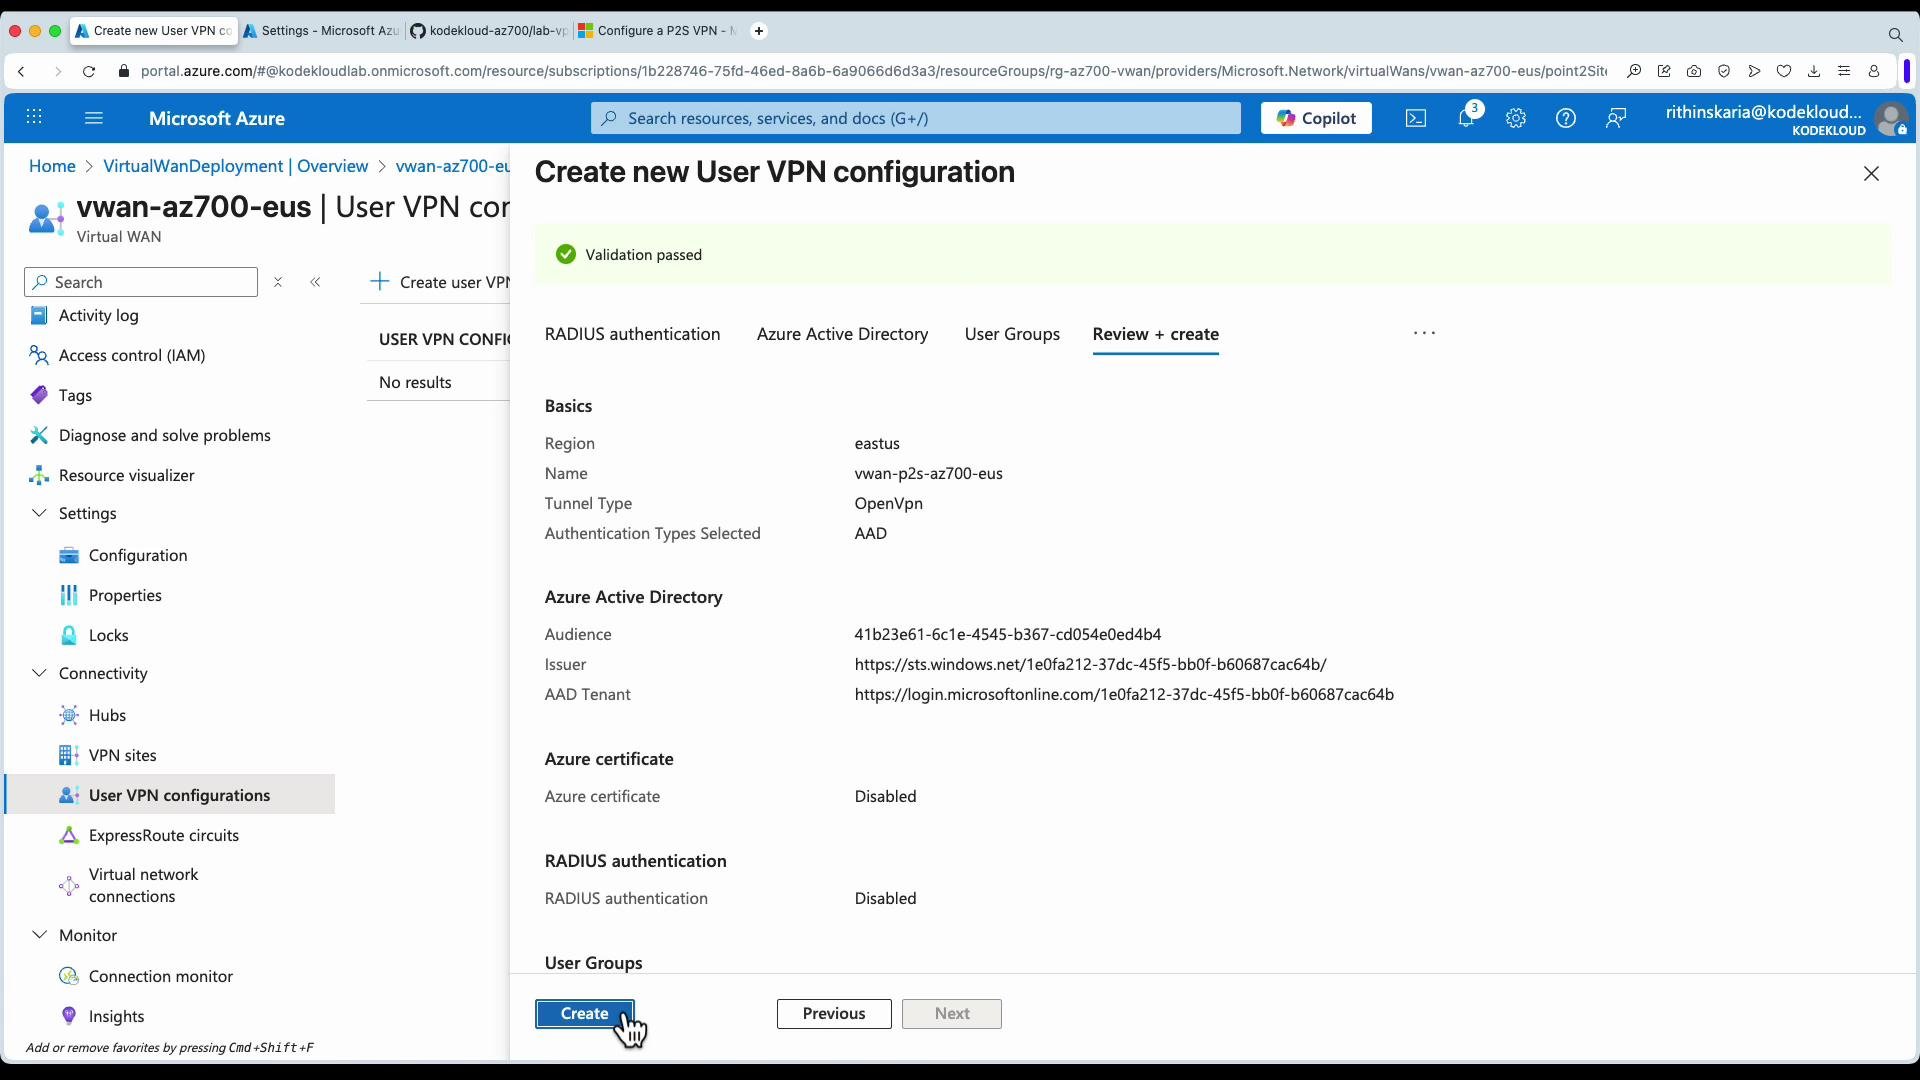
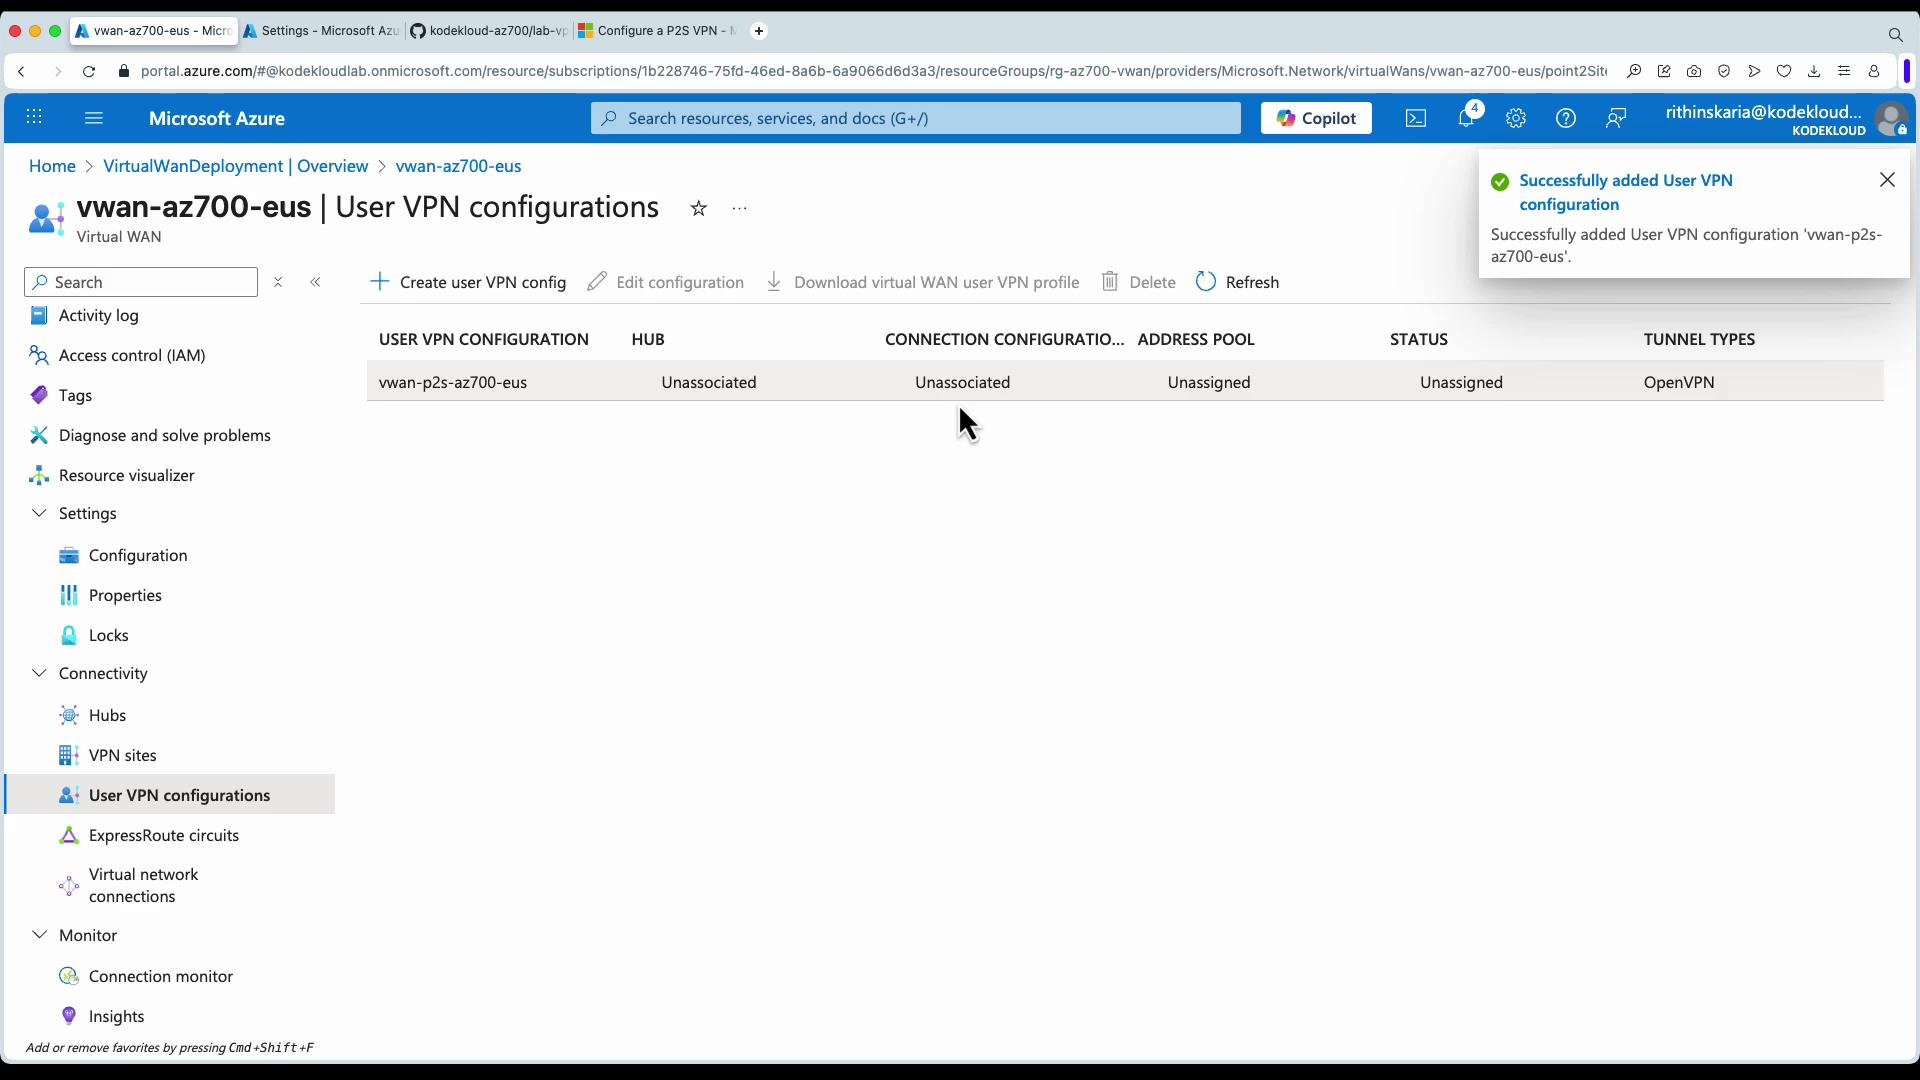
- Create a User VPN configuration (Point-to-site):
- From the Virtual WAN blade, go to User VPN configuration -> Create.
- Select tunnel type (e.g., OpenVPN®) and choose an authentication method such as Azure AD.
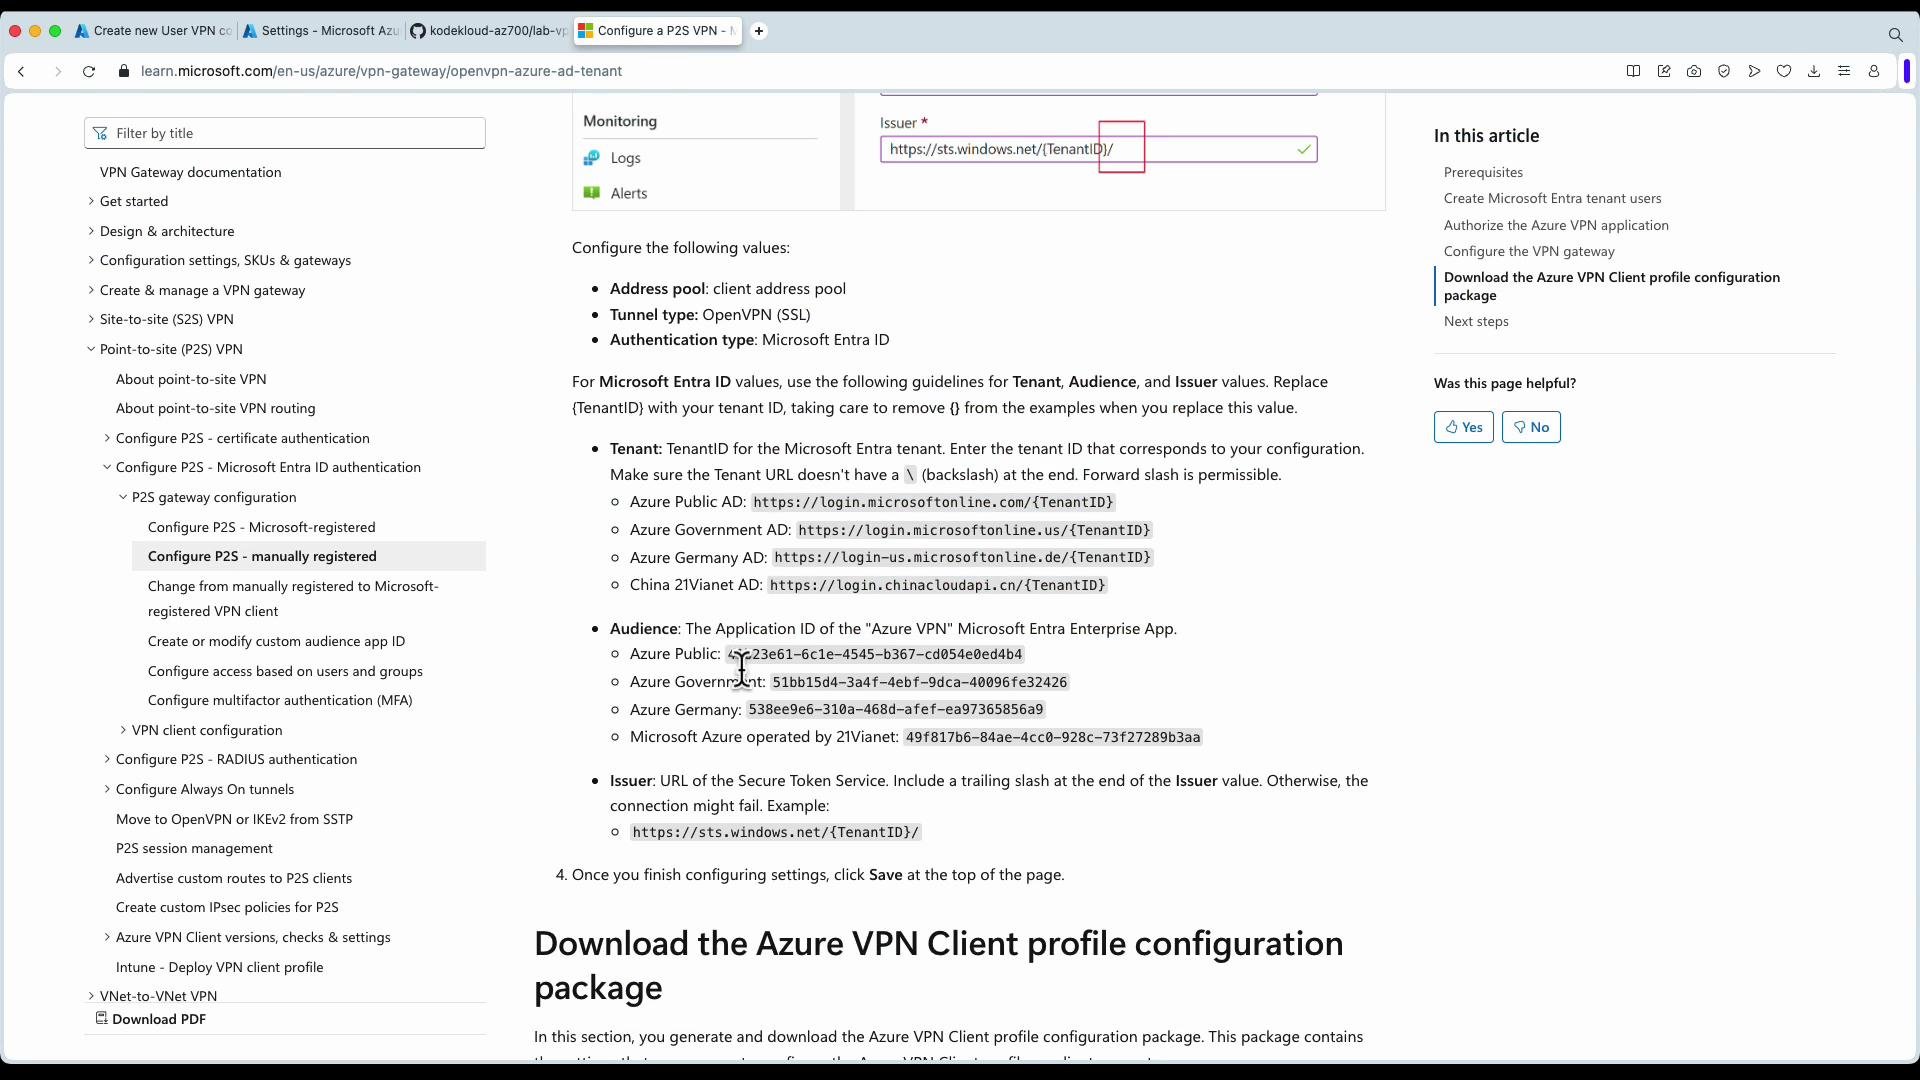
- If you choose Azure AD authentication, you must supply Audience, Issuer, and Tenant ID. See Microsoft docs for correct values.
- OpenVPN Azure AD authentication: https://learn.microsoft.com/en-us/azure/vpn-gateway/openvpn-azure-ad-authentication
Hub creation settings and capacity
When creating the hub you must specify:- Region (hub deployment region)
- Hub private address range (for example
10.140.0.0/24) - Virtual hub capacity (gateway scale units / infrastructure routing units)
- Routing preference (for example
VPN)

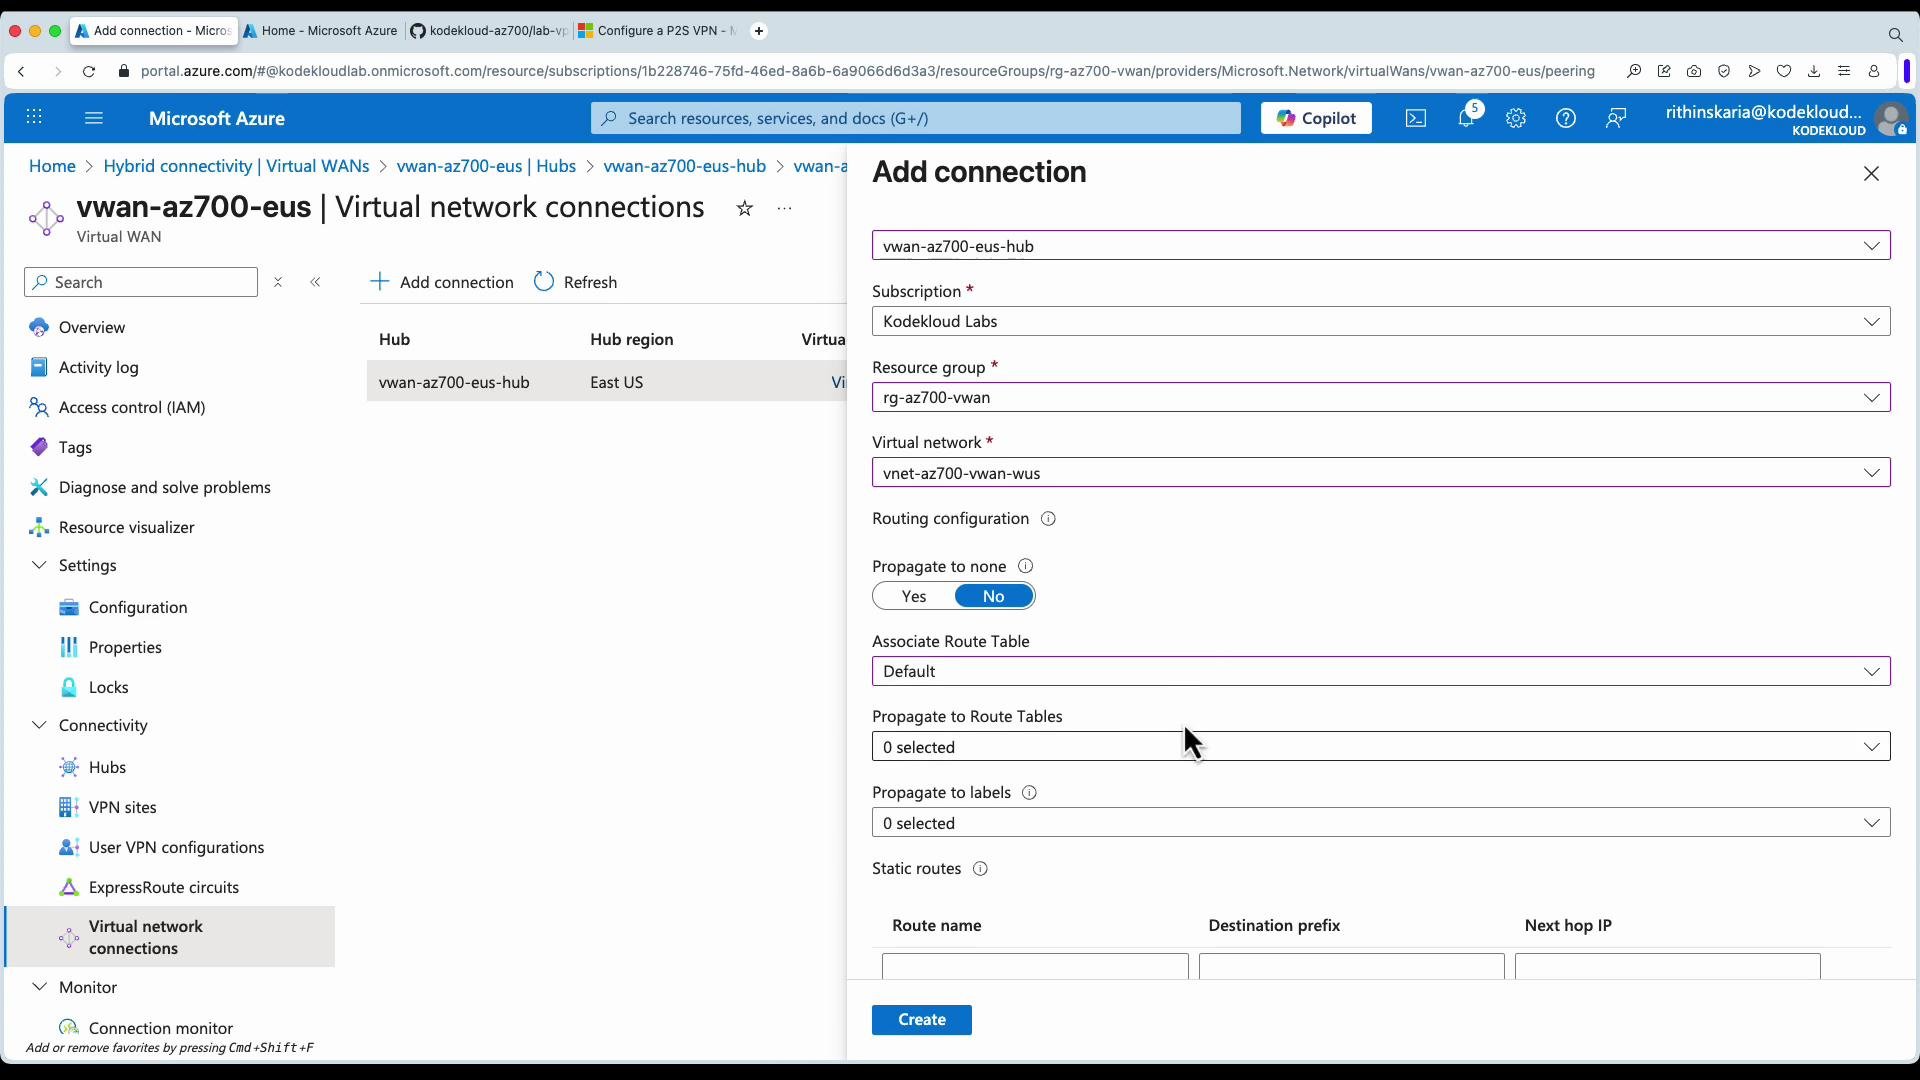
Adding virtual network connections (spokes)
From the Virtual WAN blade you create virtual network connections to attach VNets as spokes. When adding a connection you can:- Select the target VNet (spoke)
- Choose a route table association
- Configure propagation (which route tables should receive propagated routes)
- Assign labels for grouping and easier management
Managing routes, diagnostics, and point-to-site clients
From the hub resource you can:- Inspect route maps and routing intent
- View BGP peers and route tables
- Validate which routes are propagated and associated
- Download point-to-site client profiles and monitor VPN metrics
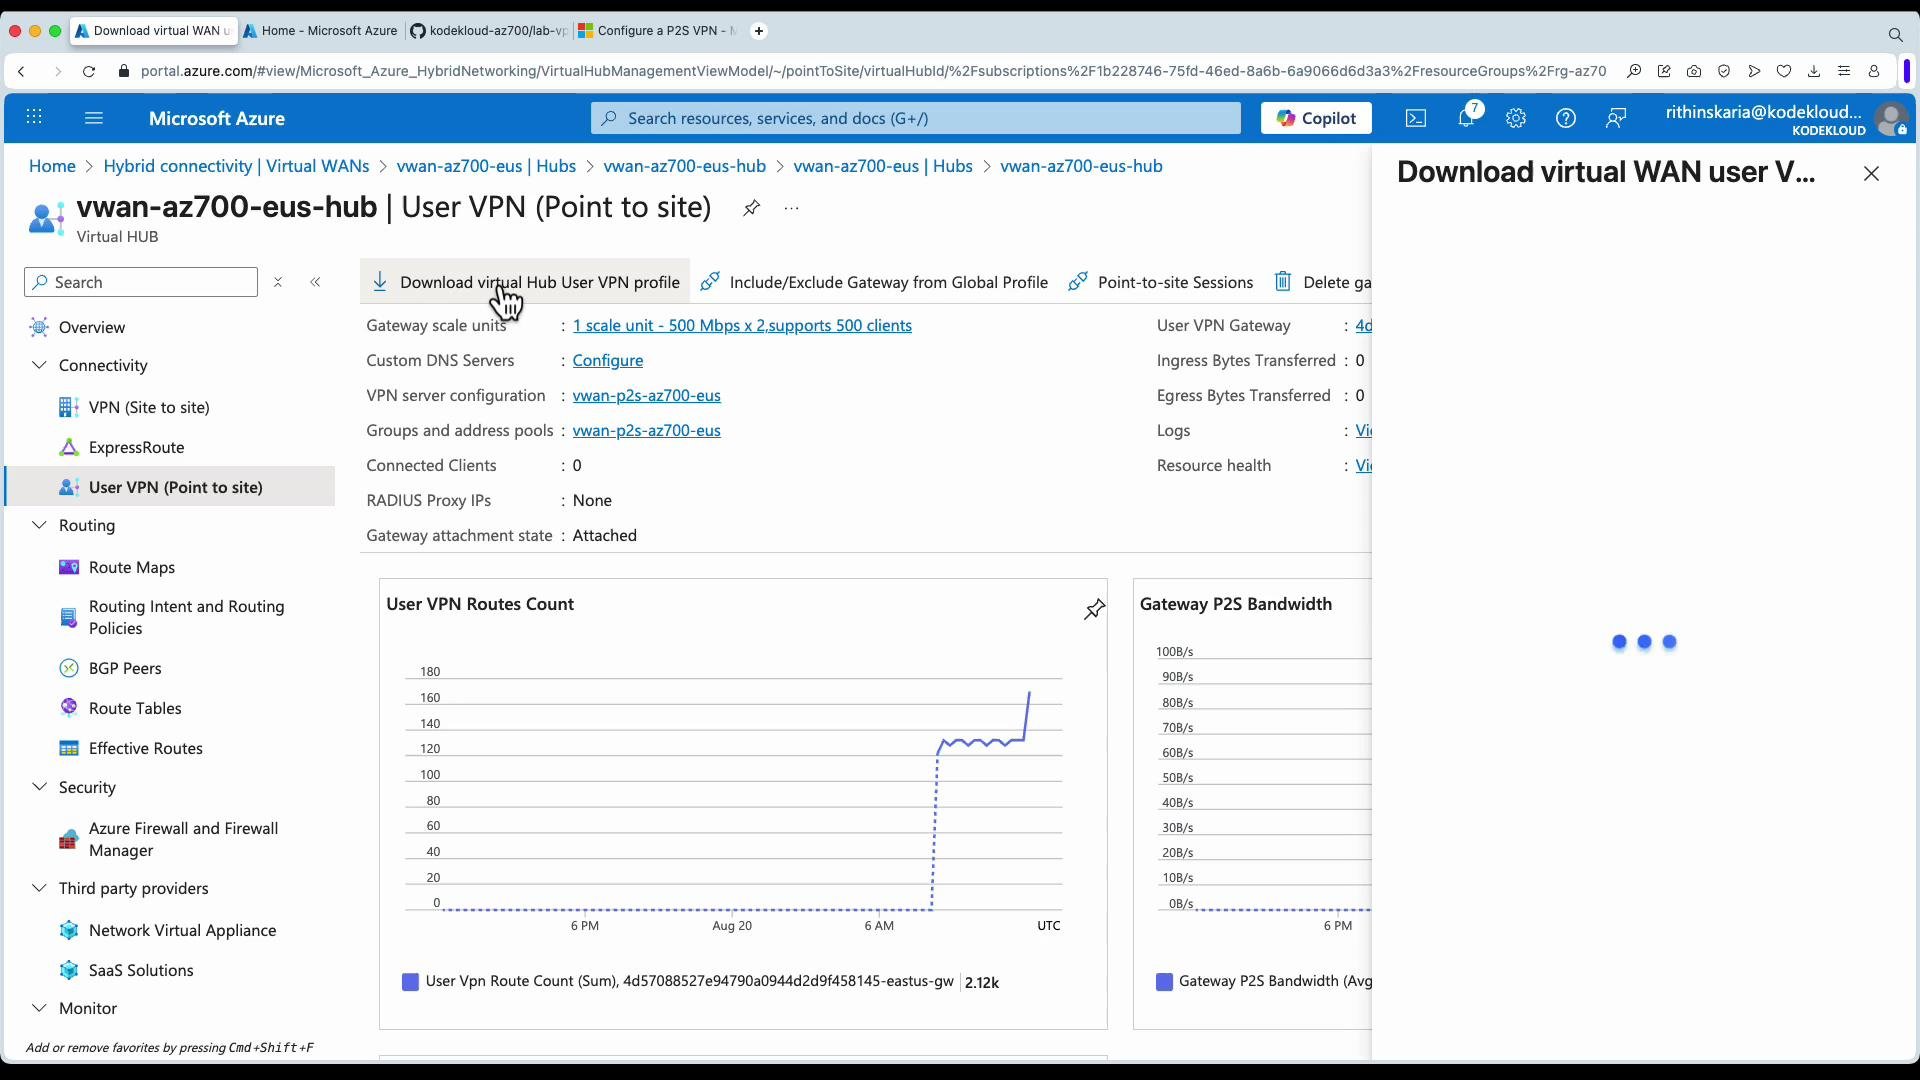
Download and use the VPN profile
Generate and download the VPN profile for the User VPN configuration. The profile contains client configuration files (for example, XML for the Azure VPN Client or OpenVPN profiles). Import the profile into the Azure VPN Client (or your OpenVPN client), then authenticate to connect.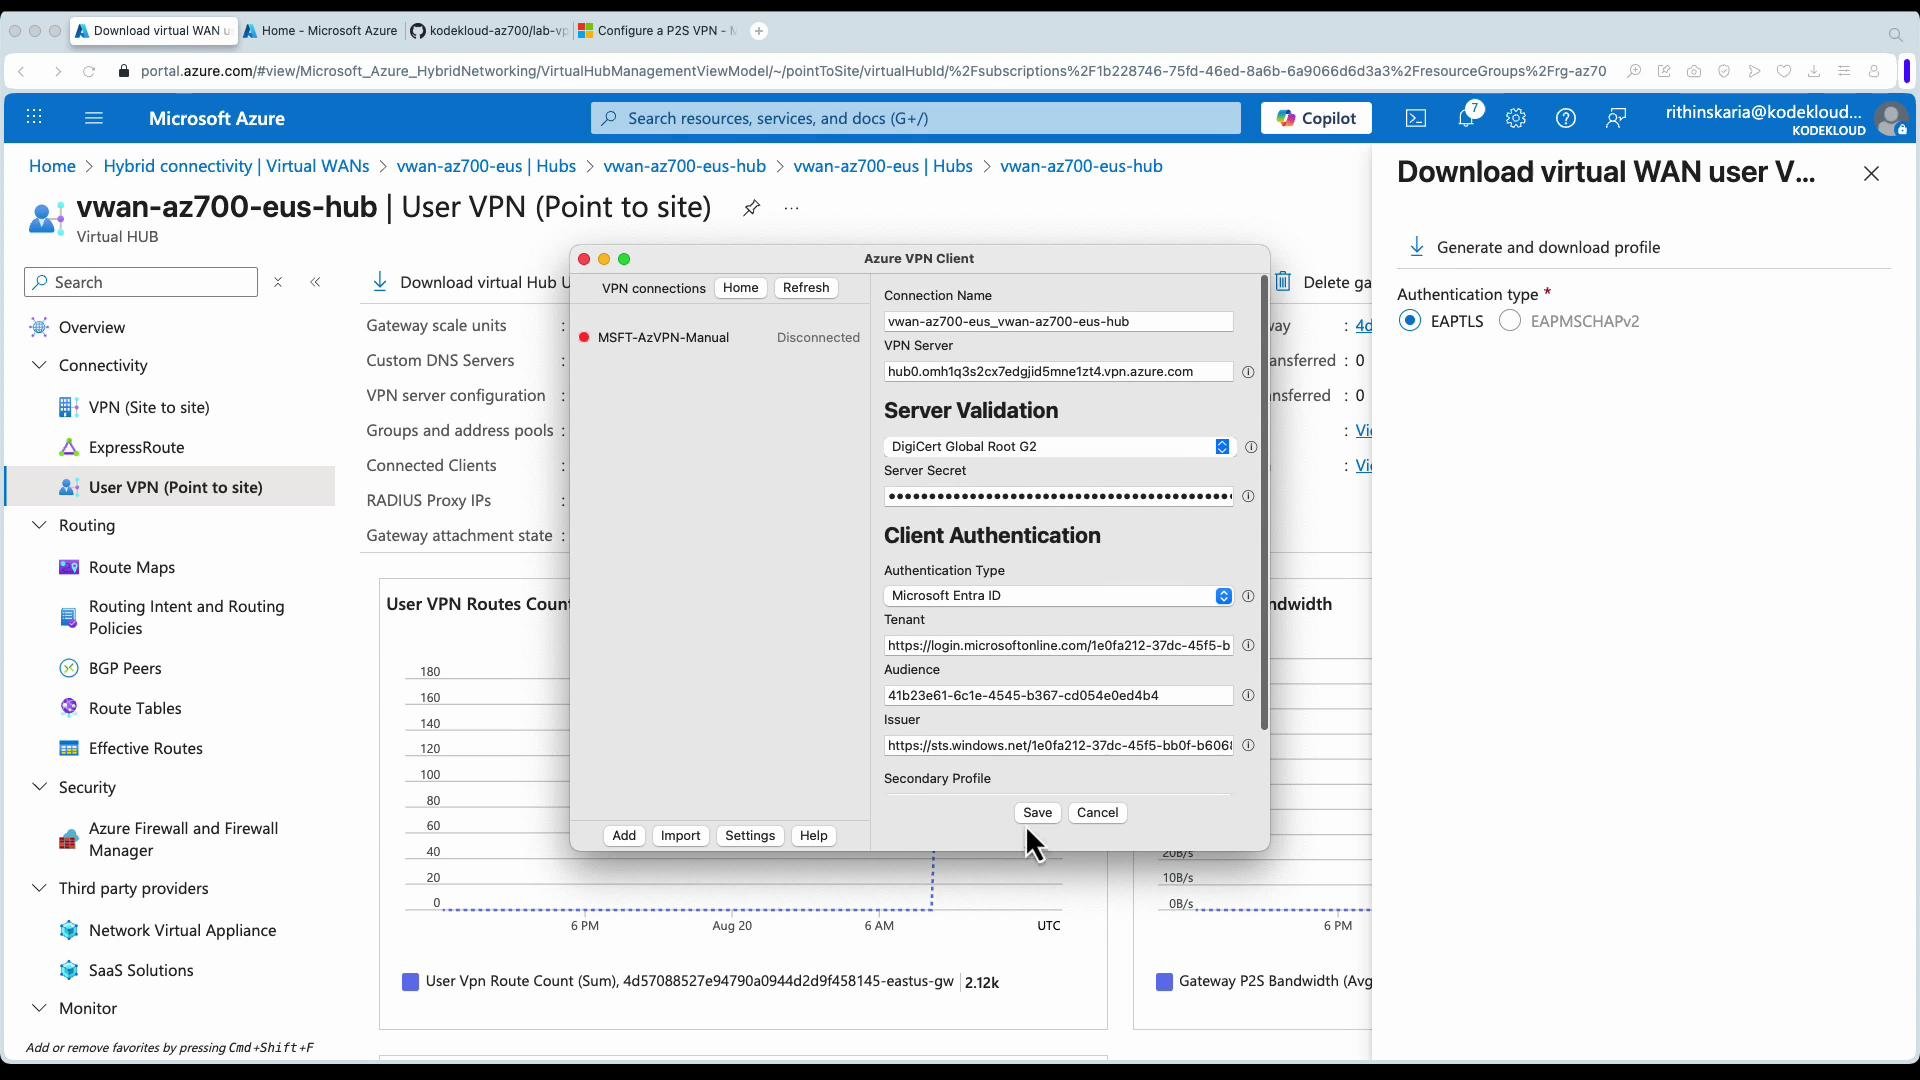
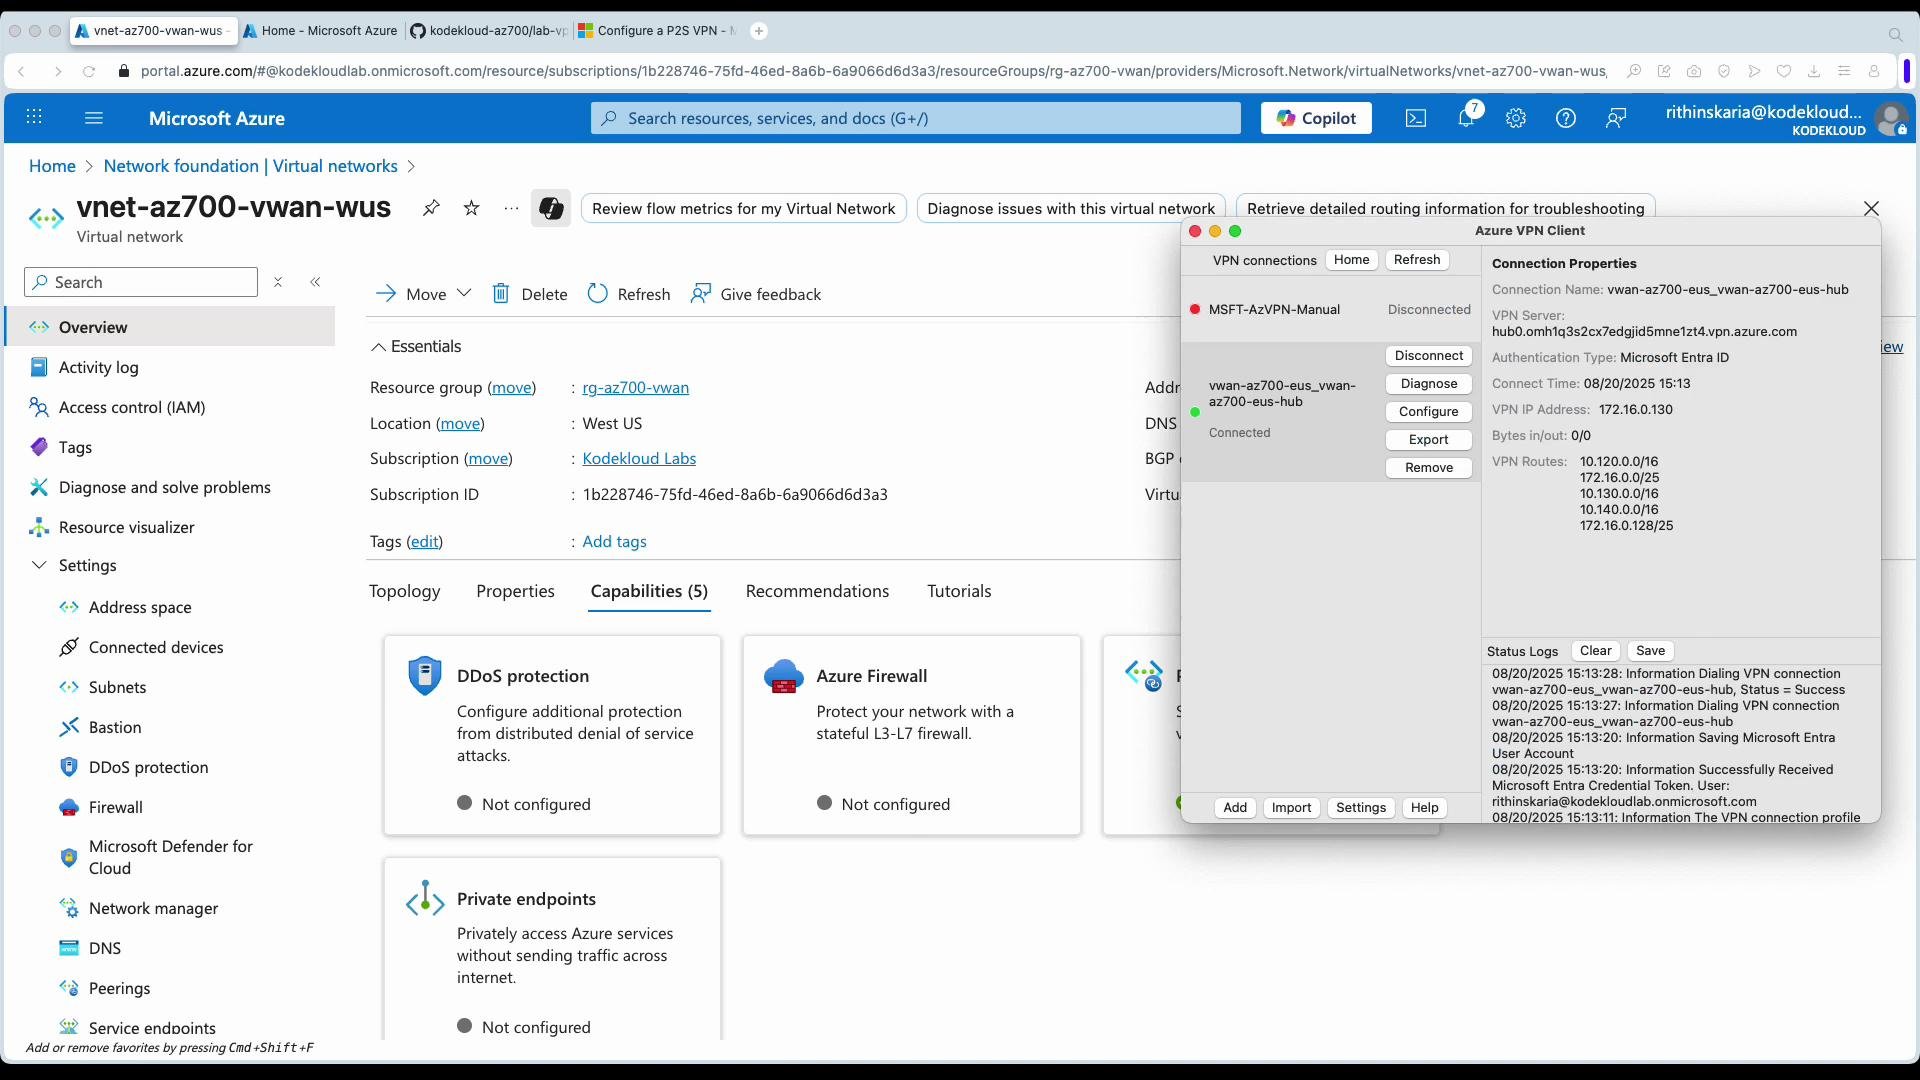
Validation: access resources across VNets
With the VPN connected and VNets attached to the hub, clients should be able to access internal VMs and services using private IP addresses. Confirm:- Route tables are associated/propagated as expected
- Security groups and NSGs allow the required traffic
- Any NVAs or firewall policies are permitting the flows
Summary
Azure Virtual WAN provides a managed, scalable solution for global, multi-branch, and cross-tenant connectivity. Use central route tables, association/propagation, labels, and custom route policies to control route distribution and traffic flow. For highly customized network functions or specialized third-party appliances, a traditional hub-and-spoke design may still be appropriate, but expect additional configuration and operational overhead. Further reading:- Azure Virtual WAN documentation: https://learn.microsoft.com/azure/virtual-wan
- OpenVPN + Azure AD authentication: https://learn.microsoft.com/en-us/azure/vpn-gateway/openvpn-azure-ad-authentication
- Virtual WAN limits and throughput: https://learn.microsoft.com/en-us/azure/virtual-wan/virtual-wan-limits