- When to use VNet peering (regional vs. global)
- Key features and configuration flags
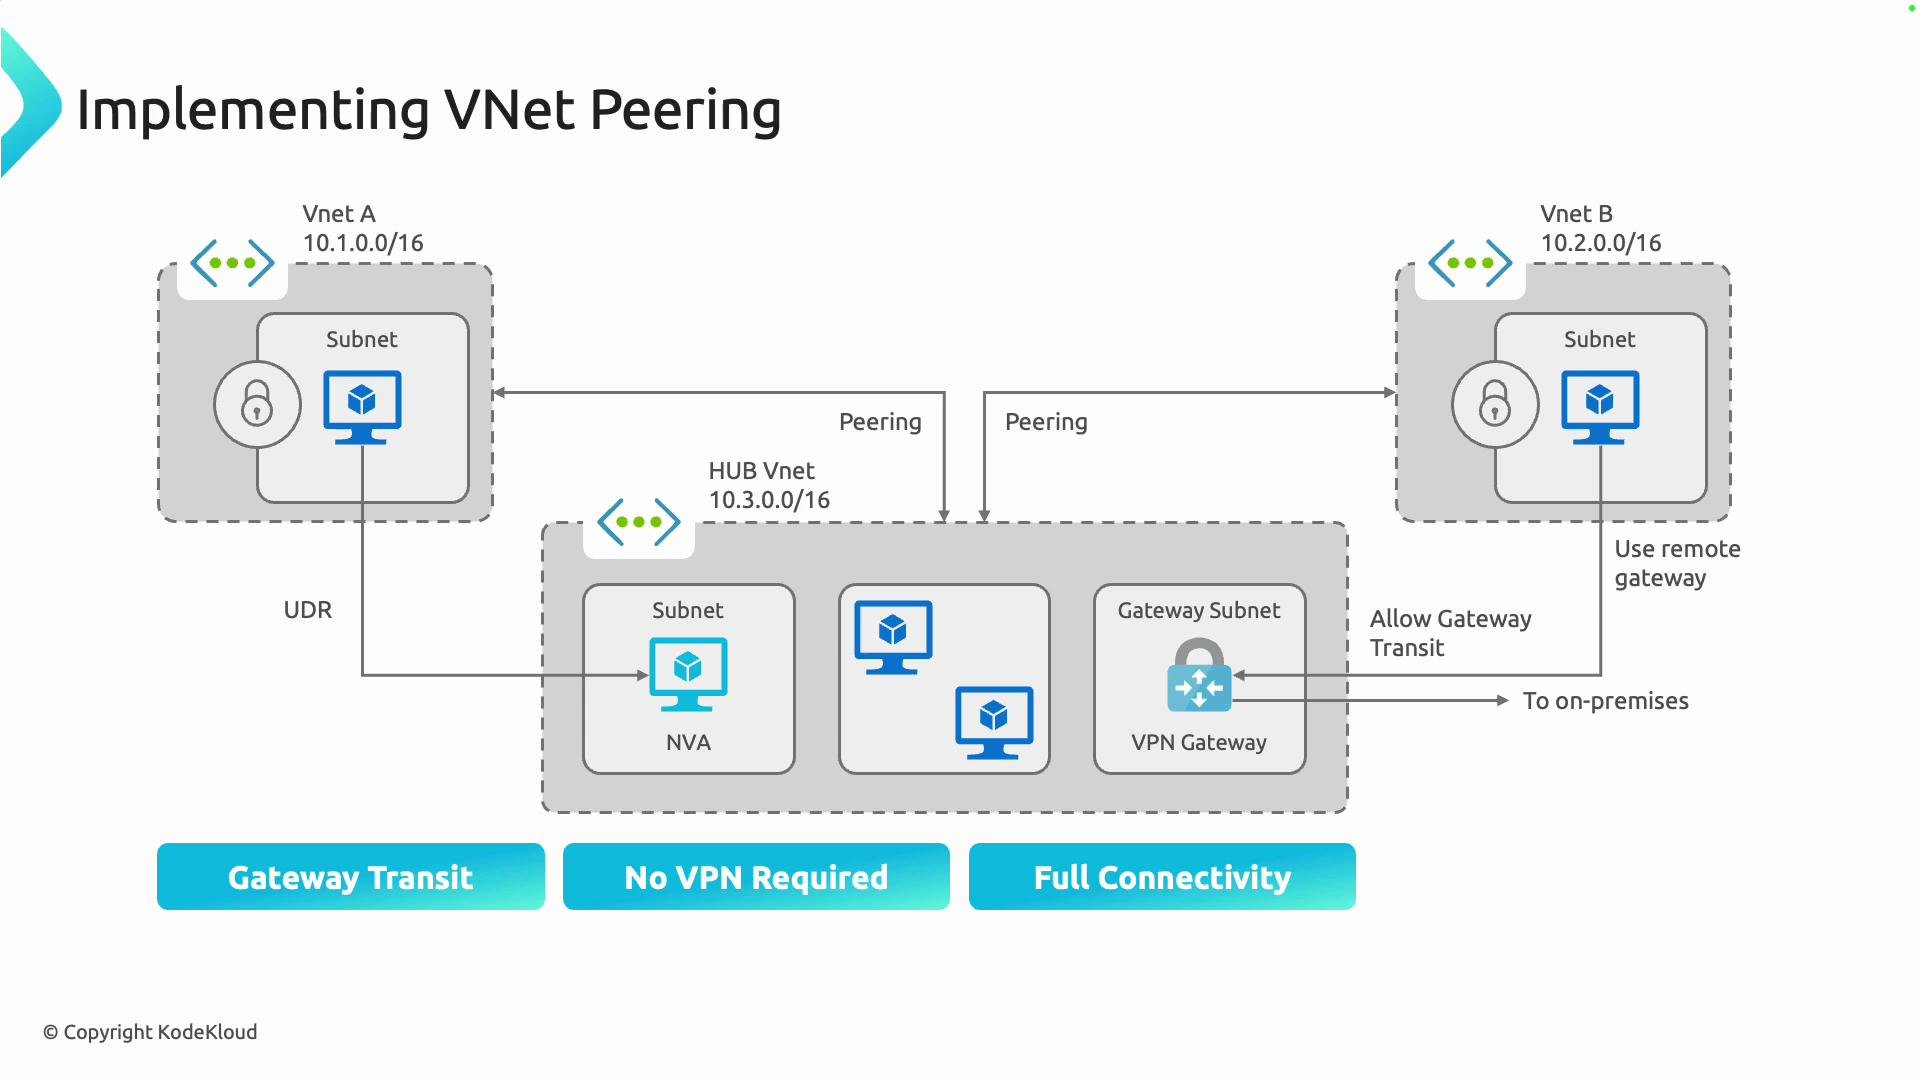
- How peering fits into common topologies such as hub-spoke with NVAs and gateway transit
- Addressing and routing considerations
Types of VNet peering
VNet peering supports two modes: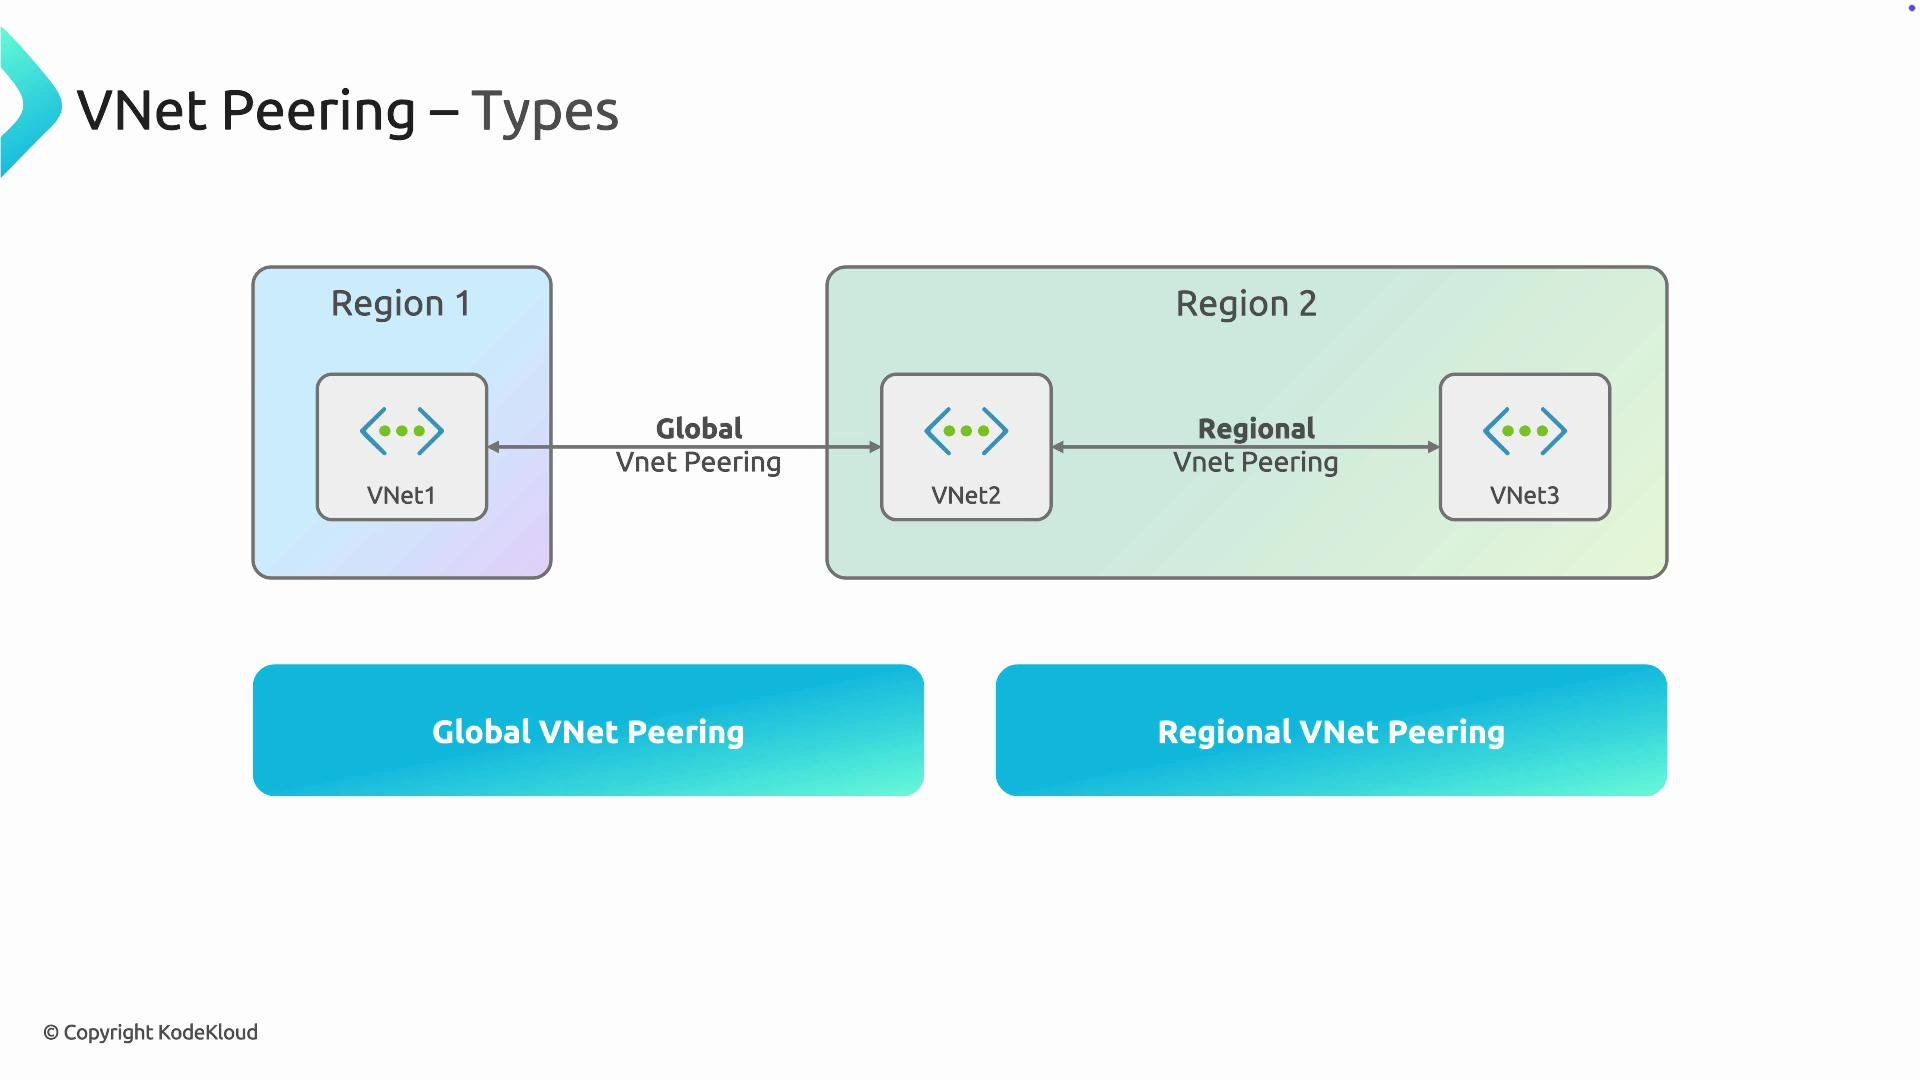
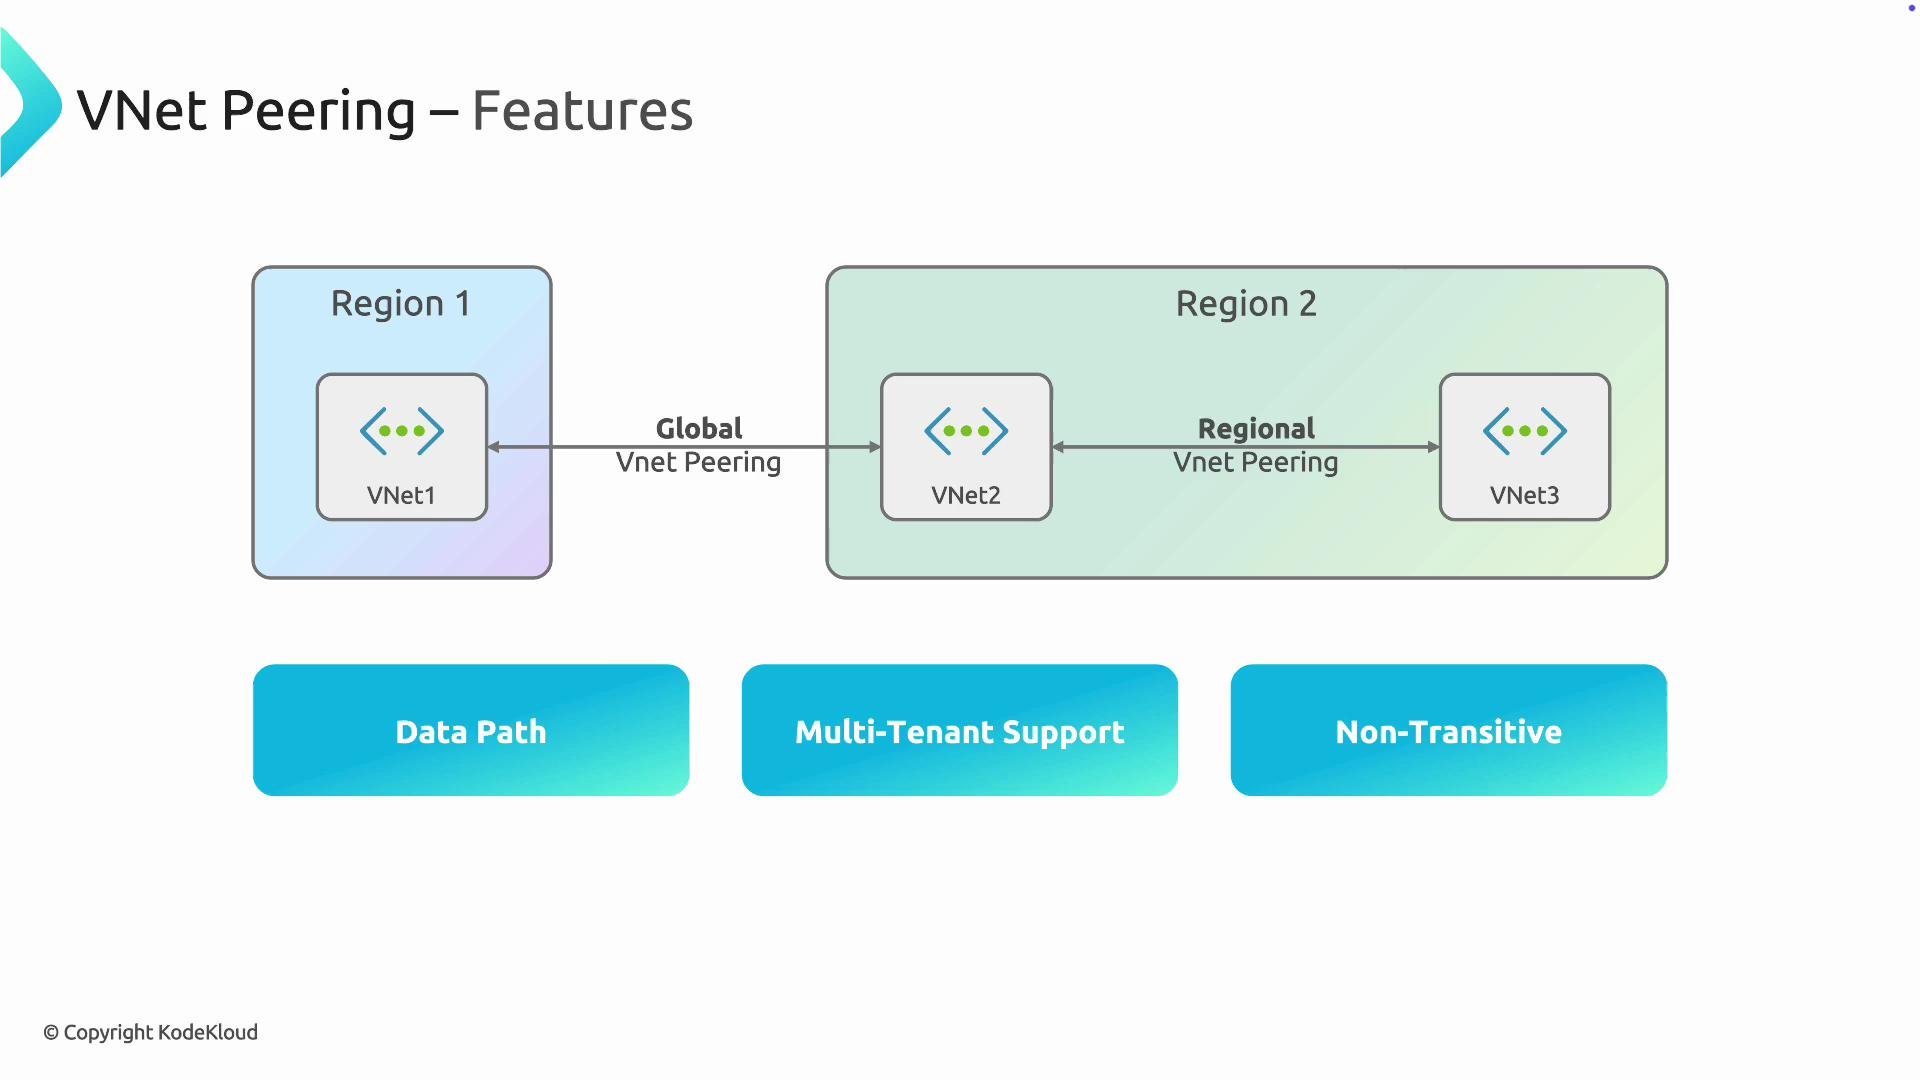
Key features
- Data path
- Traffic between peered VNets flows directly over the Microsoft backbone network; it does not transit the public internet. This improves both performance and security.
- Cross-subscription and cross-tenant support
- You can peer VNets across subscriptions and Azure Active Directory tenants (with the correct authorization). This is useful for multi-account organizations or when consolidating services across business units.
- Peering controls and configuration flags
- Each peering has several important configuration options you should plan for when designing your network.
- Non-transitive connectivity
- VNet peering is non-transitive. If VNet A is peered to VNet B, and VNet B is peered to VNet C, A does not have automatic connectivity to C. You must peer A↔C directly or forward traffic explicitly using an NVA and appropriate routing.
Peering is non-transitive by design. If you expect hub-to-spoke transit, configure user-defined routes and allow forwarded traffic where necessary. Assuming transitive connectivity without explicit configuration can break traffic flows.
Example: Create VNet peering (Azure CLI)
Here is a concise example that creates peering between two VNets using the Azure CLI. Adjust names, resource groups, and locations to your environment.AllowGatewayTransit and UseRemoteGateways, you must set these appropriately on the hub and spoke peerings and deploy a gateway in the hub’s GatewaySubnet.
Hub-spoke architecture, NVAs, and gateway transit
A common design pattern is hub-spoke, where the hub VNet hosts shared services (for example, an NVA, firewall, VPN gateway, or ExpressRoute). Spokes peer with the hub to consume those shared services. NVAs and forwarding- Because peering is non-transitive, to route traffic from Spoke A to Spoke B via an NVA in the hub:
- Configure user-defined routes (UDRs) in the spokes to direct the relevant traffic to the hub NVA.
- Enable
AllowForwardedTrafficon the peering(s) if the NVA will forward traffic across peered VNets. - Ensure the NVA’s routing and Network Security Groups (NSGs) allow and forward the traffic to the intended destination.
- To centralize an on-premises VPN or ExpressRoute gateway in the hub (saving cost and simplifying management):
- On the hub peering, enable
AllowGatewayTransit. - On the spoke peering(s), enable
UseRemoteGateways. - The hub must have a VPN or ExpressRoute gateway deployed in its
GatewaySubnet.
- On the hub peering, enable
- Centralizing gateways requires careful capacity, routing, and security planning; monitor throughput and failover behavior.
Address space requirements
- Peered VNets must have non-overlapping IP address ranges. If address spaces overlap, the peering cannot be created.
- Plan address spaces during design to avoid collisions and to accommodate future growth and cross-region expansion.
Plan IP addressing and peering settings (
AllowForwardedTraffic, AllowGatewayTransit, UseRemoteGateways) before implementation. Early planning prevents routing surprises in hub-spoke and NVA scenarios.Troubleshooting checklist
- Confirm address spaces do not overlap.
- Verify peering status is “Connected” in both VNets.
- Check
AllowVirtualNetworkAccess,AllowForwardedTraffic, and gateway settings on both sides. - Validate UDRs and NSGs to ensure traffic is routed and permitted as expected.
- For cross-tenant peering, ensure the required role assignments and authorizations are in place.
Summary and next steps
VNet peering provides private, high-performance connectivity across VNets using the Microsoft backbone. It supports cross-subscription and cross-tenant peering and enables hub-spoke topologies with NVAs and centralized gateways when properly configured. Remember:- Peering is non-transitive—explicit peering or NVAs + routing are required for multi-hop connectivity.
- VNets must have non-overlapping address spaces.
- Plan peering flags and routing before deployment.
- Follow the Azure portal walkthrough or the Azure CLI examples to create peering in your subscription.
- Review related concepts: Virtual Network, Network Security Groups, User-Defined Routes (UDRs), and Azure VPN/ExpressRoute gateways.
- Azure Virtual Network peering overview
- Designing a hub-spoke topology in Azure
- Azure CLI: az network vnet peering