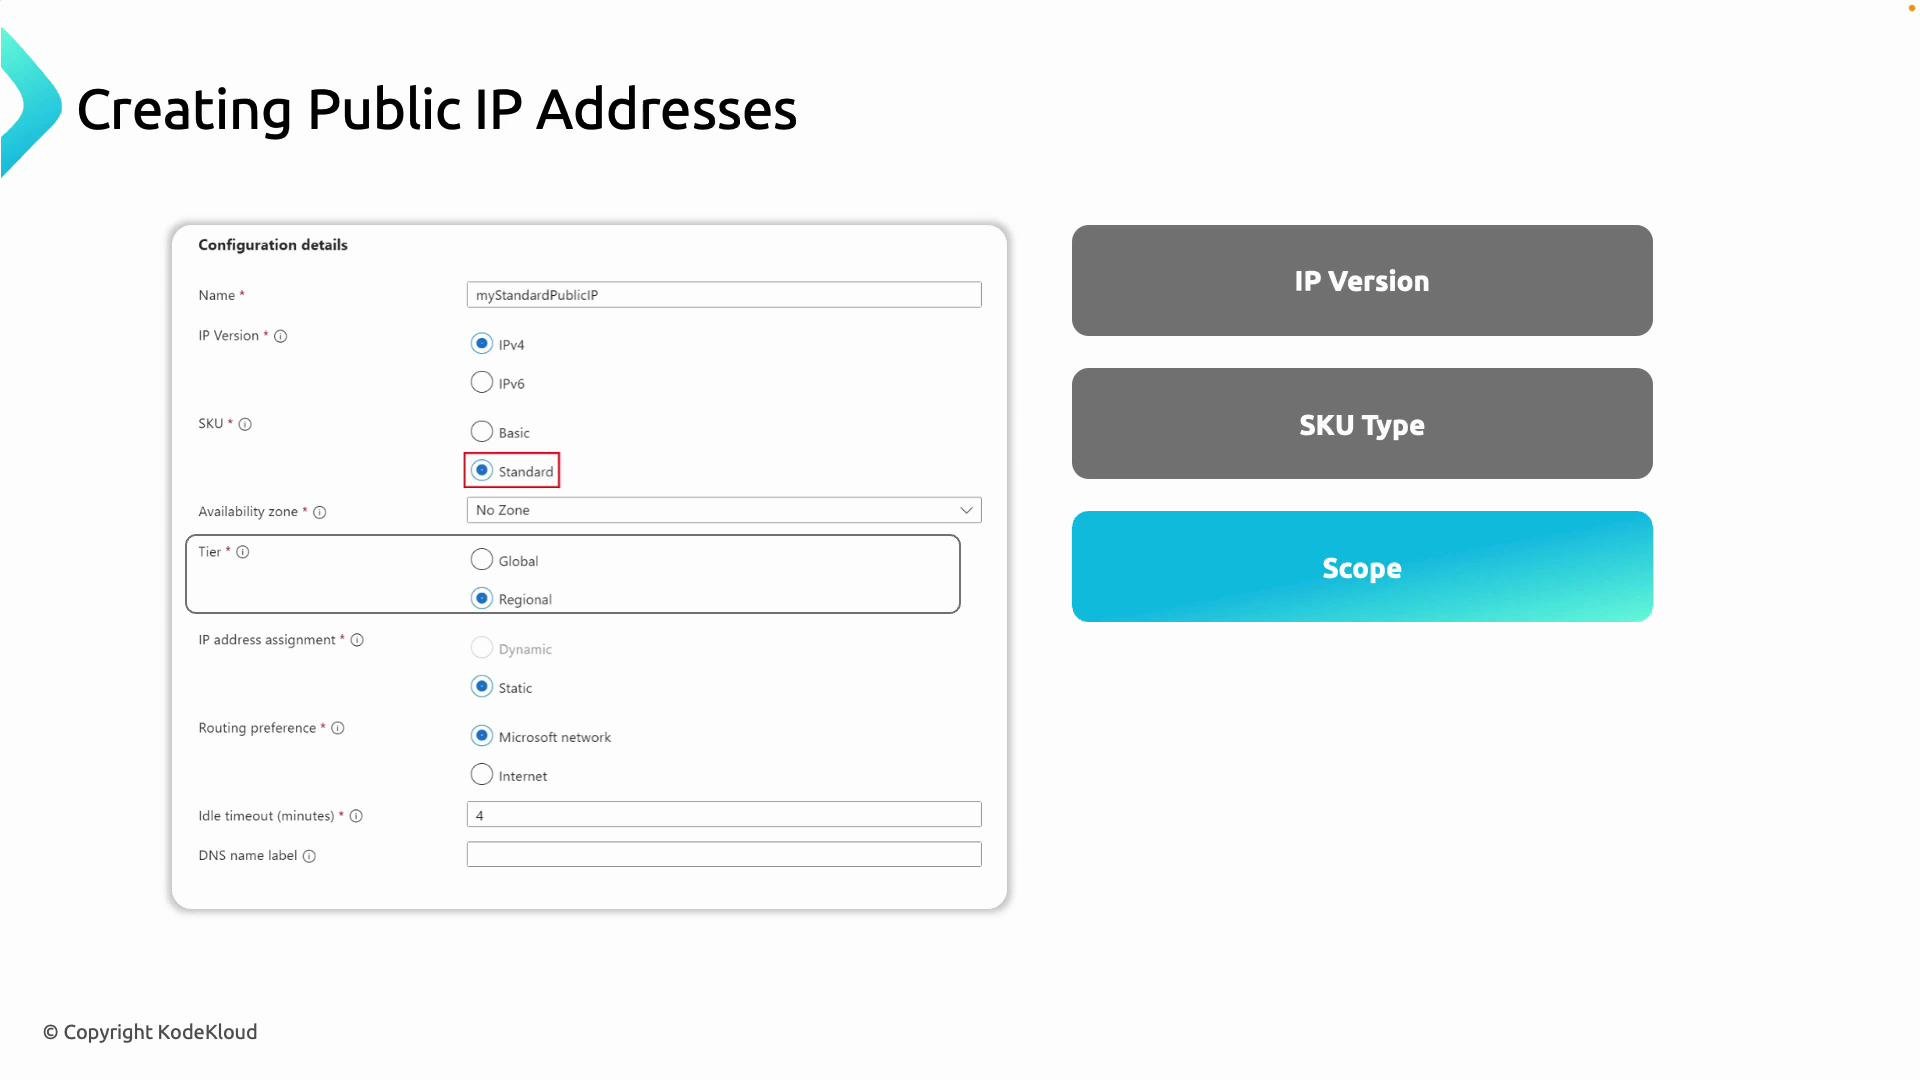
Key configuration options
- IP version: IPv4 or IPv6. IPv4 is the default for most deployments; choose IPv6 when your design requires it.
- SKU: Standard or Basic. Use Standard for production (better security, static allocation, and SLA). Basic is legacy.
- Scope (Tier): Regional or Global. Regional for most resources; Global for cross-region load balancers.
- Allocation (Assignment): Static or Dynamic. Standard SKU supports Static only; Basic supports Dynamic or Static.
- Routing preference:
Microsoft network(keeps traffic on Azure’s private backbone, recommended) orInternet(may traverse the public internet). - Additional settings: Idle timeout and optional DNS name label for a friendly hostname.
Quick reference table
For most new deployments, choose Standard SKU + Static assignment + Regional tier, and set routing preference to
Microsoft network for best performance and reliability.Exposing a VM to the internet requires careful Network Security Group (NSG) rules. Only open necessary ports (e.g., SSH, HTTP) and consider using Jump Boxes, Bastion, or Just-In-Time access for management.
Demo: create a VM and attach a Public IP
This demo shows how to create a VM in an existing virtual network, provision a Standard static Public IP, and associate it with the VM’s NIC. VM creation (portal):- Resource group: the same RG used earlier (example:
RG-AZ-700-VM-PIP) - VM name:
vm-az700-pip - Region:
West Europe - Image: Ubuntu
- Size: choose a small size to save costs
- Authentication: Password (enter and confirm)
- Inbound ports: enable SSH and HTTP (ensure NSG rules are configured accordingly)
- OS disk: Standard SSD
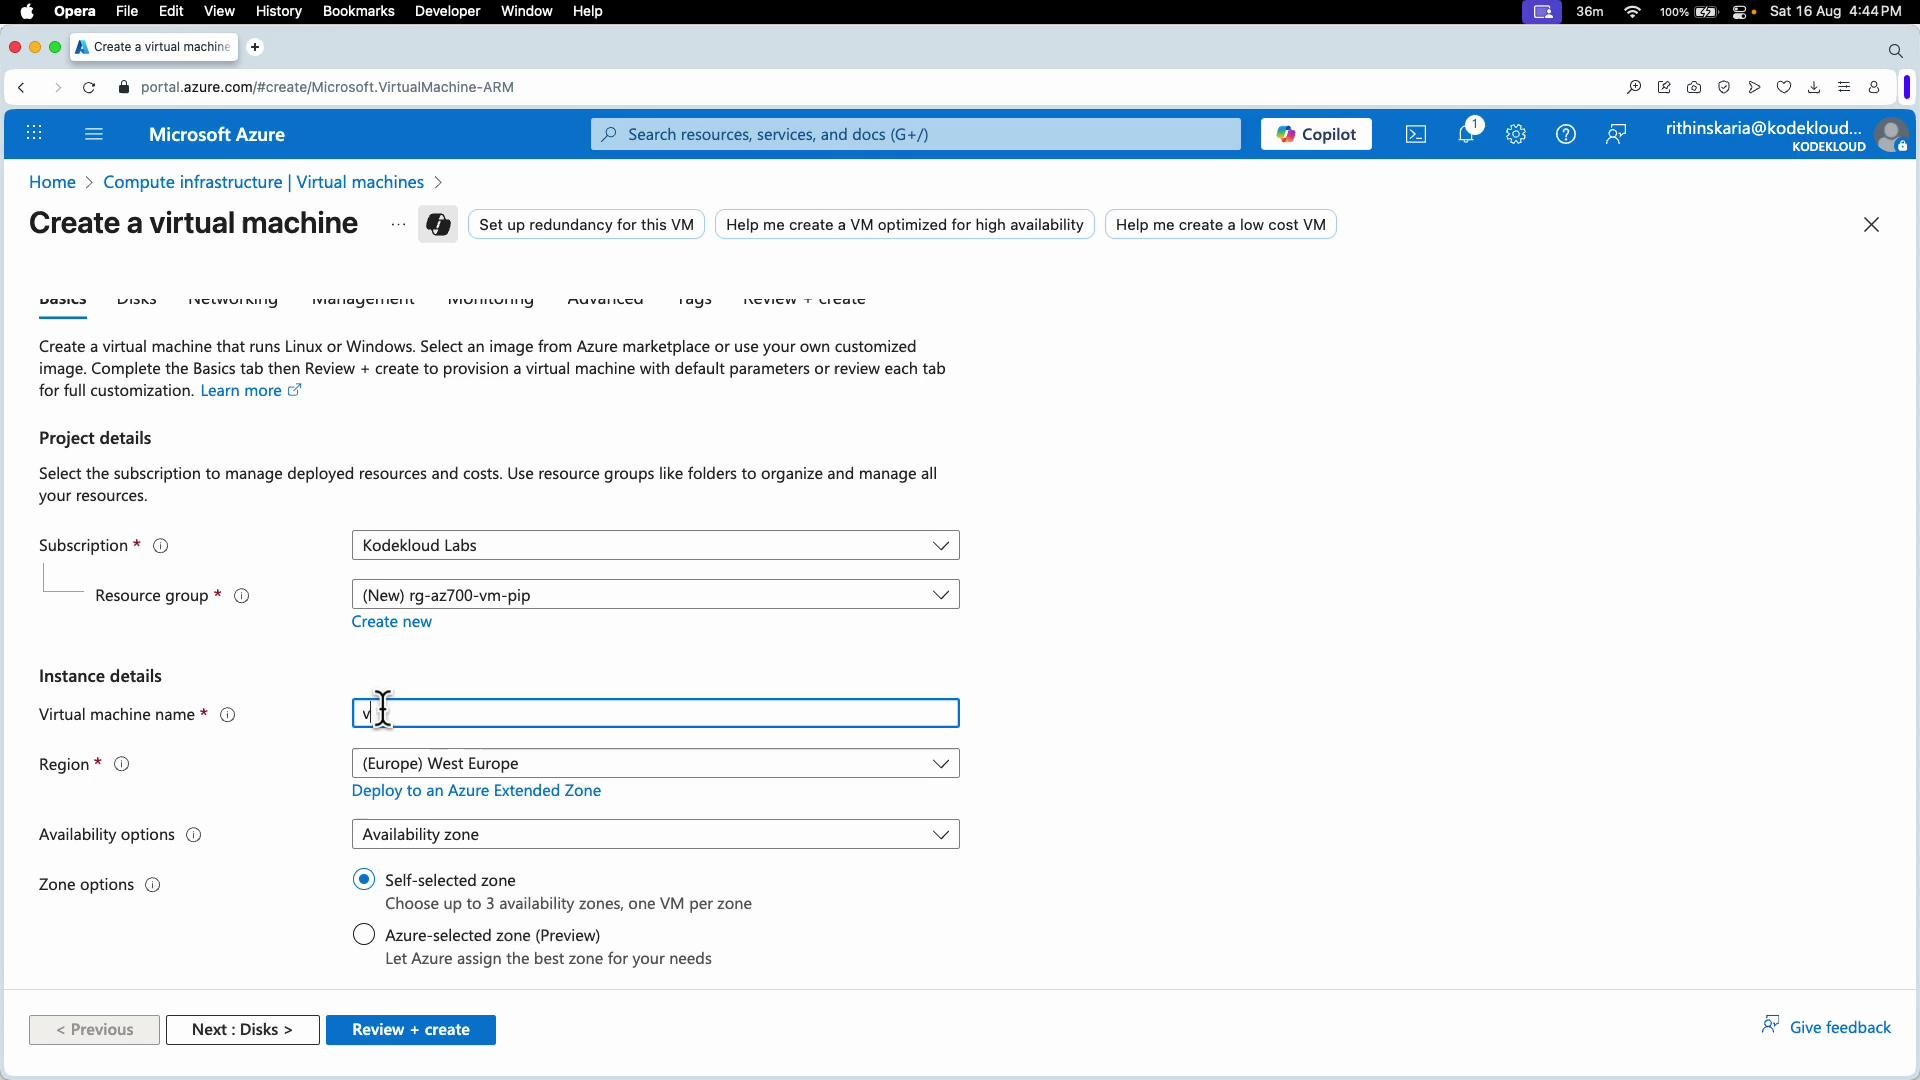
Networking selection during VM creation
- Select the pre-created virtual network.
- Choose the intended subnet (for example, a
websubnet). - For Public IP: you may create a Public IP during VM provisioning or set it to
Noneand create/attach it later. This demo sets Public IP toNoneso we can create and attach the Public IP as a separate resource.
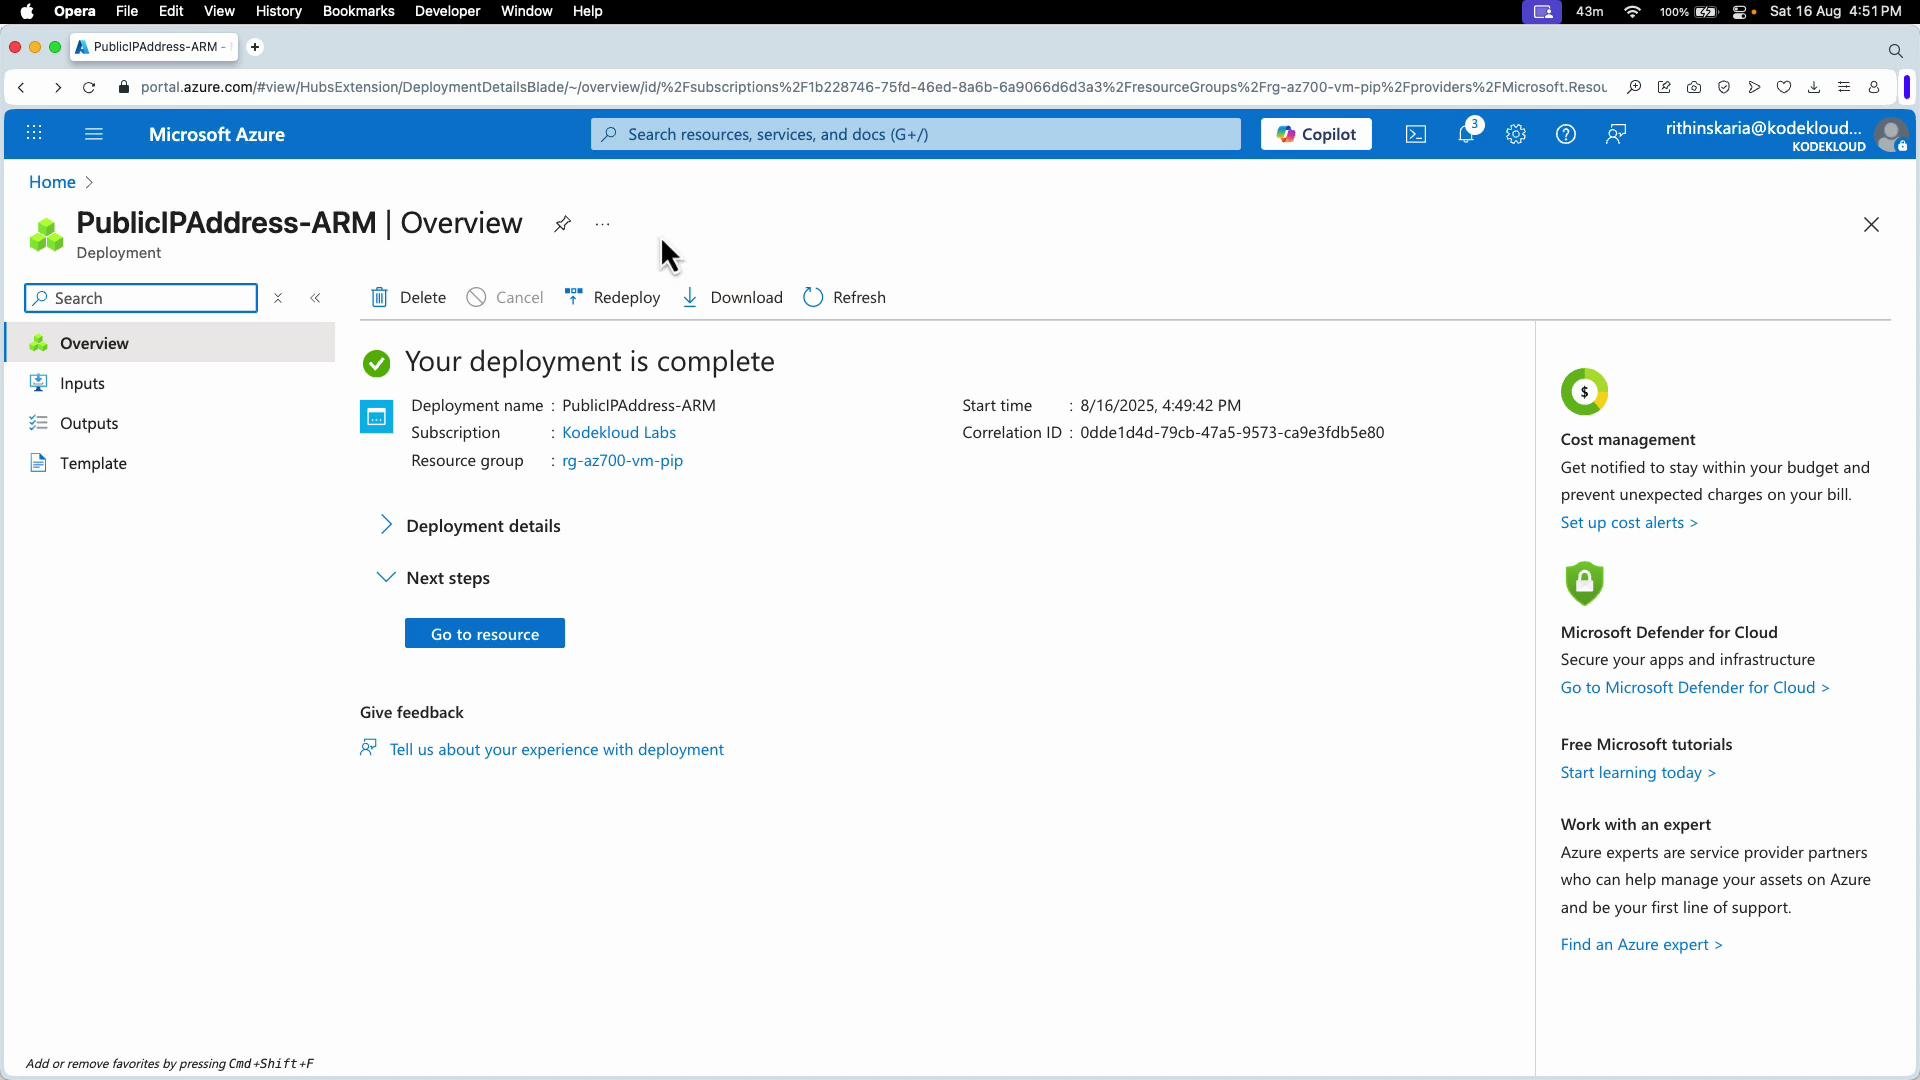
Create a Public IP resource (portal)
- Navigate to Public IP addresses and select Create.
- Configure:
- Resource group: same RG as the VM
- Region:
West Europe - Name:
pip-vm-az700 - IP version:
IPv4 - SKU:
Standard - Tier:
Regional - Assignment:
Static - DNS name label: optional (left blank in this demo)
- Deploy the Public IP.
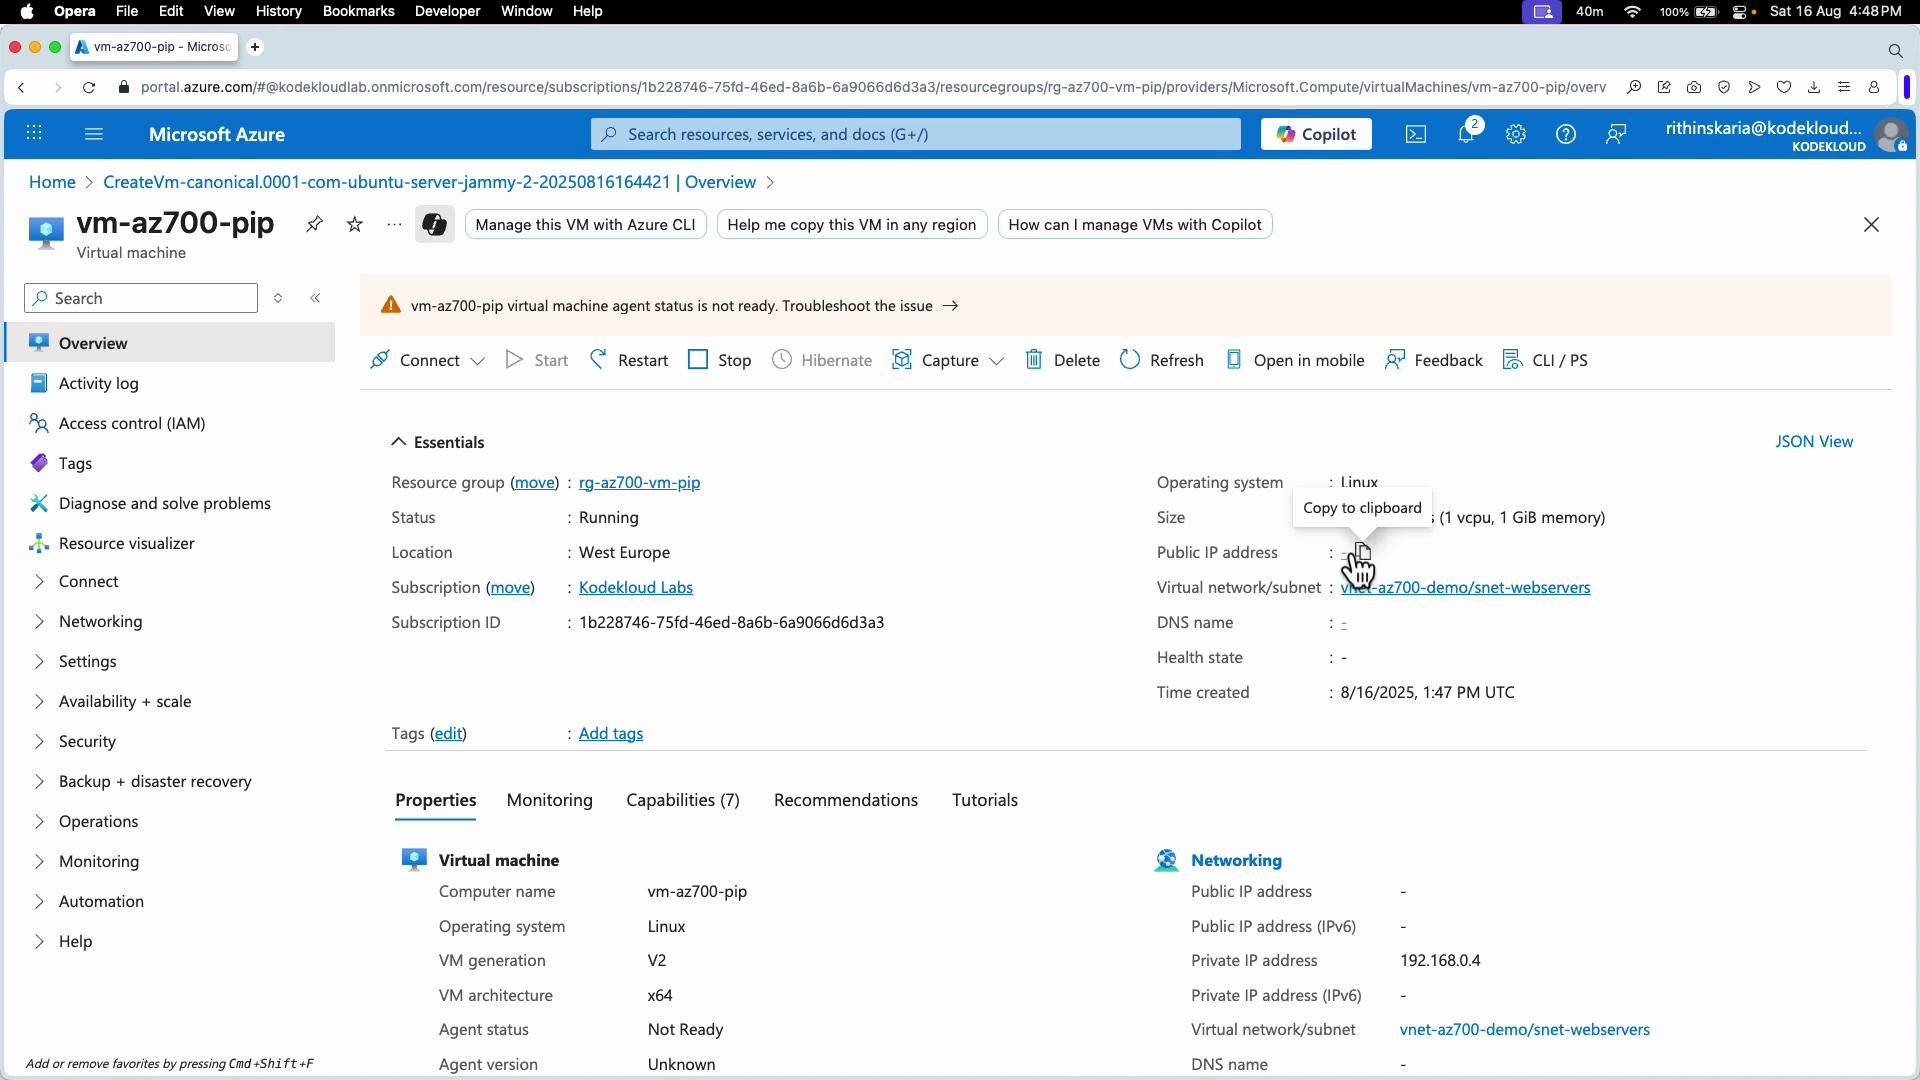
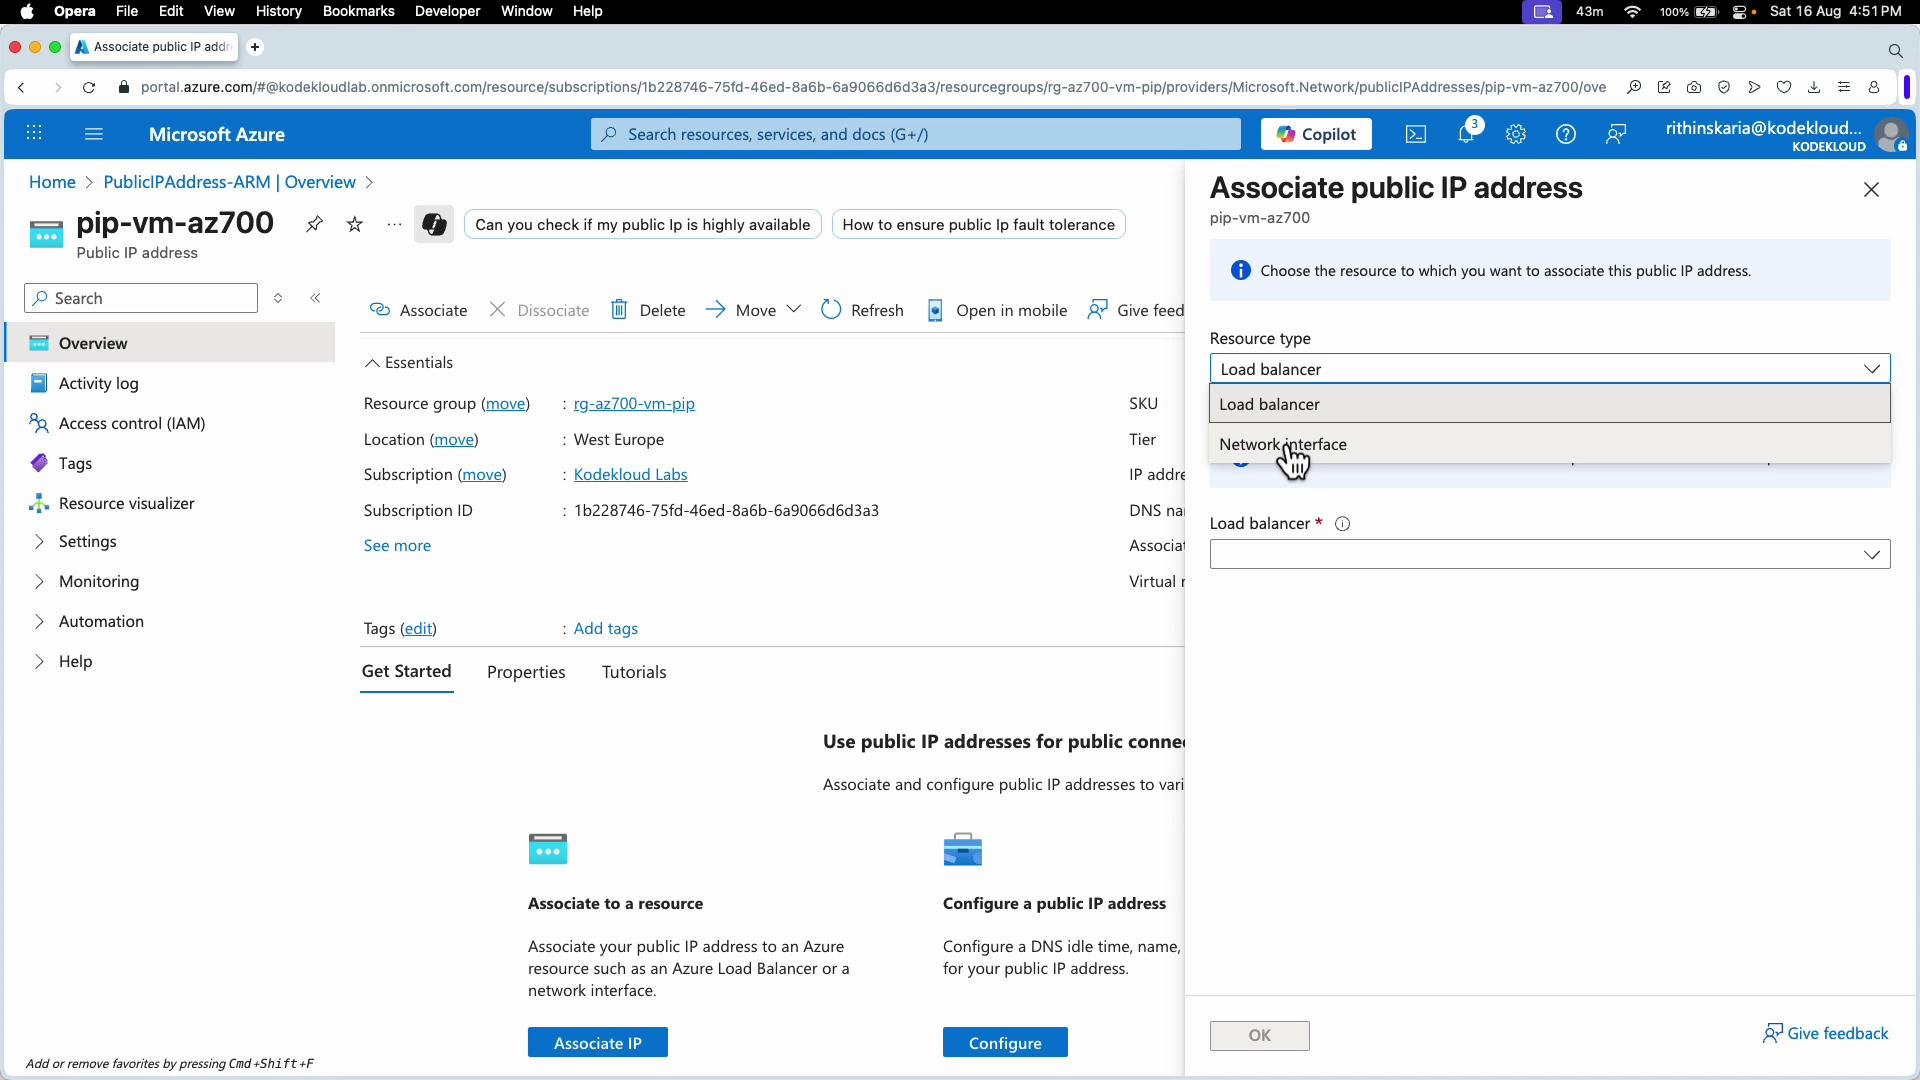
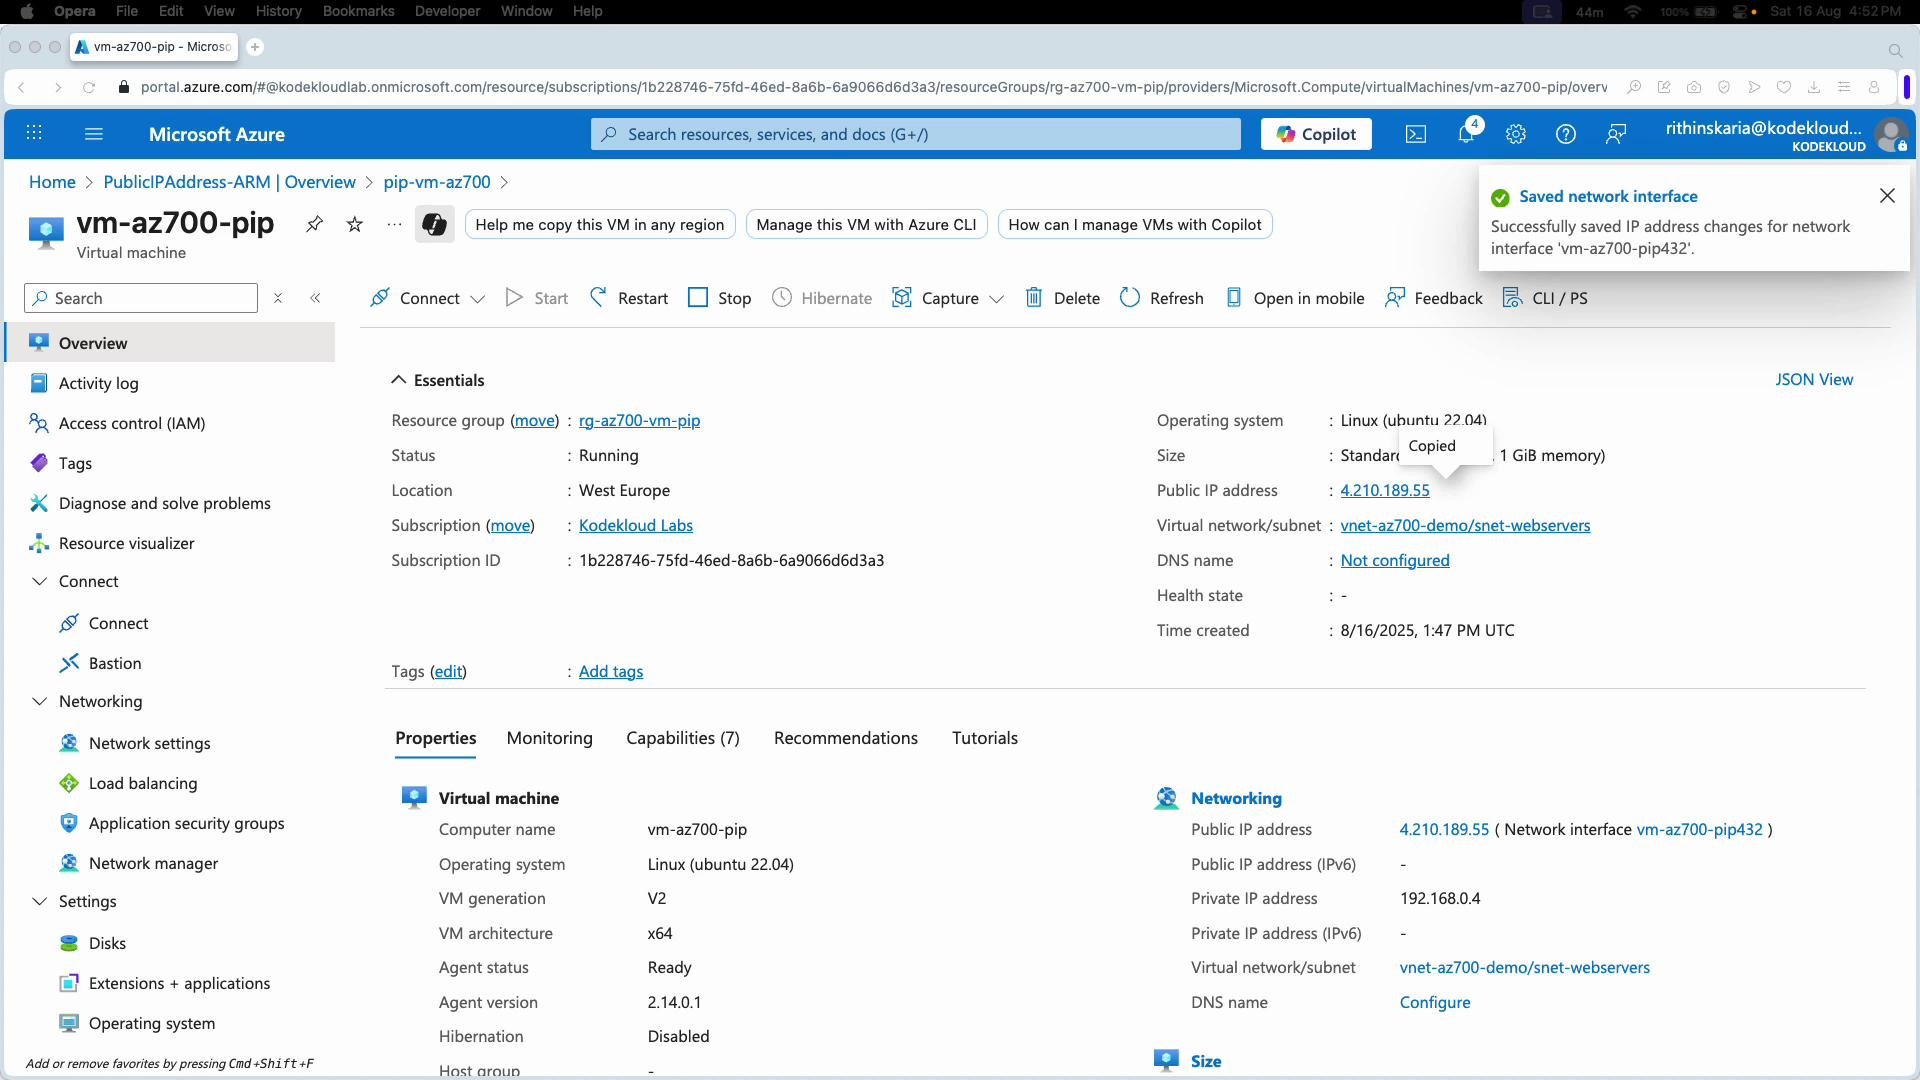
Associate the Public IP to the VM NIC
Public IPs attach to a VM’s network interface (NIC). From the public IP resource:- Click Associate.
- Set Resource type to Network interface.
- Select the VM’s NIC from the list (e.g.,
vm-az700-pip-nic). - Save the association.
4.210.189.55) will be visible in the portal.
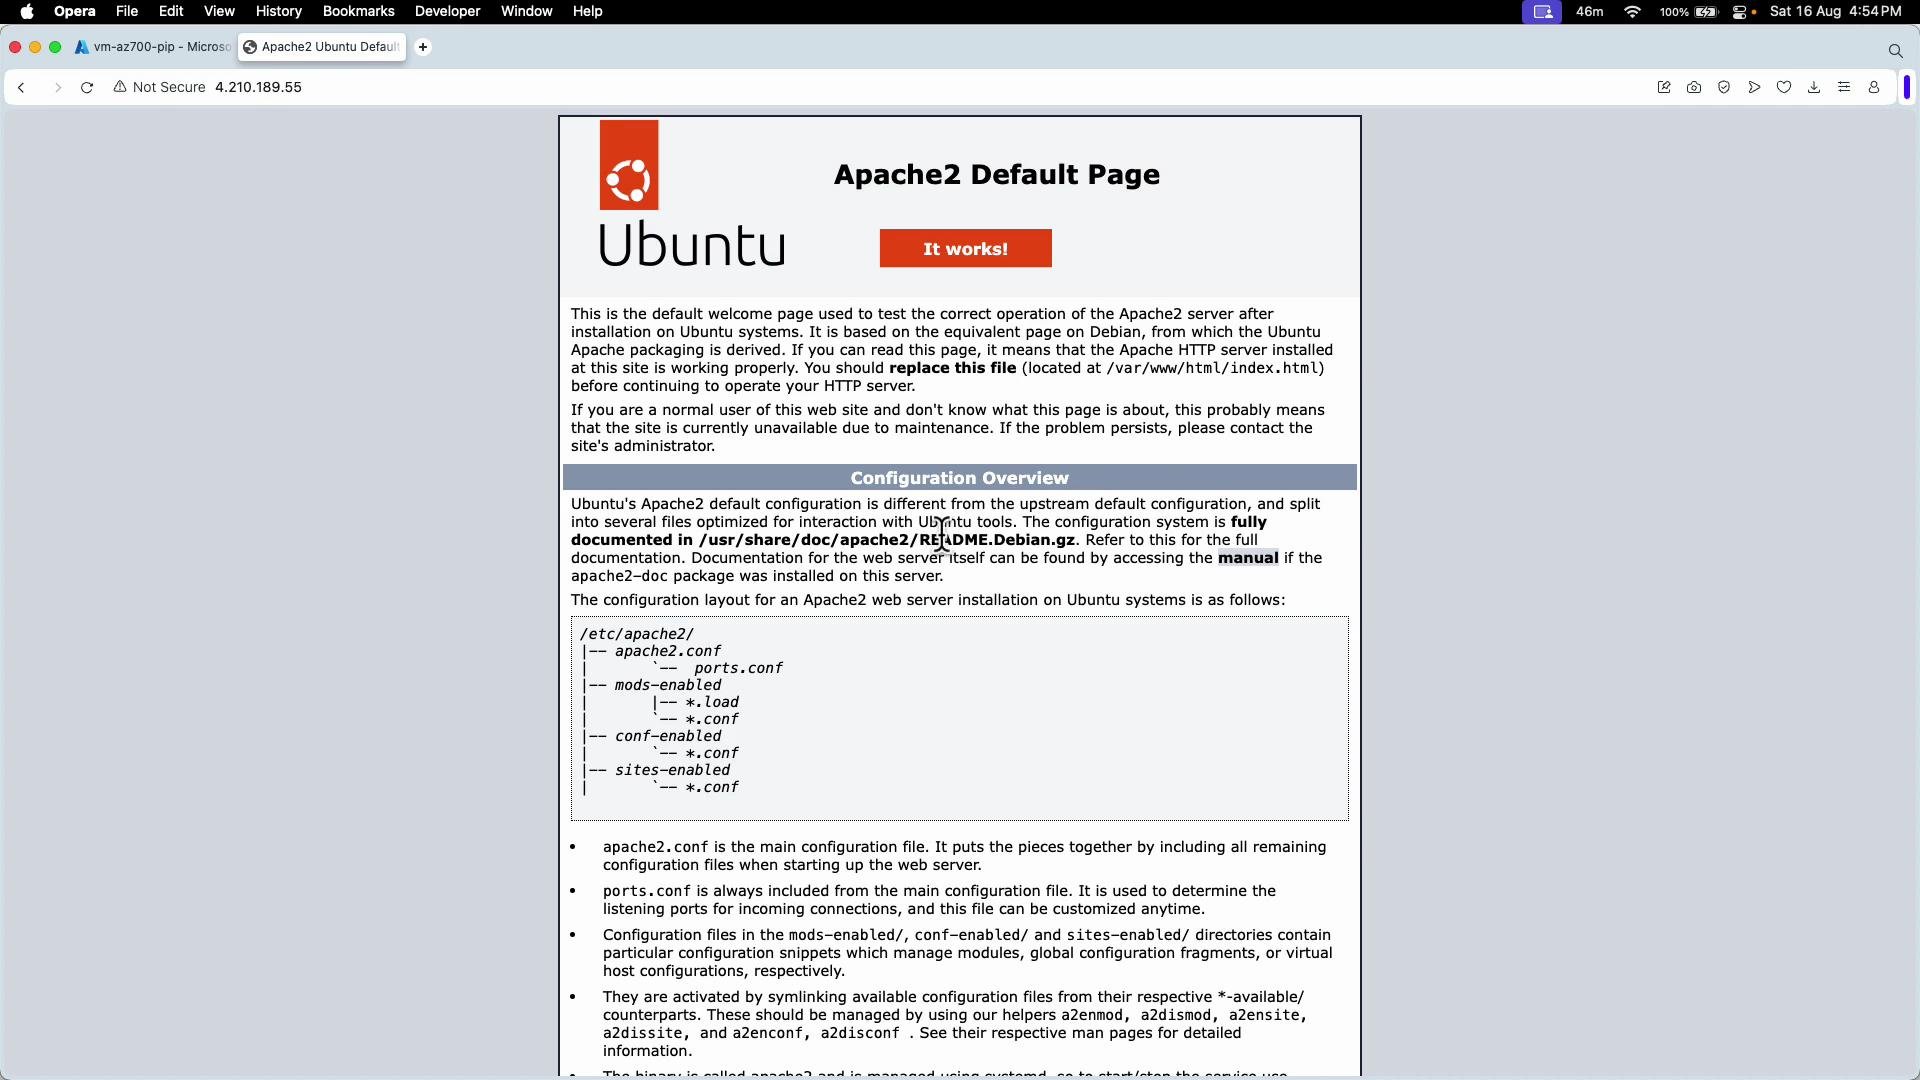
SSH into the VM and install Apache
From your terminal, SSH to the VM using the public IP and the username created during provisioning (example:azureuser):
yes to accept the host key. Then update packages and install Apache:
http://4.210.189.55). You should see the default Apache landing page.
Summary
- Azure public IPs are configurable across IP version, SKU, scope (tier), assignment, routing preference, DNS label, and idle timeout.
- Recommended defaults for new deployments: Standard SKU + Static assignment + Regional tier +
Microsoft networkrouting. - For VMs, public IPs attach to the NIC. You can create them during VM provisioning or create and associate them afterward.
- Always secure inbound access with NSG rules, Bastion, or other hardened access methods.
Links and references
- Azure Public IP Documentation
- Azure Virtual Machines Documentation
- Azure Network Security Groups (NSG)