Key peering settings
When creating a VNet peering, you typically choose from these options:
Peering is configured per VNet—if you want bidirectional traffic, create the peering from both sides and enable the appropriate options.
Peering is non-transitive by default. To support forwarded traffic or gateway transit, ensure the correct options are enabled on both sides of the peering and that your routing/NVA policies permit transit.
Lab overview
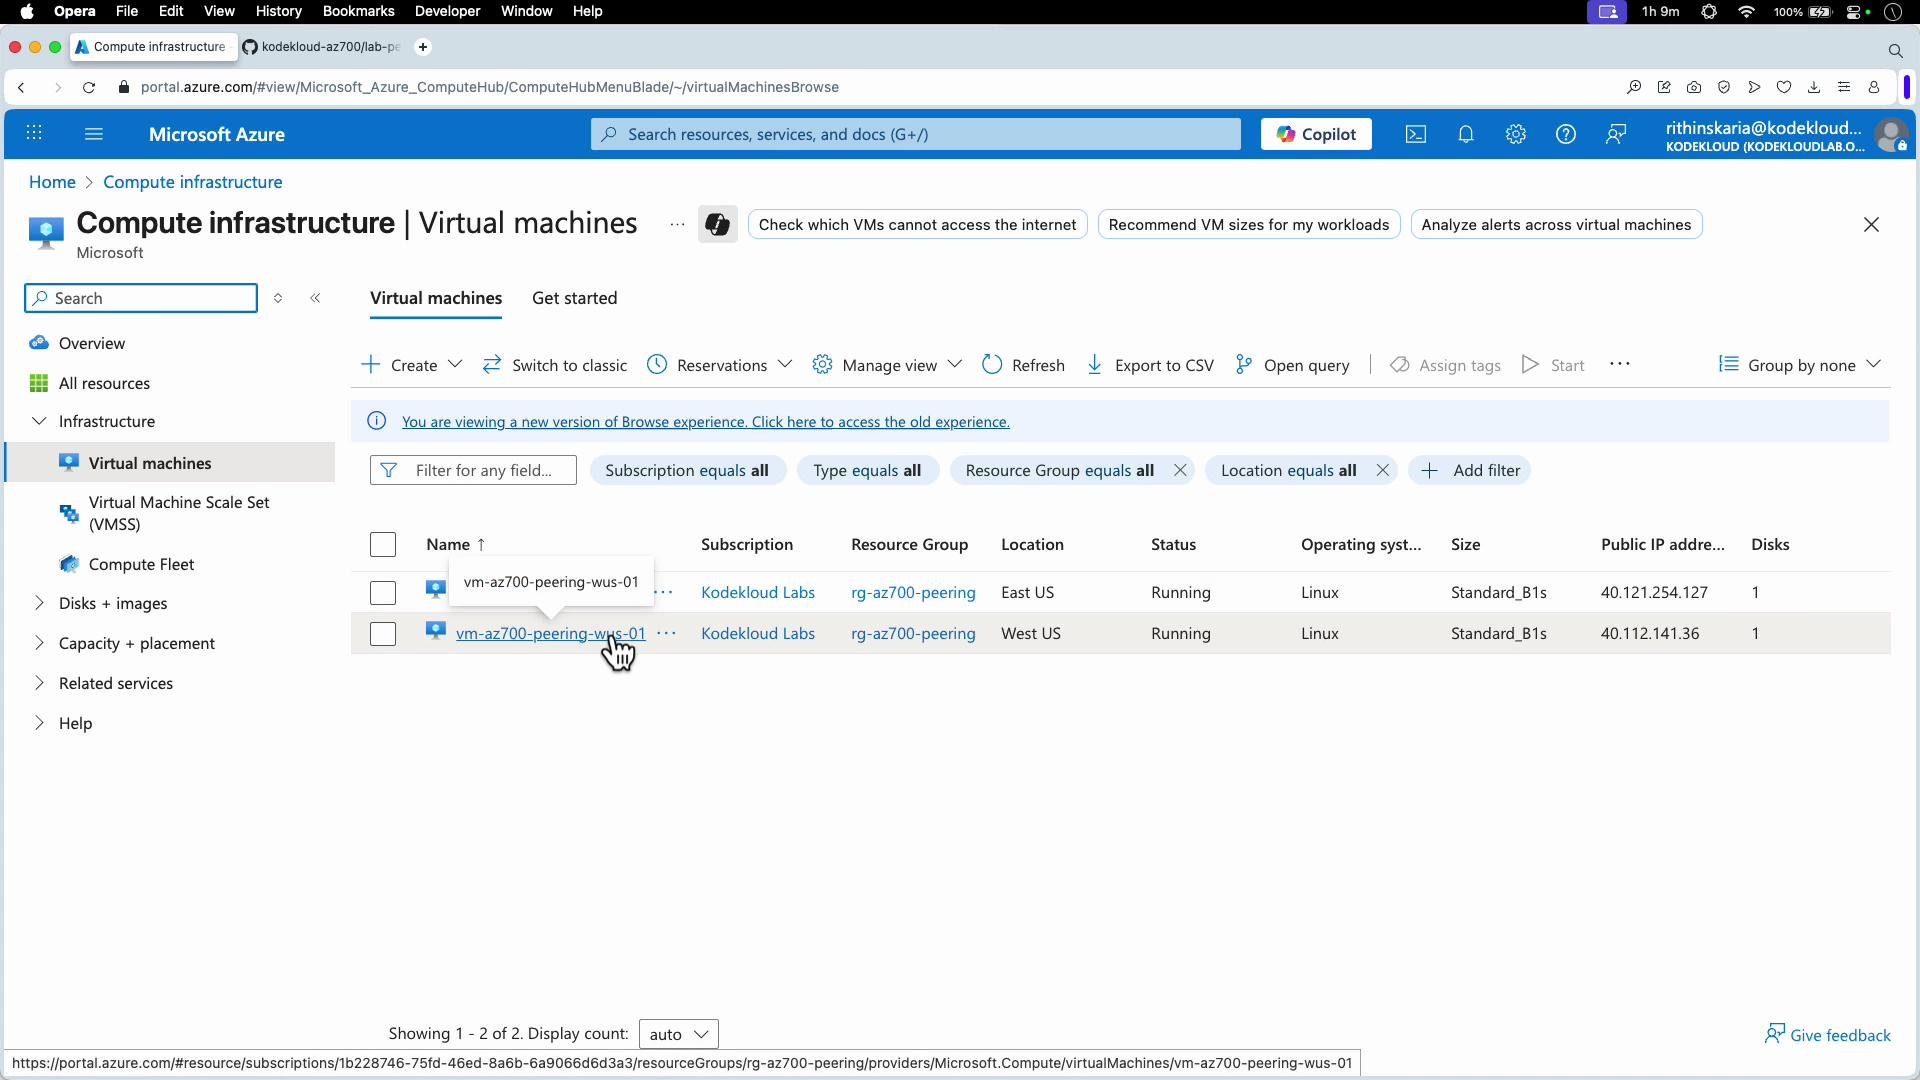
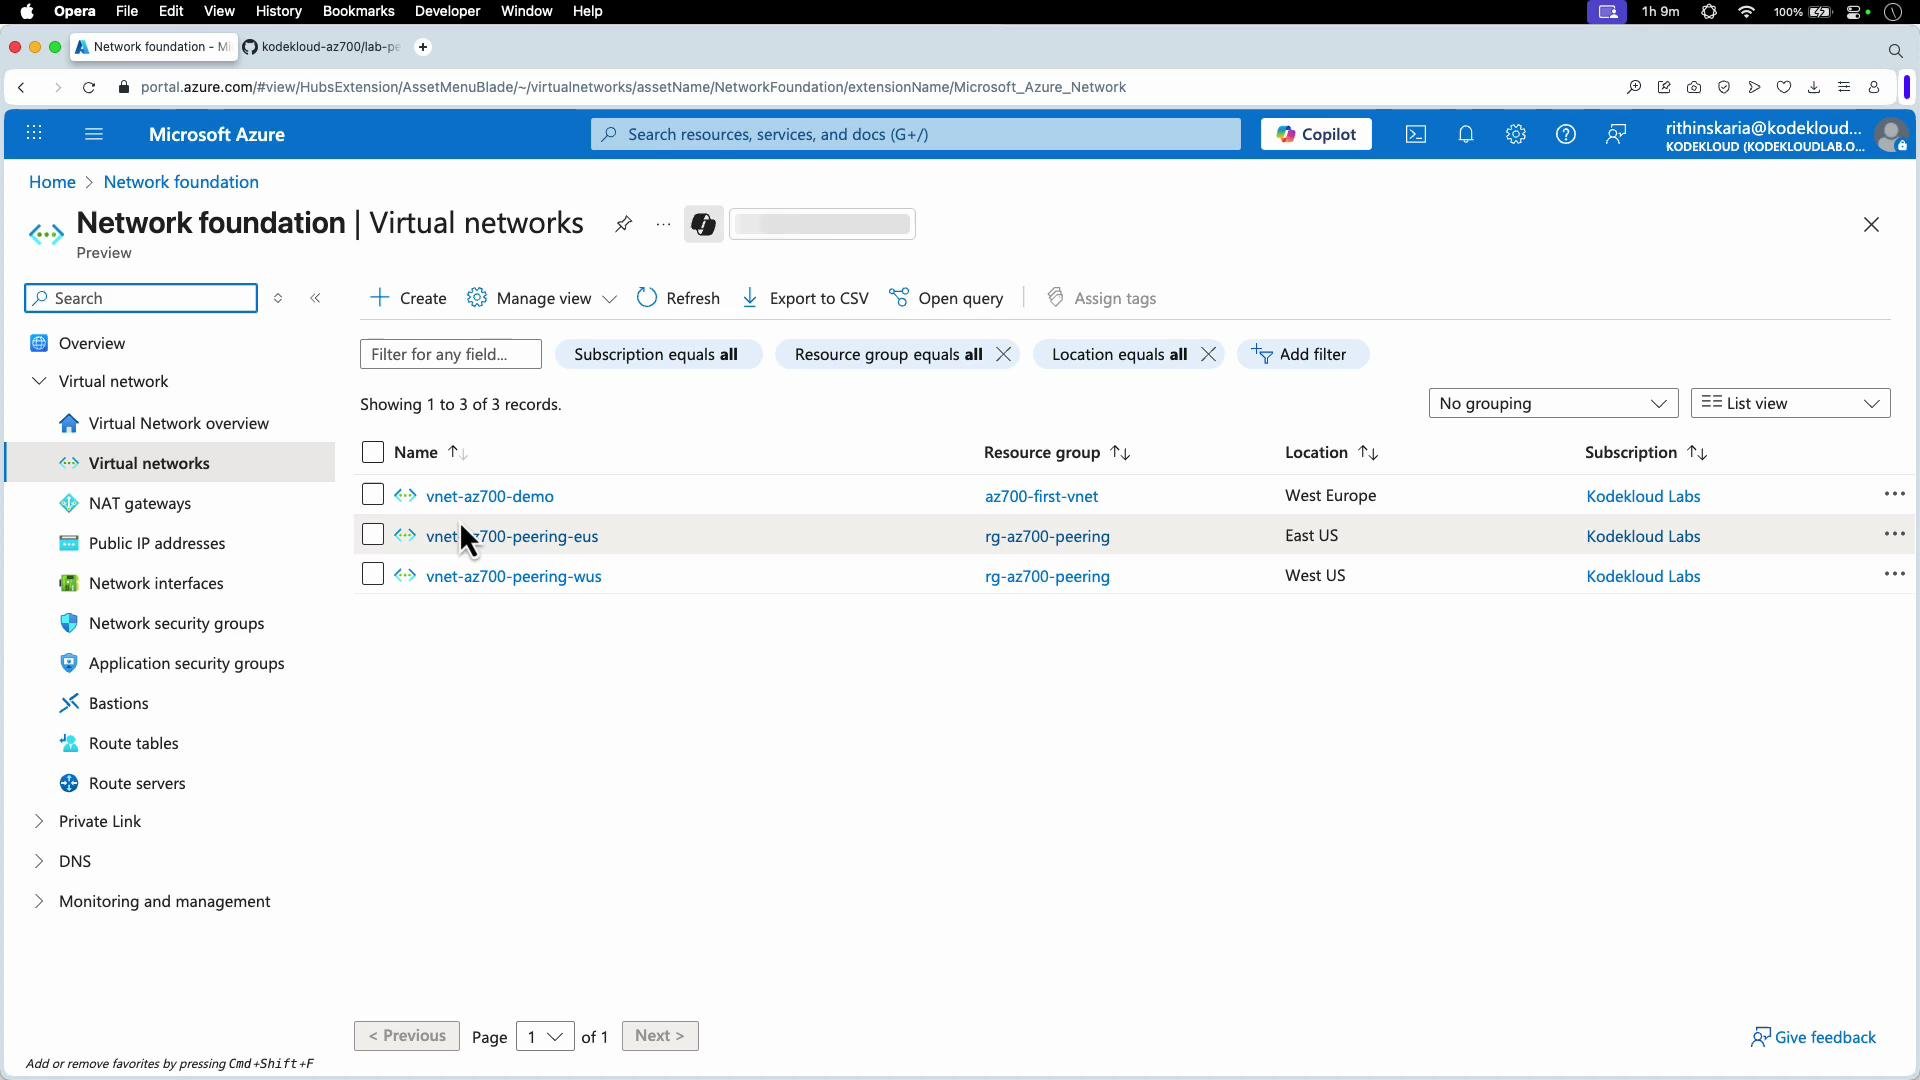
This lab demonstrates private DNS name resolution and peering-based connectivity between VNets in different regions:- Two Linux VMs are deployed in separate VNets and regions (East US and West US).
- A Private DNS zone is created and linked to both VNets so VMs are auto-registered with A records and resolve by private name.
- Initially DNS resolution succeeds but traffic between VNets is blocked. After creating peering (configured on both VNets), connectivity via private IPs is validated (ping / SSH).
Create NICs, VMs, and a Private DNS zone (PowerShell snippet)
The following PowerShell excerpt shows the key steps to create NICs, VM configurations, deploy VMs, and create/link a Private DNS zone. Variables such as$resourceGroup, $locationWUS, $locationEUS, $subnetObj1, $subnetObj2, $pip1, $pip2, and credentials are assumed to be defined earlier in your script.
Check Private DNS registration
When the Private DNS zone is linked to both VNets with auto-registration enabled, each VM is automatically created as an A record in the zone.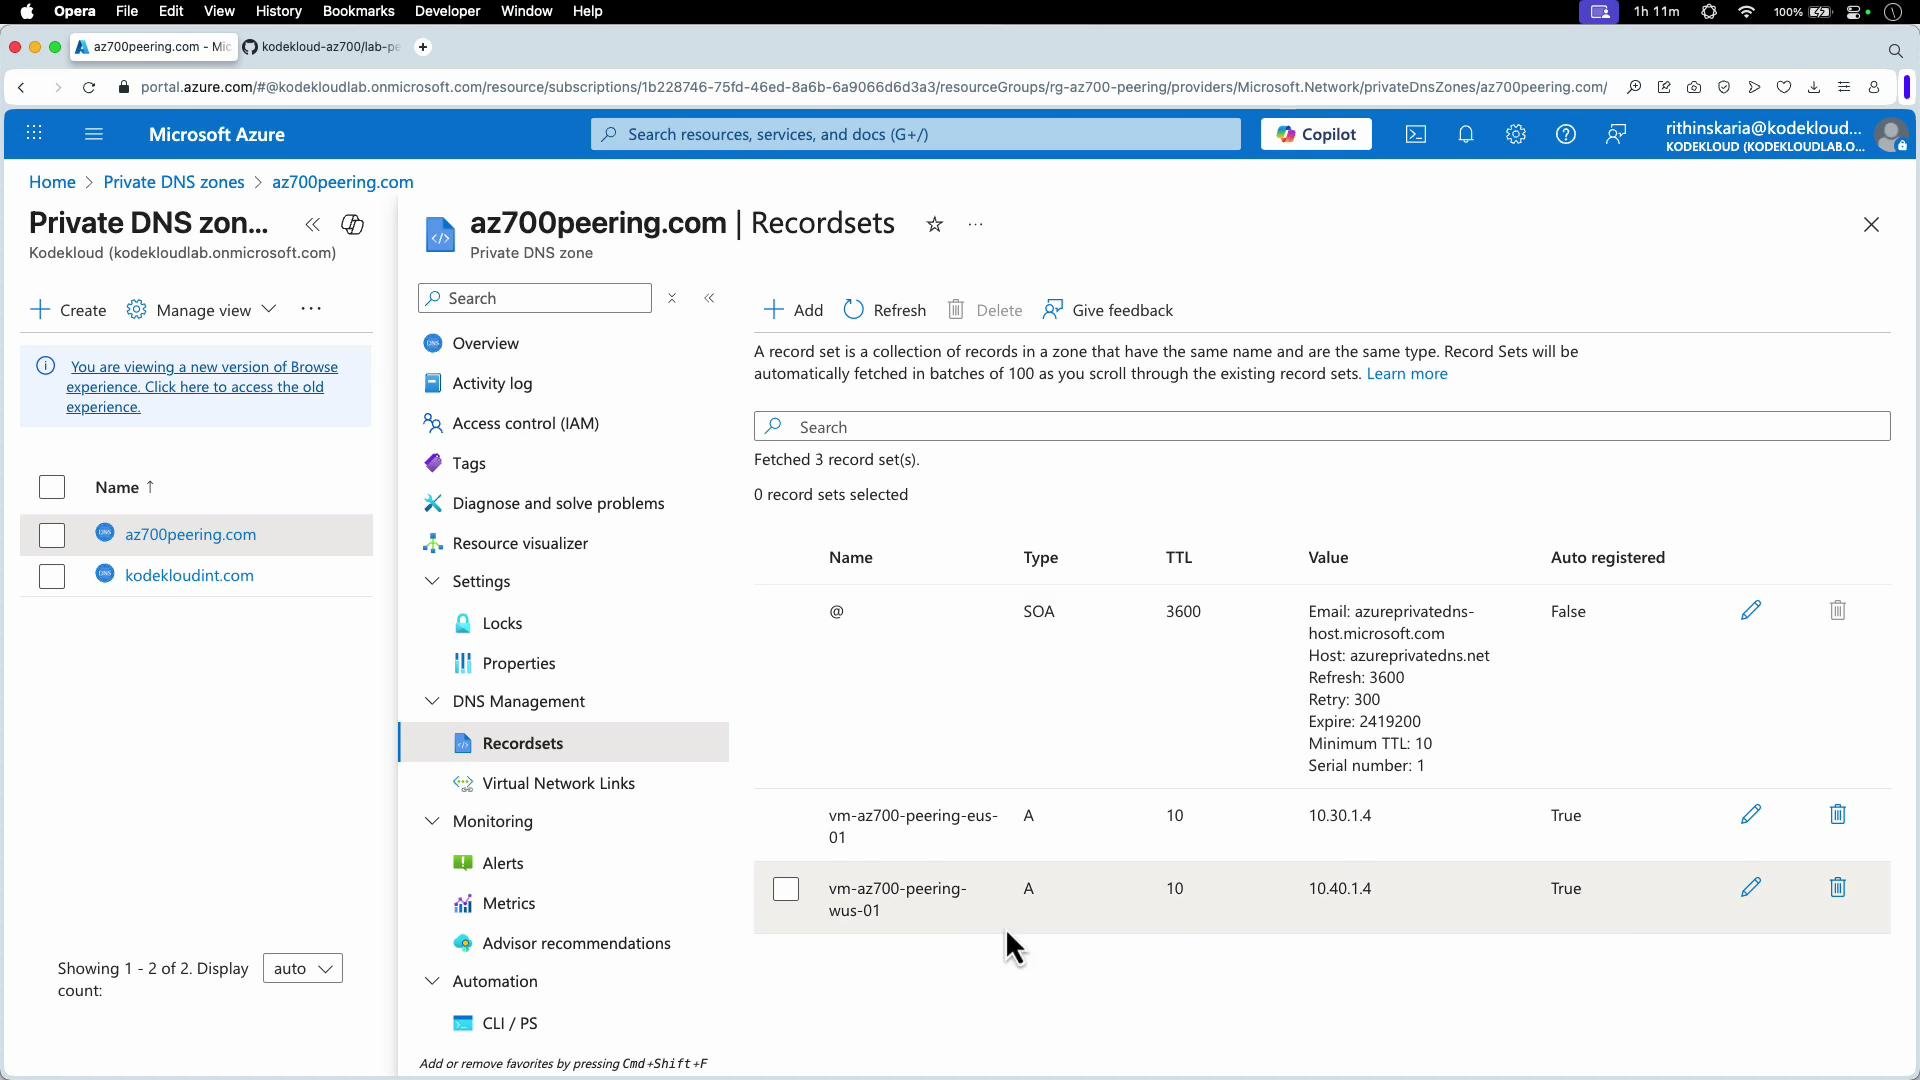
DNS resolution via a Private DNS zone does not guarantee connectivity. Private name resolution can succeed while traffic is blocked until you establish the VNet peering and enable Virtual Network Access on both sides.
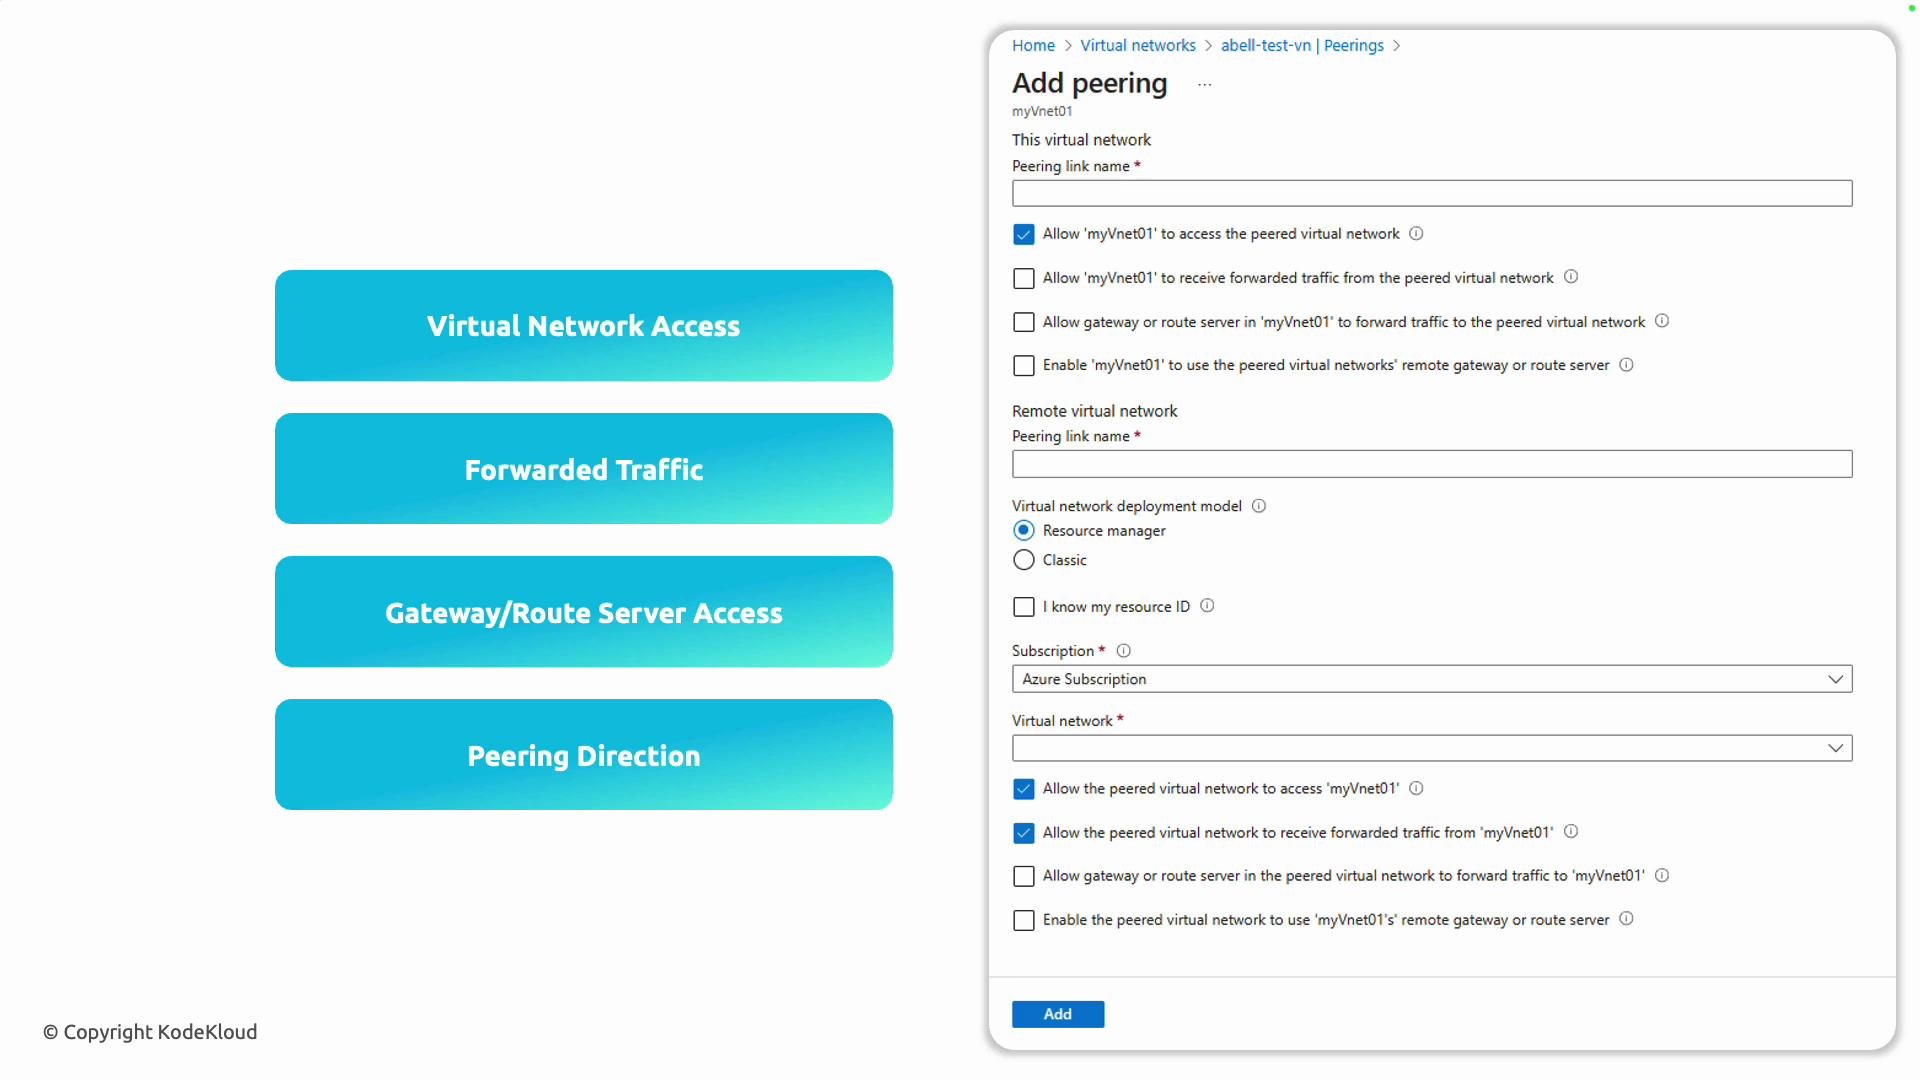
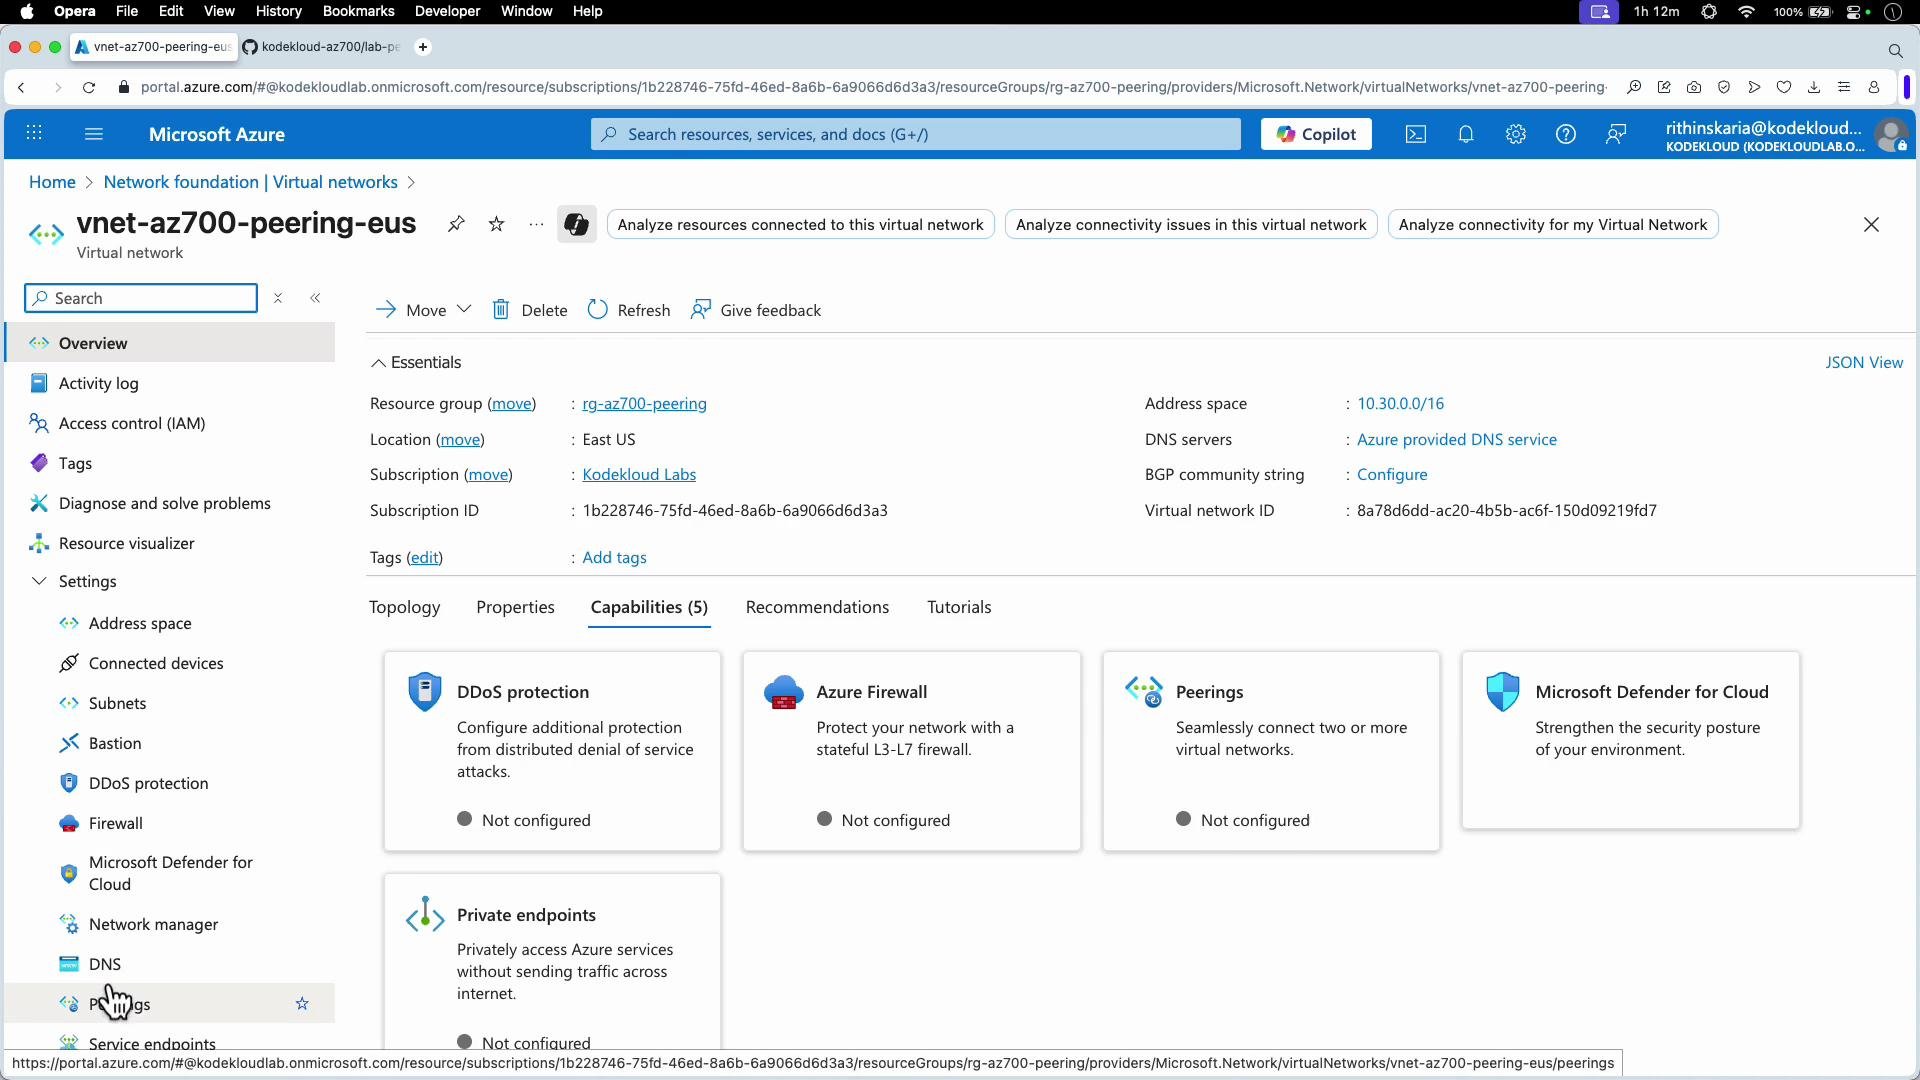
Configure VNet peering in the Azure portal
- Open one of the virtual networks (for example, the East US VNet).
- Select Peering and click Add peering.
- On the Add peering page, select the remote virtual network and set the peering options:
- Allow virtual network access (basic connectivity),
- Allow forwarded traffic (hub-and-spoke / NVA scenarios),
- Use remote gateway (gateway transit) if you want to reuse the gateway in the remote VNet.
- Repeat on the remote VNet to establish bidirectional peering if required.

Test connectivity after peering
After enabling peering (with Virtual Network Access allowed on both sides), ping/SSH across private addresses should succeed. Example ping output after peering was enabled:Conclusion and best practices
- VNet peering provides private connectivity between VNets using Azure’s backbone and should be configured on both sides for full bidirectional flows.
- Enable forwarded traffic and gateway transit only when your architecture requires inspection, centralized routing, or gateway reuse.
- Always verify both name resolution (Private DNS) and actual traffic flow (ping/SSH) when validating a peering setup.
- Review network security group (NSG) and firewall rules if connectivity is blocked despite peering being in place.
Links and references
- Azure Virtual Network Peering documentation
- Azure Private DNS documentation
- Azure VPN Gateway documentation