- You already control public IPv4/IPv6 address ranges used by websites, applications, corporate offices, or partner integrations.
- Those addresses may be whitelisted by partners, embedded in DNS, or associated with a reputation/trust profile.
- Migrating workloads without BYOIP would typically require updating DNS, asking partners to update firewall rules, and re-establishing IP reputation.
How BYOIP works in Azure
Azure implements BYOIP with a secure three-stage process: validation, provisioning, and commissioning. Each stage is designed to protect ownership and prevent accidental prefix hijacking.
Think of the process like land and building permissions: validation proves you own the land, provisioning constructs the building and keeps the doors closed, and commissioning opens the doors to visitors.
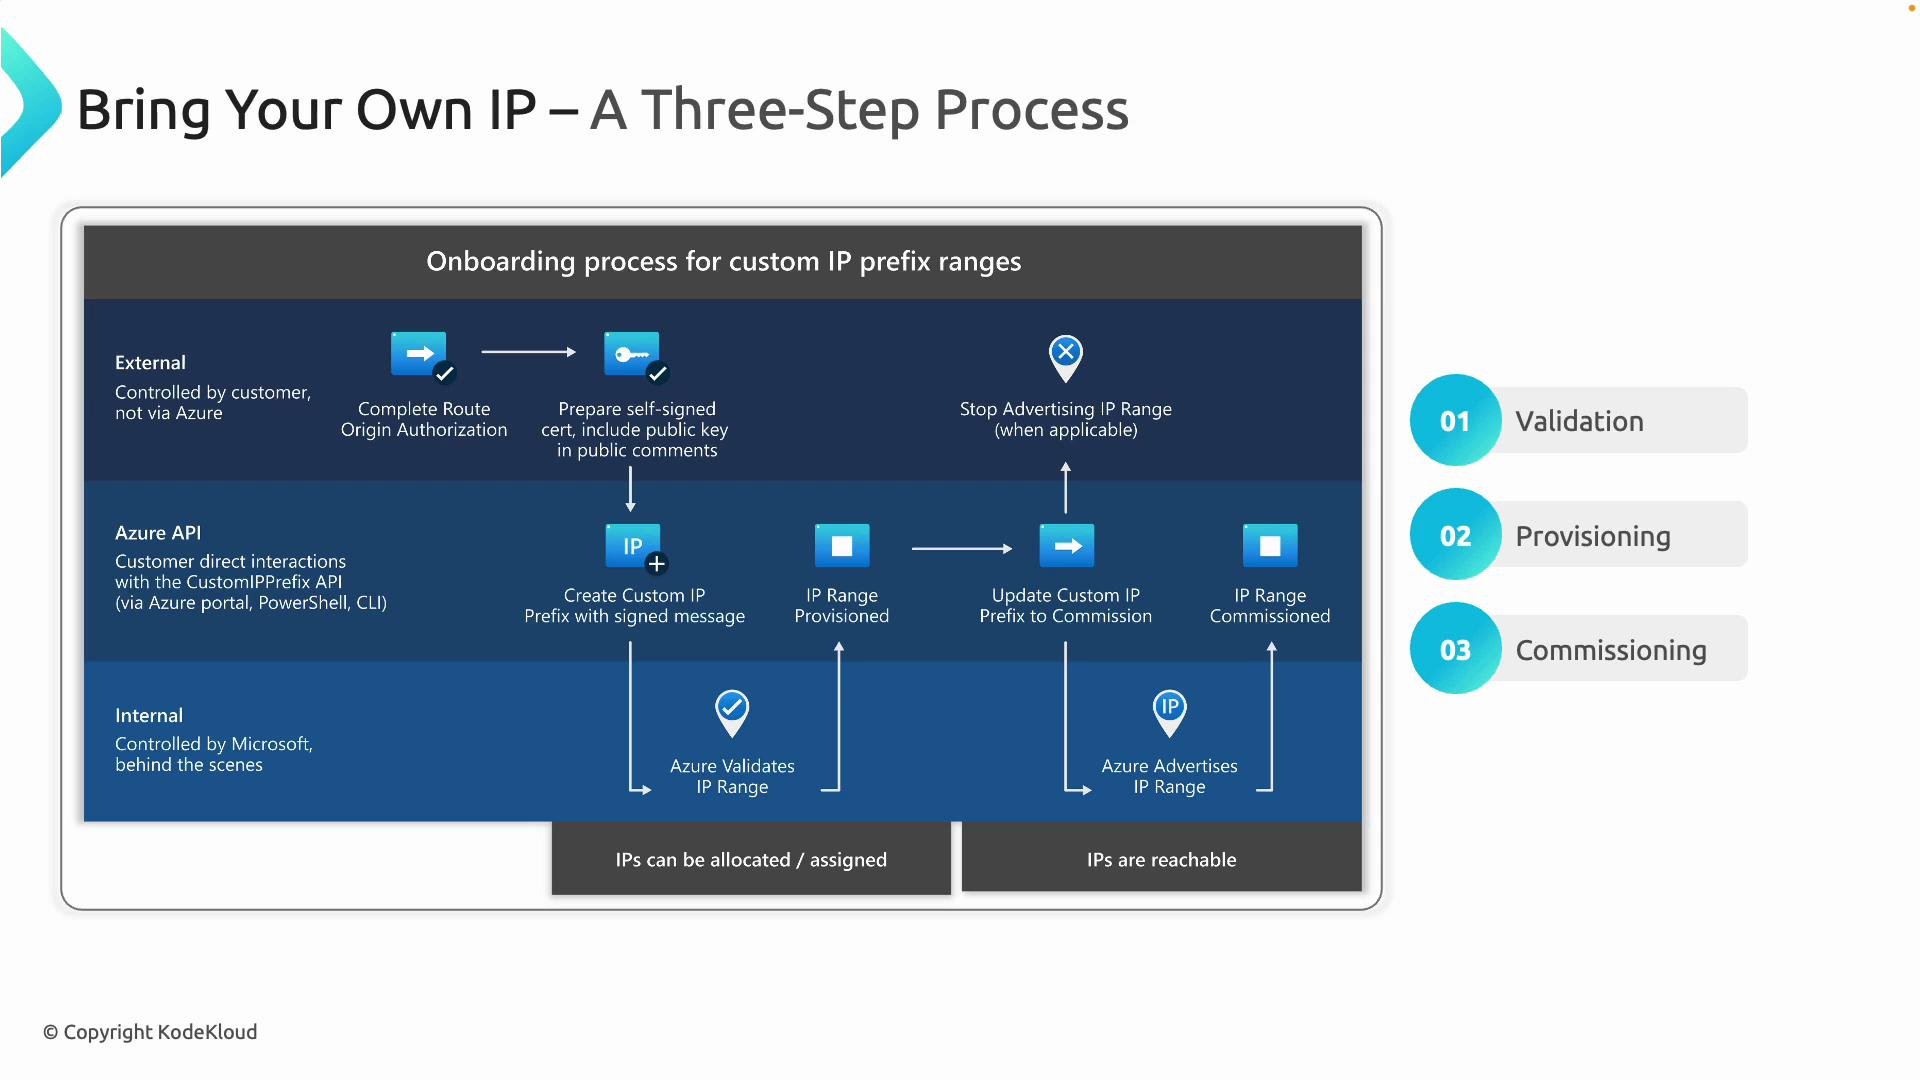
1. Validation
- Azure must verify you legitimately own or are authorized to use the IP prefix being brought in.
- Common methods include Route Origin Authorization (ROA) / RPKI proofs or other Azure-supported validation methods to demonstrate authority to originate the prefix on the Internet.
- You will also provide cryptographic proof-of-possession (for example, a certificate or public key) that Azure can verify to ensure only legitimate owners can claim the addresses.
2. Provisioning
- After successful validation, you create a custom IP prefix object in Azure (via the portal, PowerShell, or CLI). This represents your brought-in IP range inside Azure.
- The prefix is provisioned so you can allocate addresses to resources within your subscription, but Azure does not yet advertise the prefix to the Internet.
- You can assign IPs internally and perform testing without affecting external routing.
3. Commissioning
- When ready to receive external traffic, you commission the prefix. Azure begins advertising the prefix to global BGP so traffic reaches your Azure-hosted services.
- Before commissioning, ensure any previous advertisements of those IPs from other providers or on-premises locations are stopped to avoid routing conflicts.
Key benefits
- Preserve existing public IP addresses so you don’t need to change DNS entries or ask partners to update firewall rules.
- Maintain reputation, trust, and compliance associated with your IP ranges.
- Simplify multi-cloud or hybrid migrations by keeping public addressing consistent across environments.
Operational considerations and best practices
- Plan the cutover carefully: make sure the prefix is no longer advertised from other locations before commissioning in Azure to avoid route leaks or intermittent connectivity.
- Coordinate with upstream providers, registries, and partners, especially if you use ROAs/RPKI for origin validation.
- BYOIP is intended only for public address ranges that you legally control. Azure’s validation and proof-of-possession processes are designed to prevent IP hijacking and unauthorized claims.
- Keep an audit trail of validation artifacts and communications with registries to help troubleshoot validation or routing issues.
Before commissioning a brought-in prefix, stop advertising it from any other network location. Failing to do so can cause routing conflicts or unpredictable traffic paths.
Summary
Bring Your Own IP (BYOIP) in Azure lets organizations migrate public IP address ranges into Azure to preserve DNS, partner whitelists, reputation, and compliance. The three-stage workflow—validation, provisioning, and commissioning—ensures proof of ownership and safe transition into Azure’s global routing fabric.Links and references
- Azure documentation: https://learn.microsoft.com/azure/virtual-network/ by searching for “Bring your own IP”
- RPKI / ROA overview: https://www.ripe.net/analyse/internet-measurements/rpki
- General BGP concepts: https://en.wikipedia.org/wiki/Border_Gateway_Protocol