Before you begin: ensure you have an Azure subscription, a resource group, and one or more Virtual Machines (VMs) deployed in the same virtual network (or in the zones/regions you plan to cover). If you need cross-region routing, consider Azure Front Door or Traffic Manager for global scenarios.
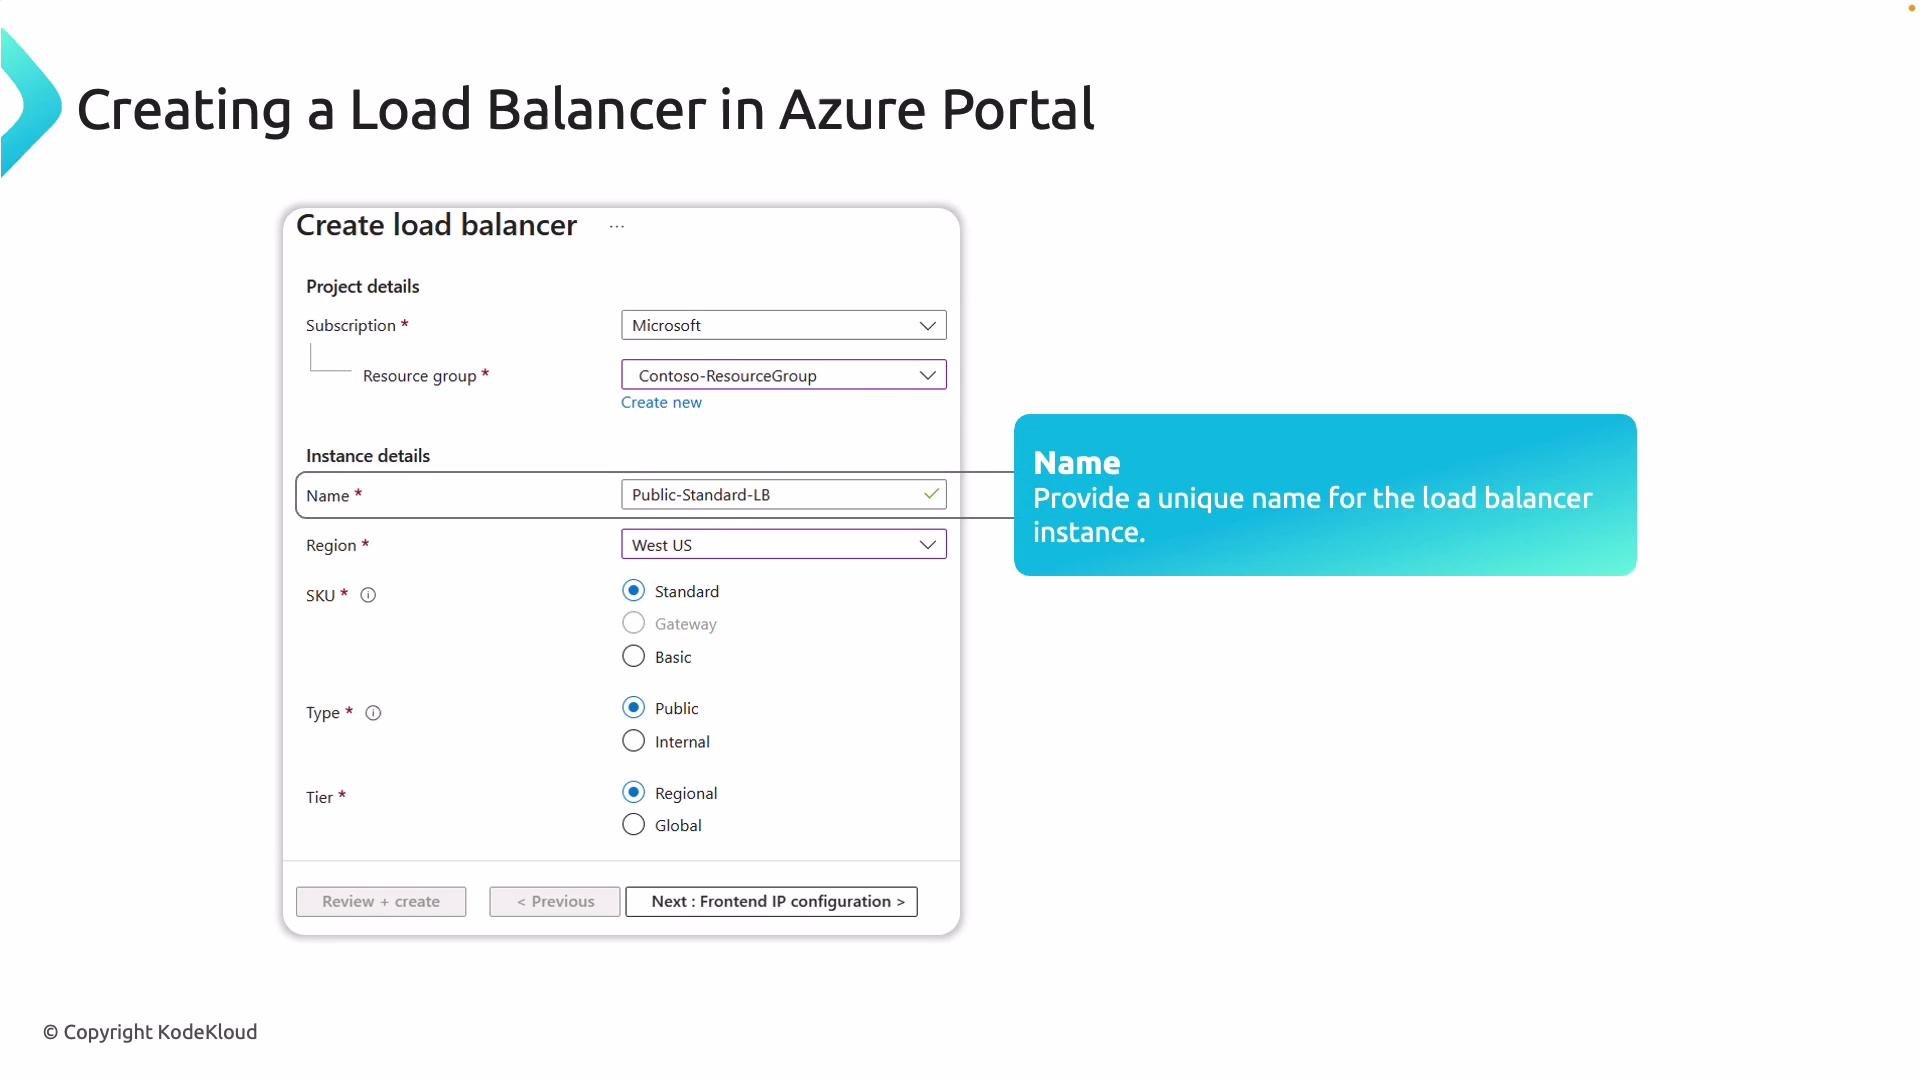
- Choose subscription, resource group, name, region, SKU, type (public/internal), and tier (regional/global).
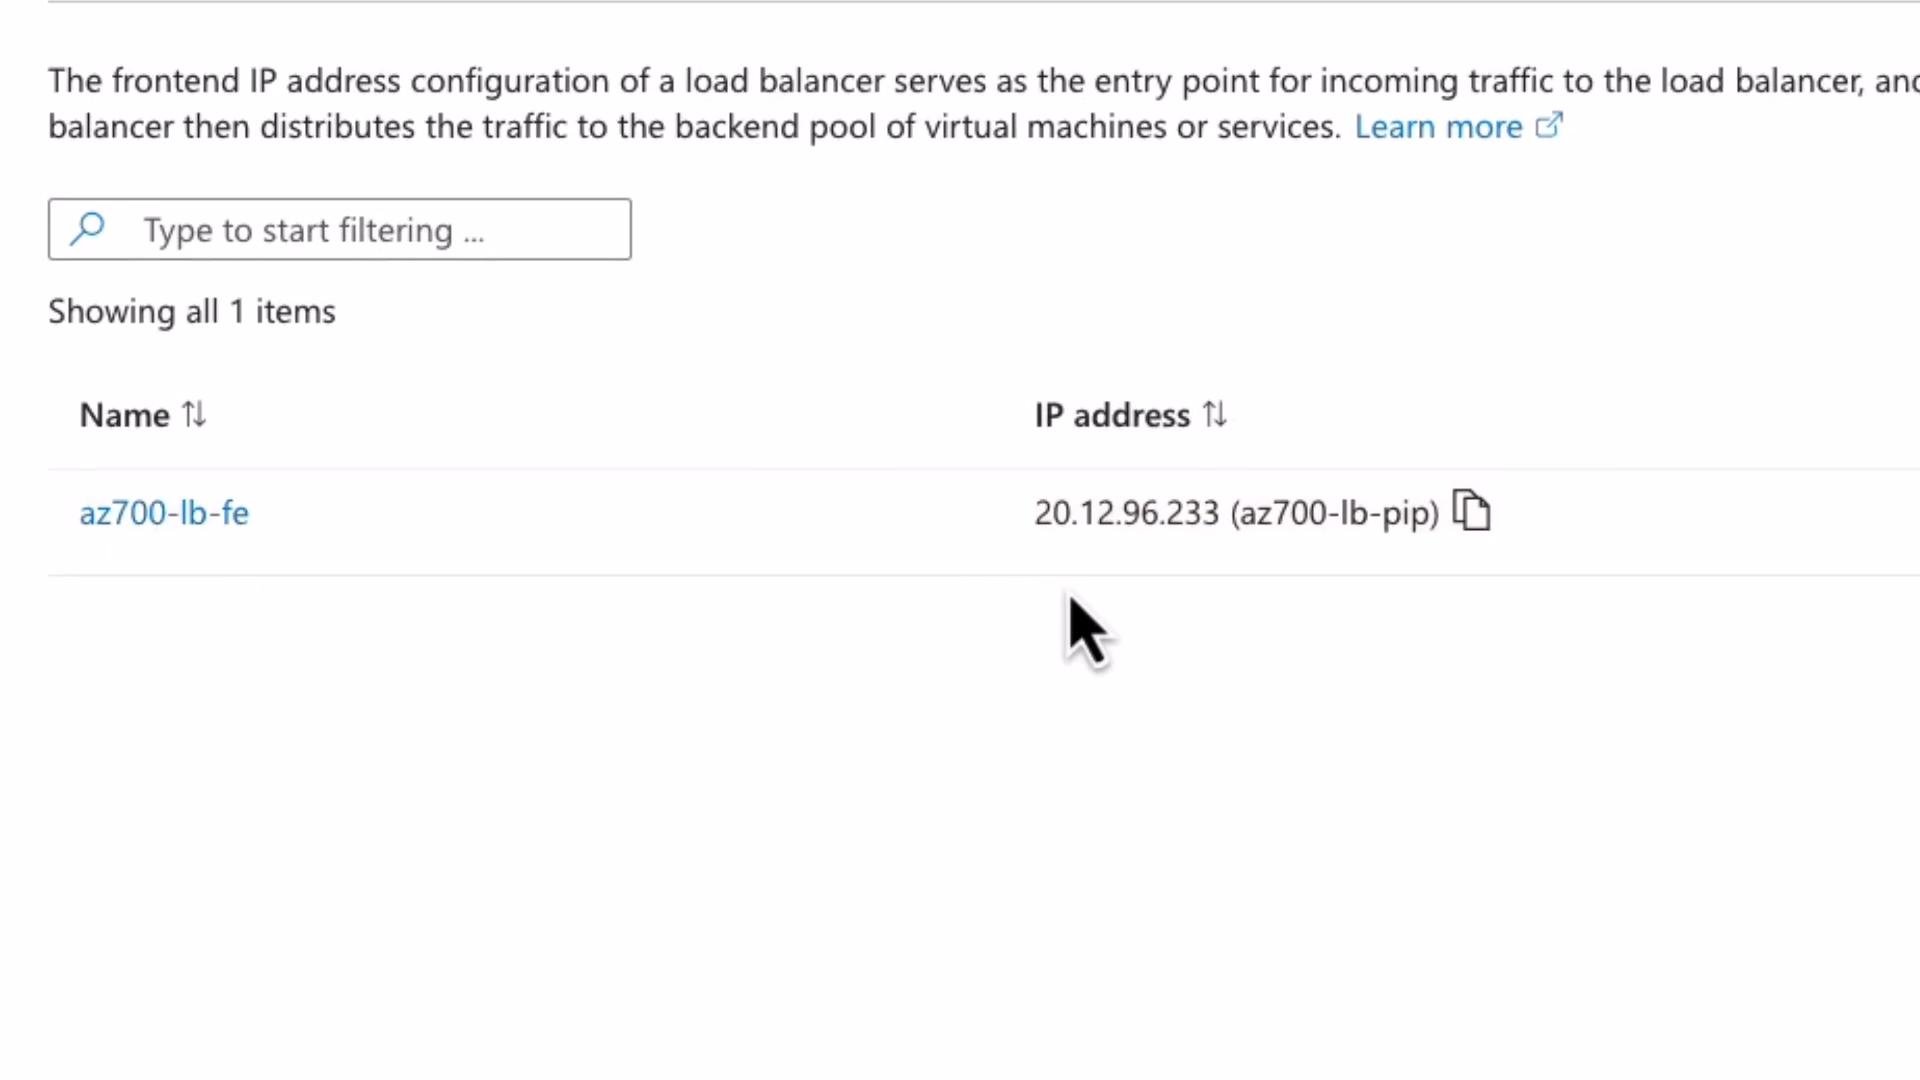
- Configure frontend IP configuration (public or private).
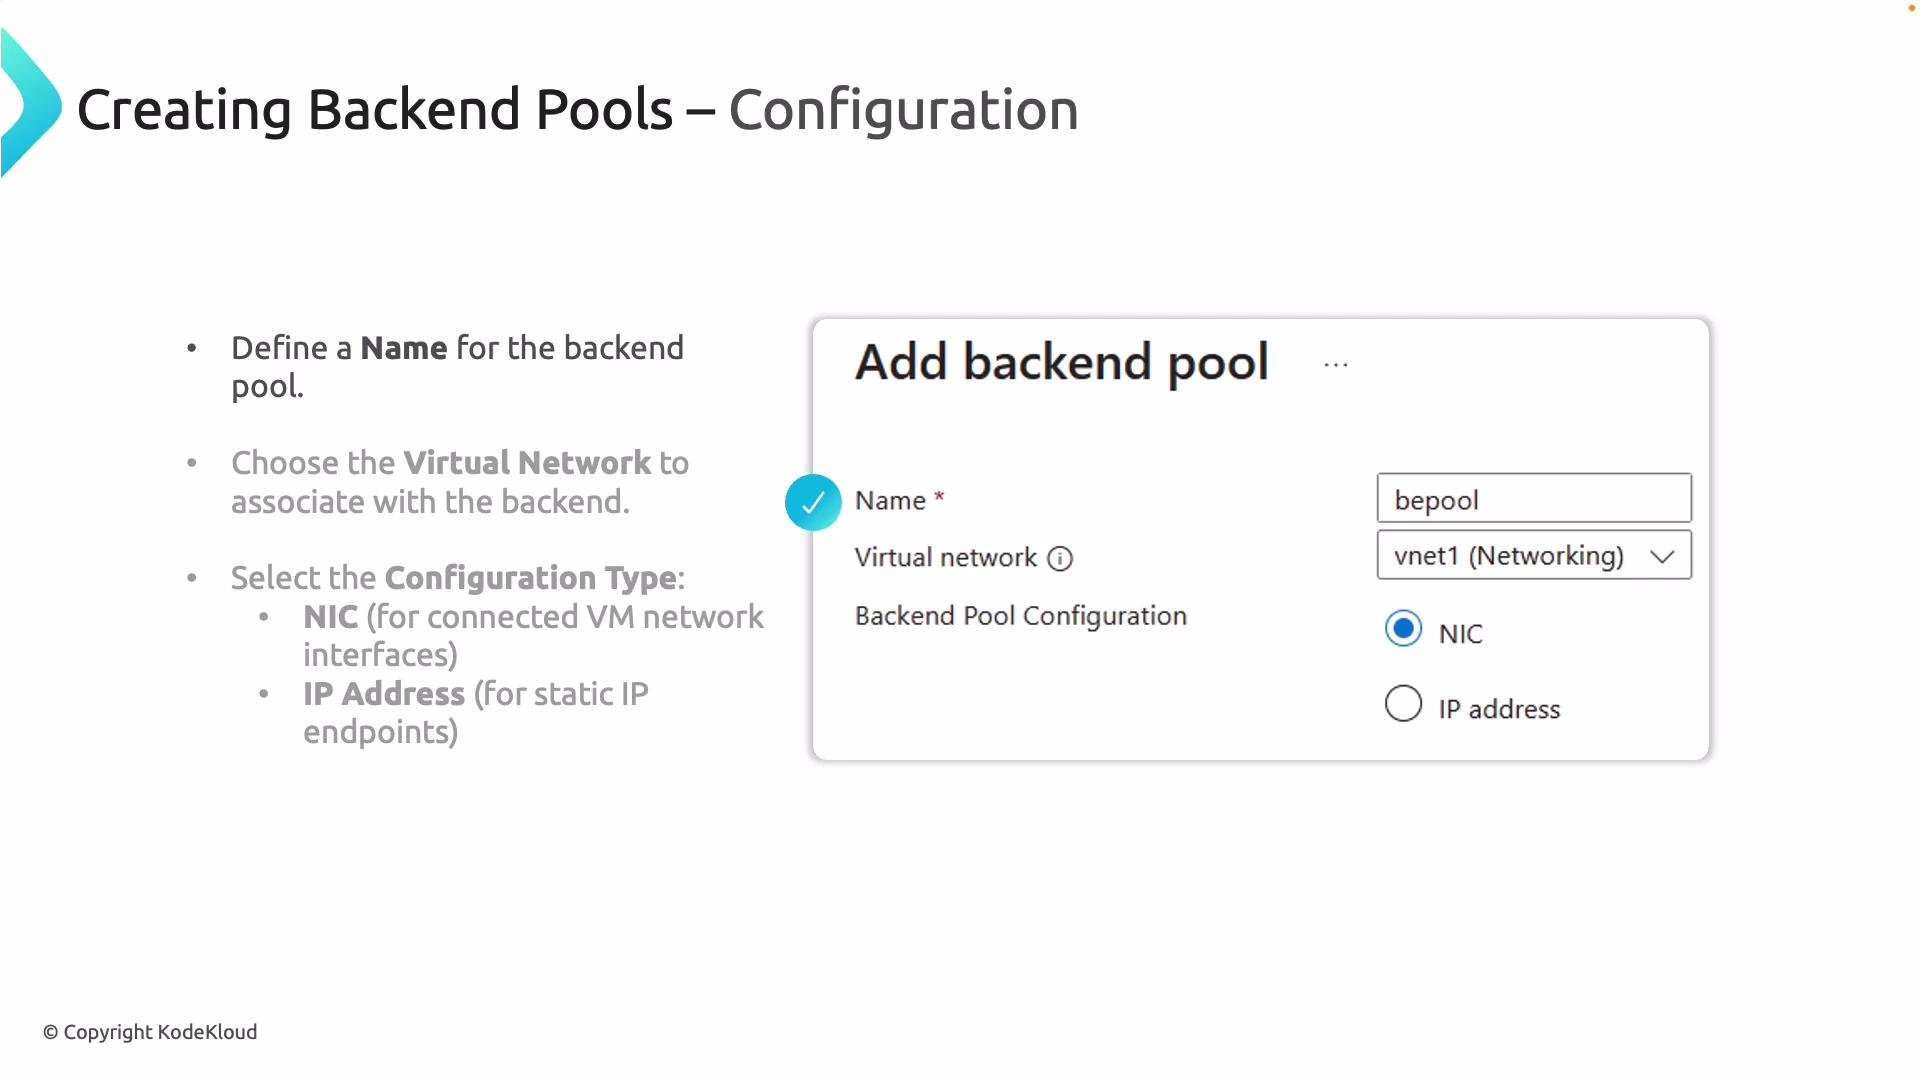
- Create backend pool(s) and add VM NICs or IP addresses.
- Create health probe(s).
- Create load balancing rule(s) that map frontend IP/port to backend pool/port.
- Optionally create inbound NAT rules for VM management and outbound rules (or use NAT gateway) for internet egress.
- Internet-facing (public) — public front end to serve internet traffic.
- Internal — private load balancing inside a virtual network.
- A descriptive name.
- The virtual network containing the backend resources.
- The configuration type:
- NIC — add VM network interfaces (recommended for managed VMs).
- IP address — for static or external endpoints.
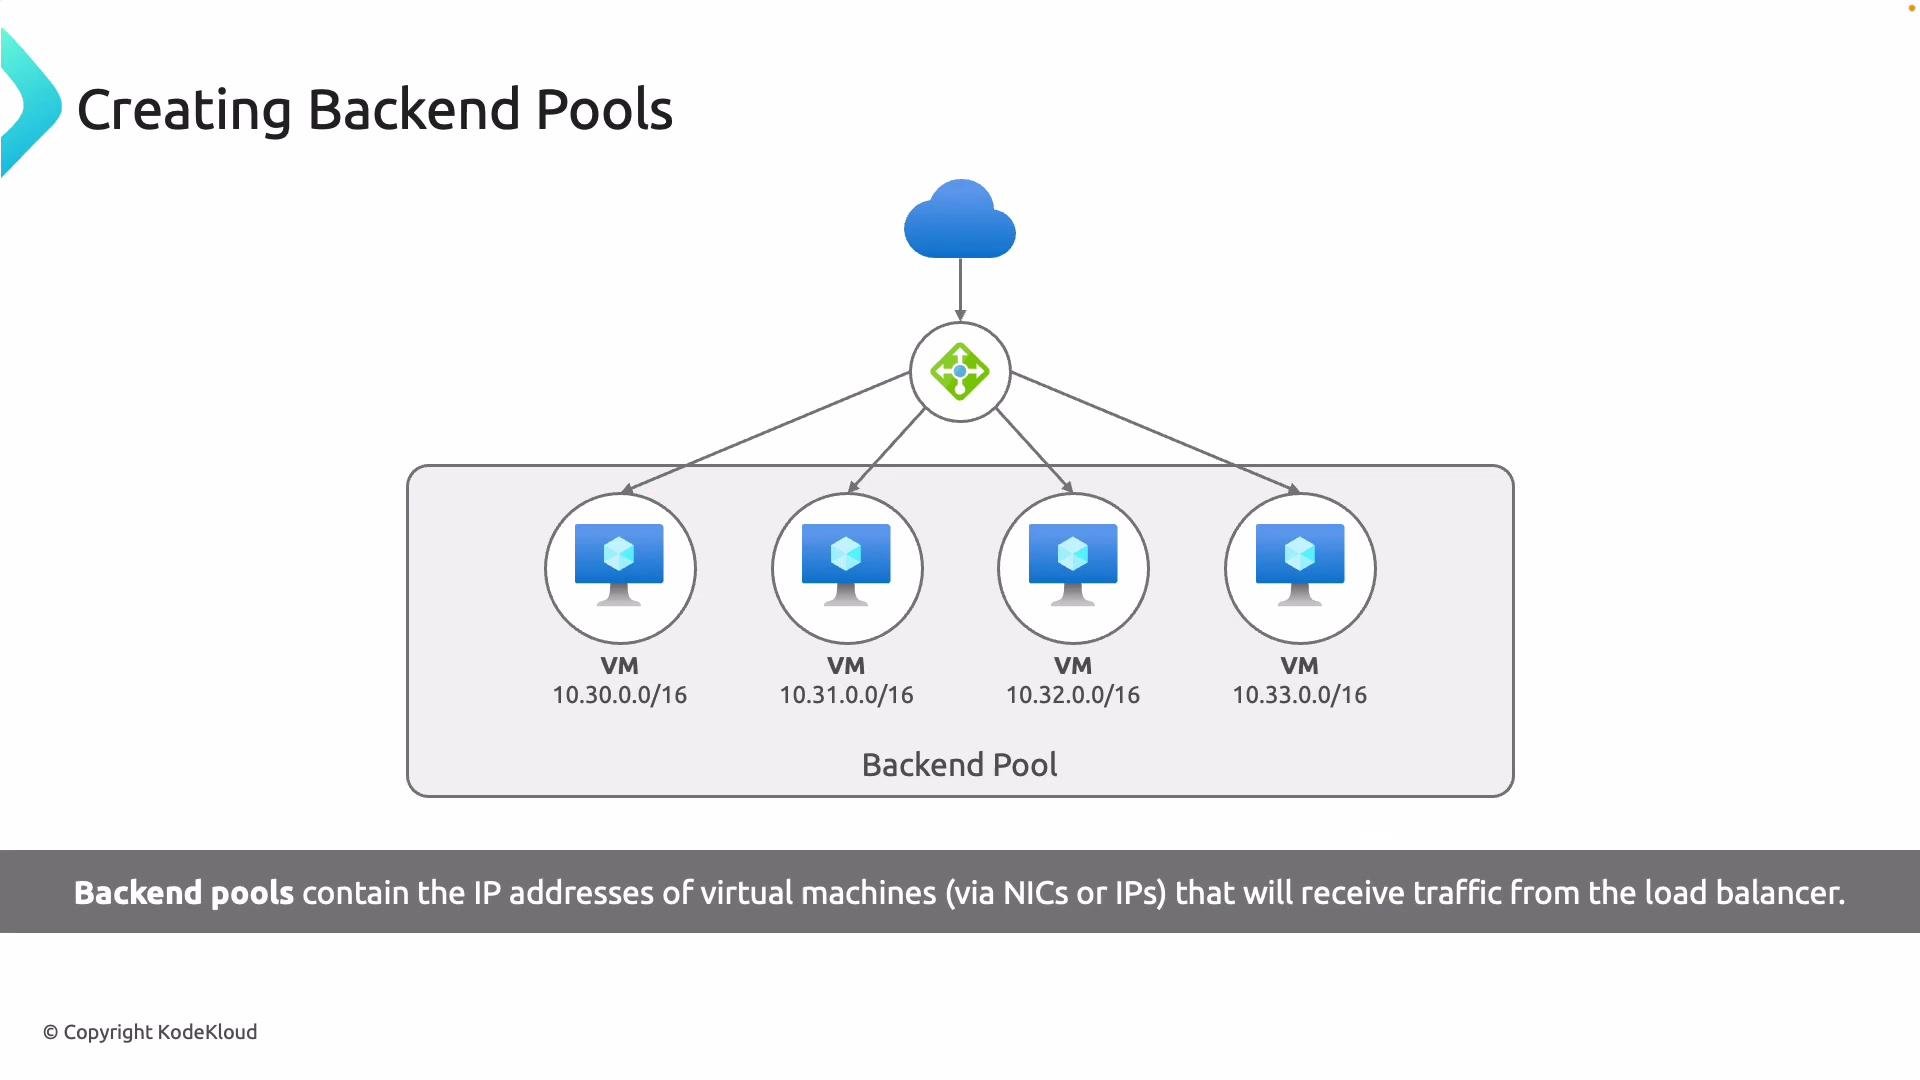
- Name the pool clearly for easier management.
- Associate the pool with the correct virtual network/subnet.
- Select the IP configurations or NICs to include.
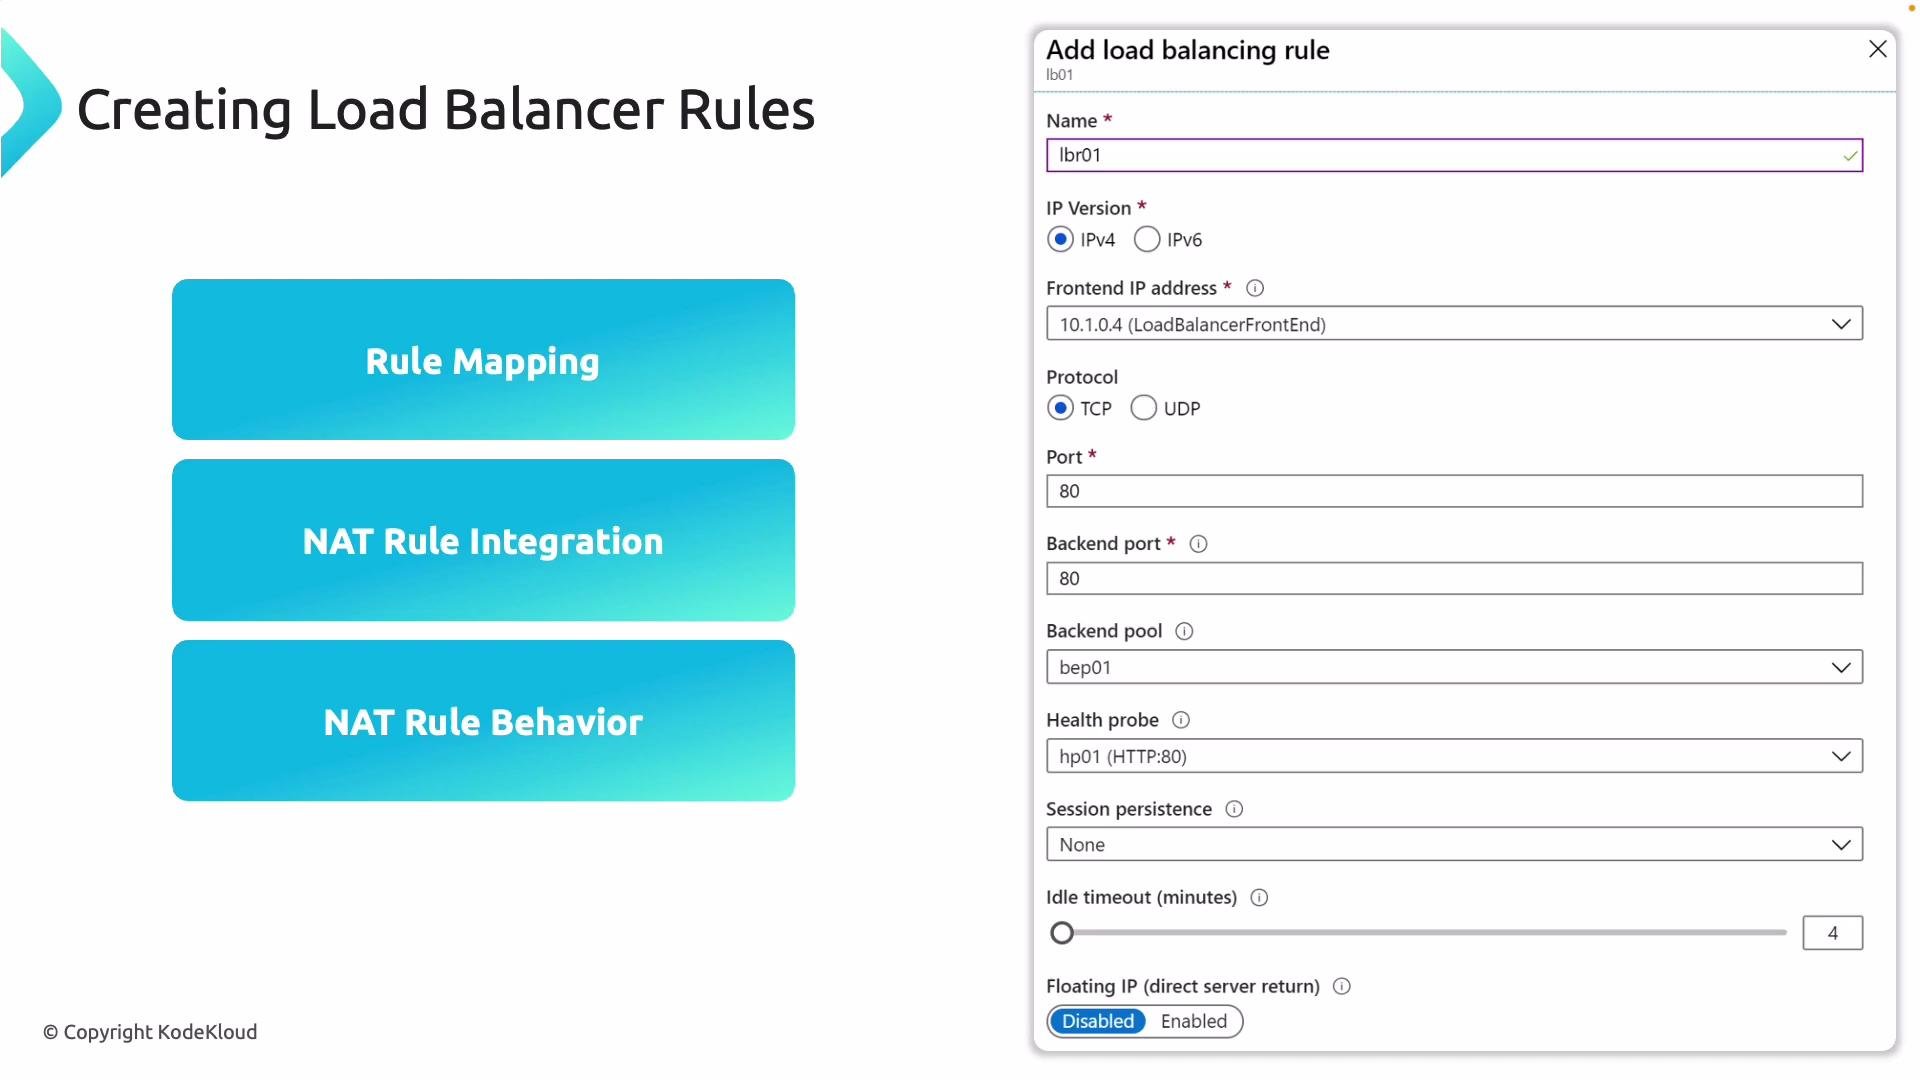
- Rule name
- Frontend IP configuration
- Frontend port → Backend port
- Protocol (TCP/UDP)
- Backend pool association
- Health probe
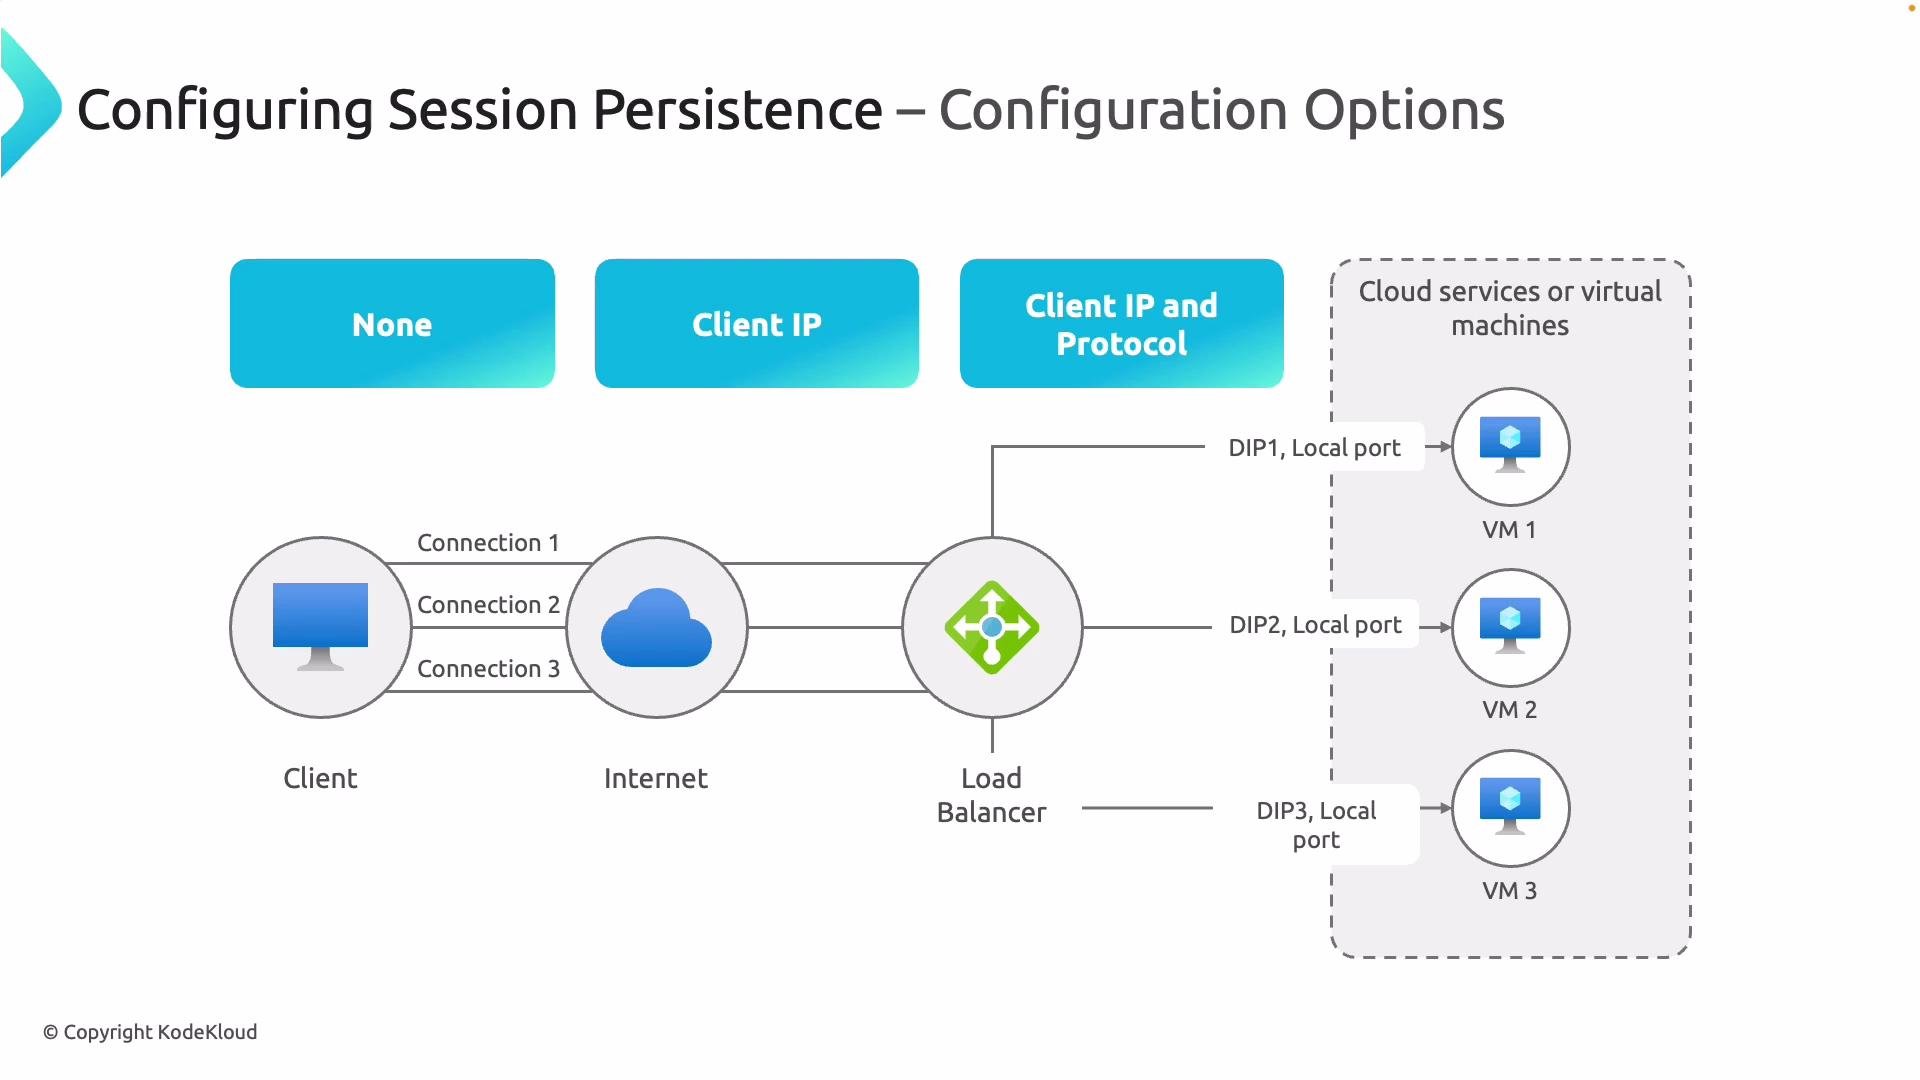
- Session persistence (sticky sessions)
- Idle timeout
- Floating IP (Direct Server Return, if required)
- None — five-tuple hash, no persistence.
- Client IP — two-tuple (client IP + destination IP).
- Client IP and protocol — three-tuple (client IP + destination IP + protocol).
Probe parameters include protocol, port, path (for HTTP/HTTPS), probe interval (seconds), and unhealthy threshold (consecutive failures). Associate the probe with the load balancing rule so traffic is only forwarded to healthy instances.

- Standard SKU has no default outbound SNAT to the internet. You must create an outbound rule or attach a NAT gateway for backend VMs to reach the internet.
- When an outbound rule is present, backend VM IPs are SNATed to the load balancer public IP.
- A single outbound rule can apply to multiple backend pools.
If you expect a large number of concurrent outbound connections, use a NAT gateway (associated to the VM subnet). NAT gateway provides scalable SNAT port allocation and avoids port exhaustion.


- SKU: Standard (general purpose; use Gateway LB only for NVAs/firewalls).
- Subscription and resource group: choose appropriate ones.
- Name: e.g.,
AZ-700-Web-LB. - Region: East US 2.

- Type: Public (internet-facing) for this demo.
- Frontend name:
AZ-700-LB-FE - IP version: IPv4
- Public IP: create
AZ-700-LB-PIP(optionally zone-redundant)

- Add a backend pool and select the virtual network where your VMs reside.
- Select VM NICs (IP configurations) that should receive traffic and save.


- Name:
AZ-700-web-rule - IP version: IPv4
- Frontend IP:
AZ-700-LB-FE - Backend pool:
AZ700LBBE - Protocol: TCP
- Frontend port: 80 → Backend port: 80
- Health probe: create an HTTP probe (path
/, interval 5s) - Session persistence: None (adjust if needed)
- Idle timeout & floating IP: defaults unless required otherwise


- Name:
AZ-700-LB-NAT-VM1 - Target VM: select VM in zone 1
- Frontend IP:
AZ-700-LB-FE - Frontend port:
9090(public) - Backend port:
22(SSH on VM) - Protocol: TCP


9090 will forward to port 22 of the selected VM. From a terminal, SSH to the VM via the load balancer public IP and NAT port:
yes and provide your credentials to verify inbound NAT mapping to port 22.
Testing outbound connectivity from a backend VM
If a VM in the backend pool cannot reach the internet (typical with Standard SKU and no outbound rule/NAT gateway), test with:
apt update or curl) should succeed.
Summary
- Load balancing rules map frontend IP/port to backend pool and port to distribute inbound traffic.
- Health probes ensure only healthy backend instances receive traffic.
- Inbound NAT rules map unique frontend ports to backend VM ports (useful for SSH/RDP or management).
- Standard Load Balancer requires an outbound rule (or NAT gateway) for backend VMs to access the internet; NAT gateway is recommended for high-scale outbound needs to avoid SNAT port exhaustion.
- Azure Load Balancer documentation
- NAT gateway overview
- Designing for high availability and redundancy in Azure