- Choose the Virtual WAN hub where the NVA will be deployed (this determines region and which networks can use the appliance).
- Select a supported NVA vendor from Azure Marketplace (examples: Barracuda, Cisco, Check Point, Fortinet, VMware).
- Configure vendor- and deployment-specific parameters such as scale/infrastructure units, licensing, and any required authentication tokens.
- Review and create. Azure provisions the NVA and integrates it with the hub.
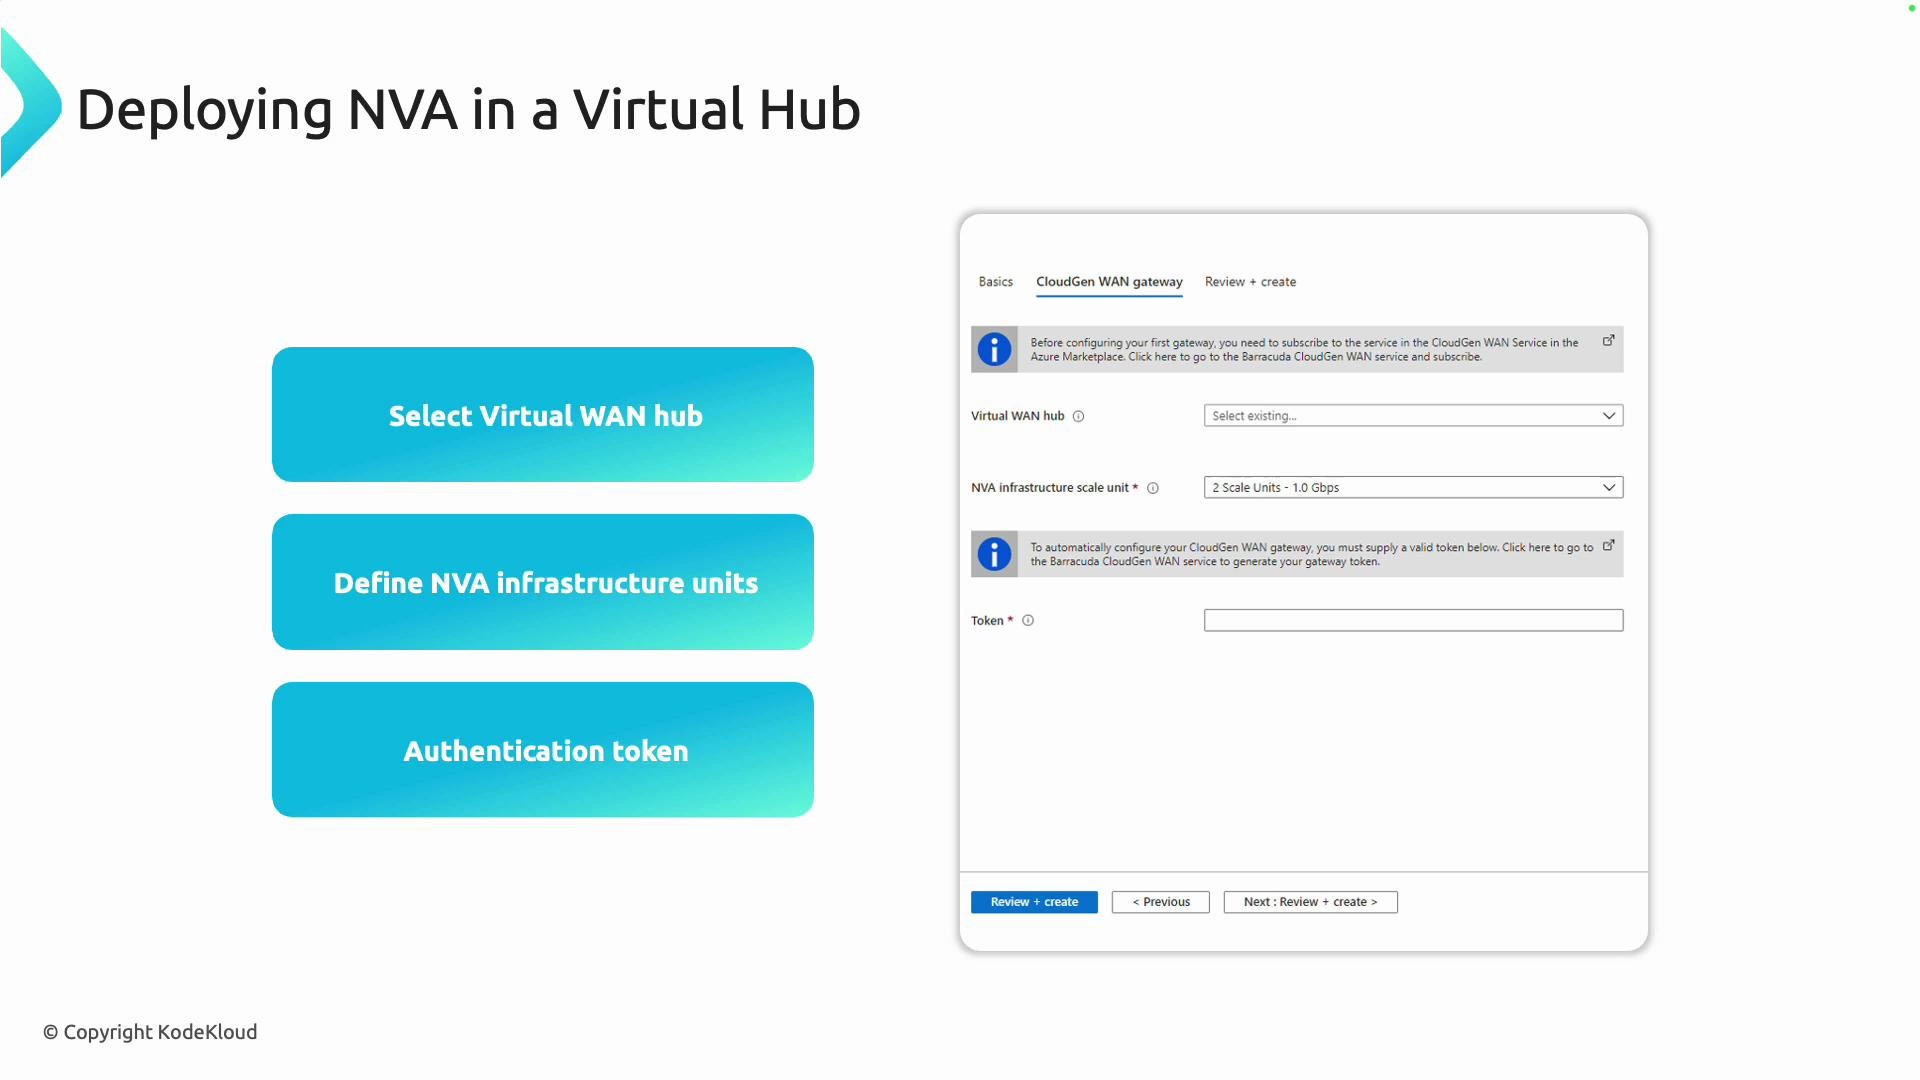
Always check vendor documentation for scale-unit definitions and licensing requirements—these details vary by vendor and affect throughput and billing.
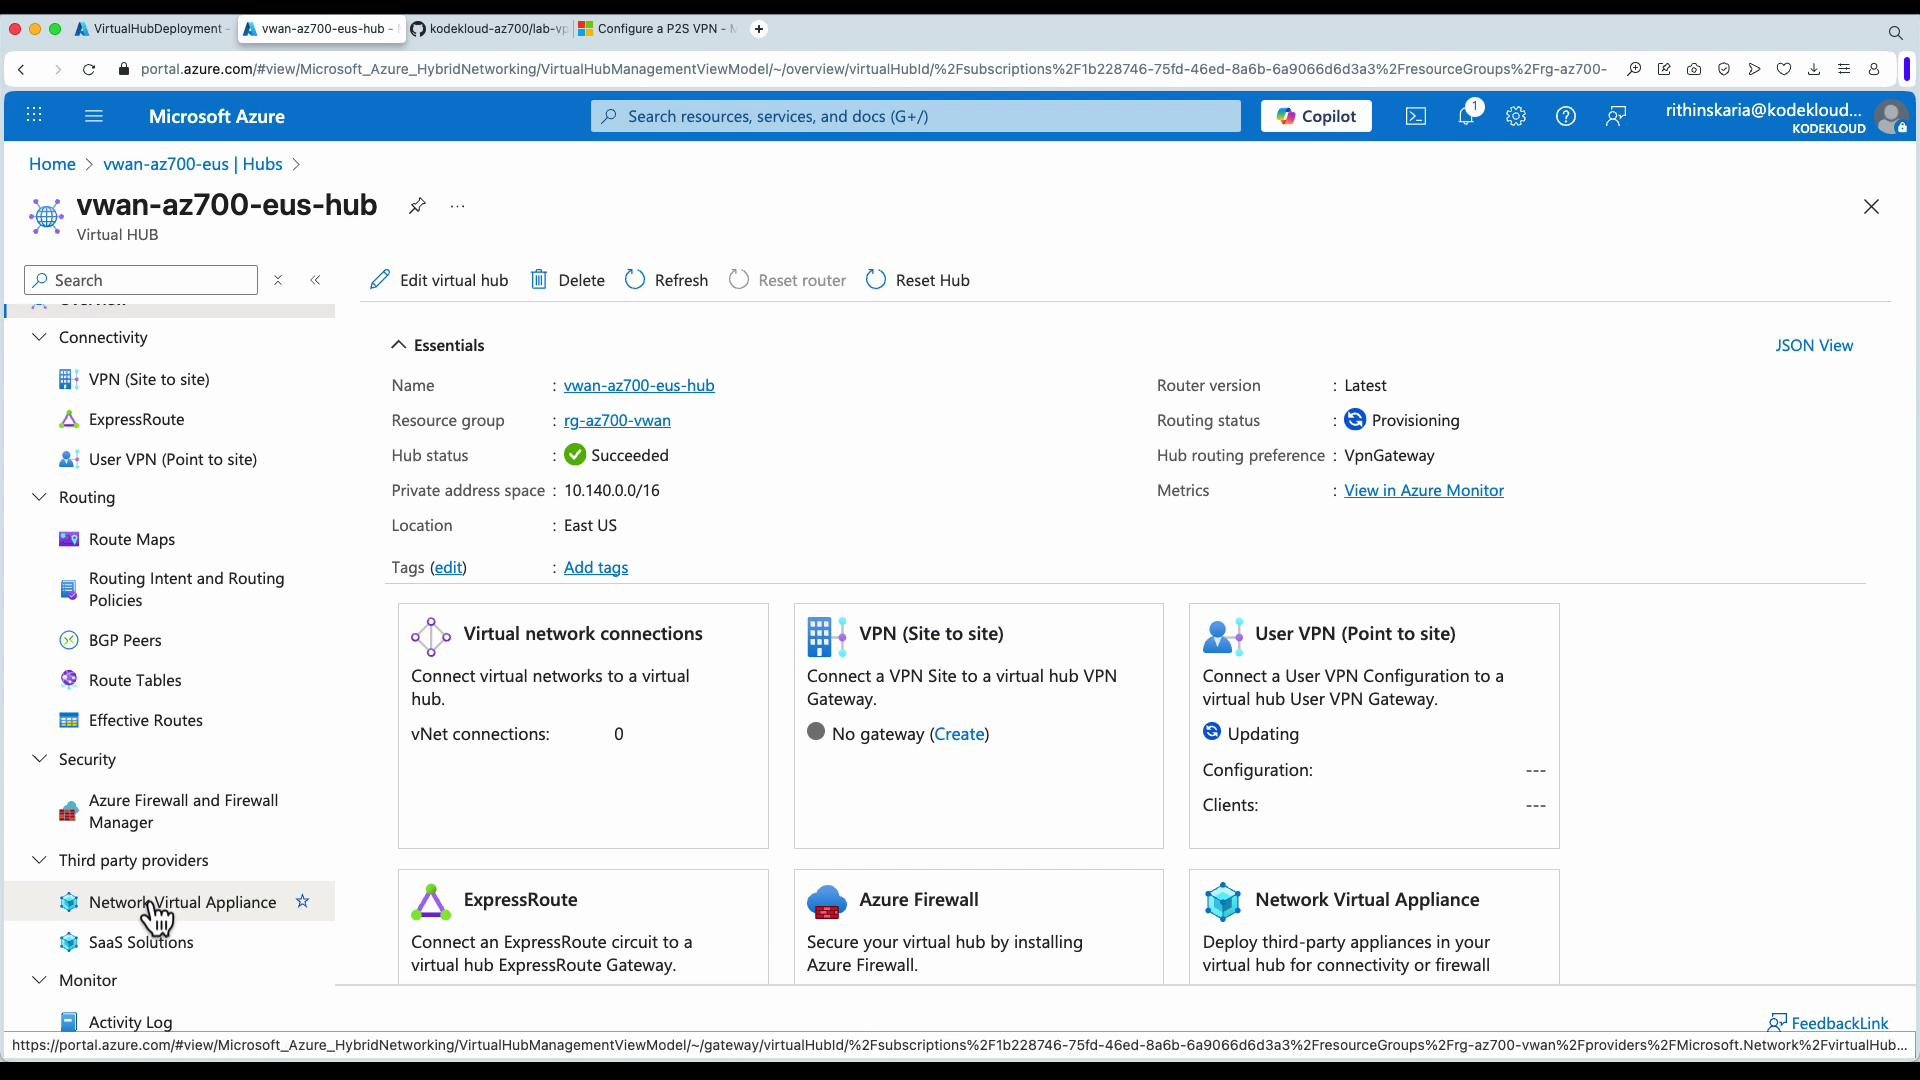
- Open the Azure portal and navigate to your Virtual WAN resource.
- From the Virtual WAN overview, select Hubs and open the hub where you want to deploy the appliance.
- Inside the hub blade, choose Network virtual appliances and click Create.
- Select a vendor/solution from the supported NVA list and click Create to open that vendor’s Marketplace offer.
- On the Marketplace page, choose a plan (BYOL vs PAYG), supply vendor-specific details (e.g., licensing token, admin credentials, instance size), and follow the Create flow.
- Review + create. Azure will provision the appliance and automatically register it with the hub’s routing fabric.
- After selecting a solution (for example, Fortinet FortiGate), the Marketplace entry displays available SKUs, pricing, and deployment options.
- Complete any vendor-specific configuration (admin credentials, network interface settings, license/token). Some vendors provide onboarding or license activation steps in their portal.
- Confirm networking configuration: ensure the NVA’s interfaces are attached to the correct hub subnet(s) and that route propagation to hub-connected spokes/branches is as expected.
- Finish the deployment and validate that the NVA appears under the hub’s Network virtual appliances list.
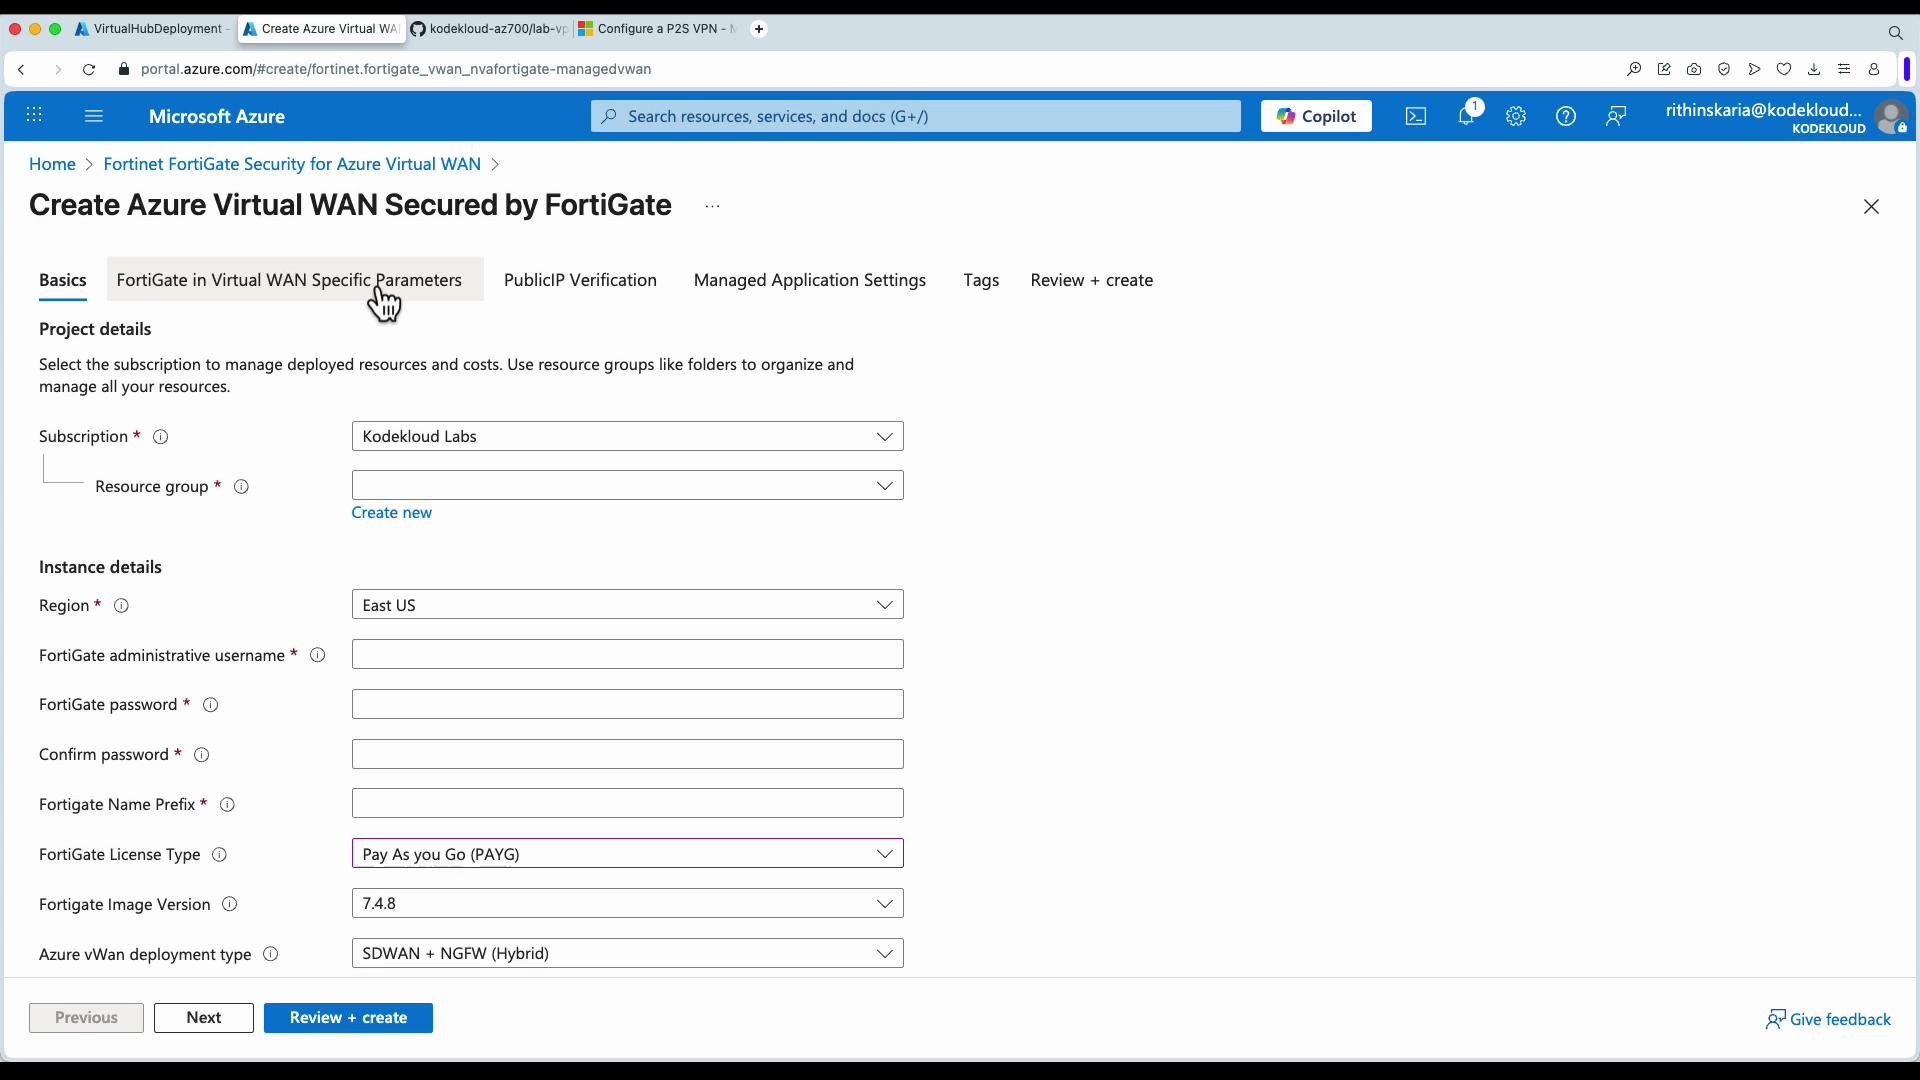
- BYOL vs PAYG: BYOL may require you to bring a license key or register with the vendor portal. PAYG charges are billed via Azure Marketplace.
- High availability: Check the vendor’s HA recommendations and whether multiple instances or availability zones are required for resilience.
- Monitoring and logging: Integrate NVA logs with Azure Monitor, SIEM, or the vendor’s logging solution for visibility.
- Throughput limits: Match scale units to your expected traffic patterns. Scale-up/scale-down processes and billing details differ by vendor.
Vendor licensing and tokens are critical—if you skip required registration or token entry, the NVA may not fully function or may incur unexpected charges. Confirm license activation before production traffic flows.
- Azure Virtual WAN overview: https://learn.microsoft.com/en-us/azure/virtual-wan/overview
- Azure Marketplace: https://azuremarketplace.microsoft.com/
- Vendor examples: Fortinet (https://www.fortinet.com/products/next-generation-firewall/fortigate), Barracuda (https://www.barracuda.com/), Cisco (https://www.cisco.com/), Check Point (https://www.checkpoint.com/), VMware (https://www.vmware.com/)