In a previous tutorial, we configured a Jenkins Shared Library . In this demo, you’ll learn how to invoke that library from your pipeline to replace inline Groovy methods and standardize notifications across jobs.
1. Confirm Shared Library Configuration
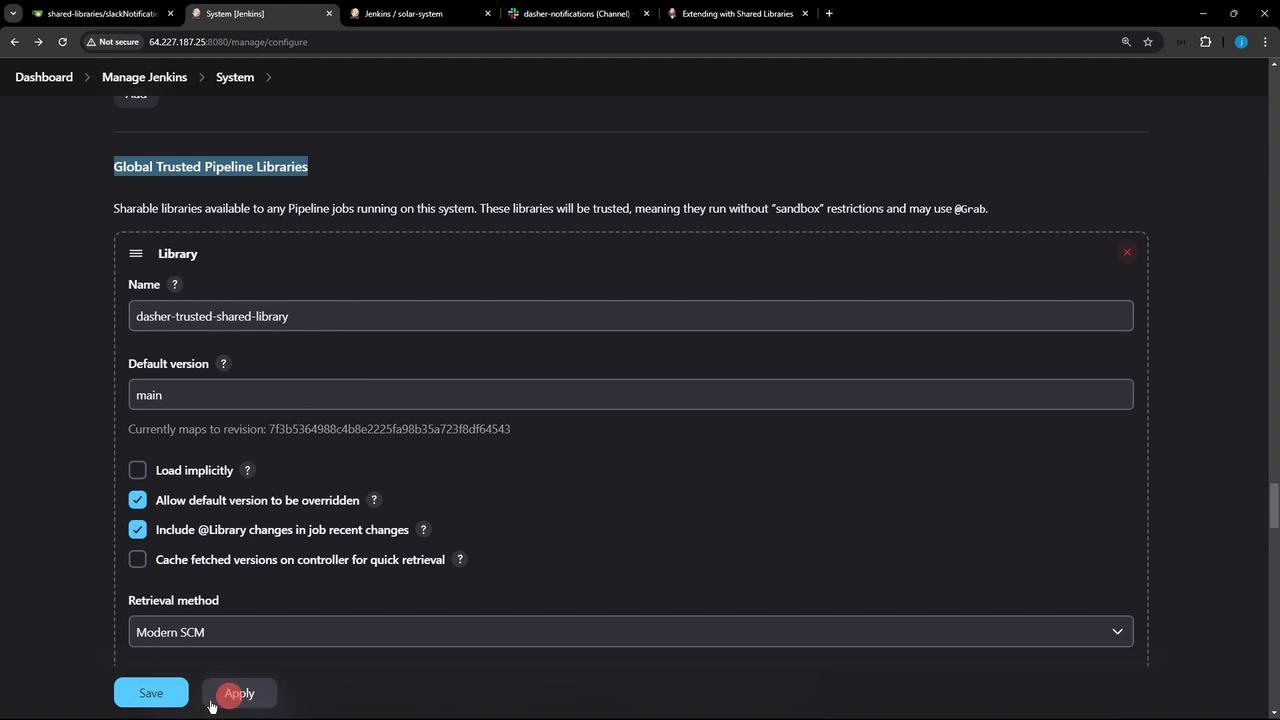
In the Jenkins UI, navigate to Manage Jenkins > Configure System .
Scroll down to the Global Pipeline Libraries section.
Verify that your library (e.g., dashers-trusted-shared-library) is listed with the correct default version (main) and retrieval method (e.g., Git).
Note the latest commit ID fetched from your repository—this ensures Jenkins is using the intended code.
2. Reference the Shared Library in Your Jenkinsfile Switch to the feature/advanced-demo branch of your project repository. First, remove any inline Slack notification methods or other utility functions you intend to centralize.
// Delete this block from your Jenkinsfile def slackNotificationMethod ( String buildStatus = 'STARTED' ) { buildStatus = buildStatus ?: 'SUCCESS' def color = (buildStatus == 'SUCCESS' ) ? '#47ec05' : (buildStatus == 'UNSTABLE' ) ? '#d5ee0d' : '#ec2805' def msg = " ${ buildStatus } : ' ${ env.JOB_NAME } ' # ${ env.BUILD_NUMBER } : \n ${ env.BUILD_URL } " slackSend( color : color, message : msg) }
Instead, add the @Library annotation at the very top. Make sure to match the library name configured in Jenkins:
@Library ( 'dashers-trusted-shared-library' ) _ pipeline { agent any tools { // e.g., maven 'M3' } environment { MONGO_URI = "mongodb+srv://supercluster.d83jj.mongodb.net/superData" MONGO_DB_CREDS = credentials( 'mongo-db-credentials' ) MONGO_USERNAME = credentials( 'mongo-db-username' ) MONGO_PASSWORD = credentials( 'mongo-db-password' ) SONAR_SCANNER_HOME = tool 'sonarqube-scanner-610' GITEA_TOKEN = credentials( 'gitea-api-token' ) } options { // Pipeline-level options (timestamps, timeout, etc.) } stages { stage( 'Installing Dependencies' ) { options { timestamps() } steps { sh 'npm install --no-audit' } } // Add more stages as needed } post { always { // Call the shared library’s notification method slackNotification(currentBuild . result) script { if (fileExists( 'solar-system-gitops-argocd' )) { sh 'rm -rf solar-system-gitops-argocd' } } } } }
The underscore (_) after the @Library annotation is mandatory syntax when importing a Shared Library.
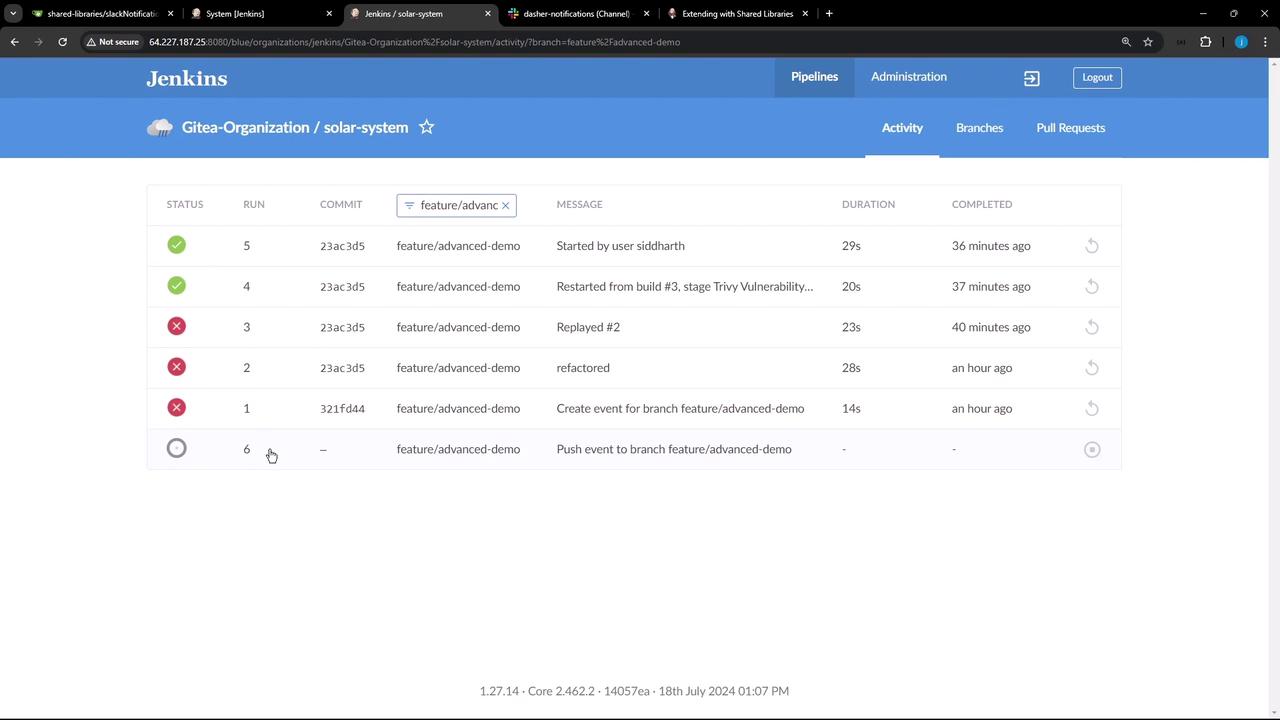
3. Commit Changes and Trigger the Build Commit your updated Jenkinsfile and push the feature branch:
git add Jenkinsfile
git commit -m "Load shared library and replace inline Slack notification"
git push origin feature/advanced-demo
Jenkins will detect the new commit and automatically launch a build. On your Jenkins dashboard, you should see the new build for your project:
4. Verify Library Loading in the Console Log Open the classic console log for the triggered build and search for “Loading library”:
[Pipeline] git
Fetching from http://64.227.187.25:5555/dasher-org/shared-libraries
...
[Pipeline] Loading library dashers-trusted-shared-library@main
...
[Pipeline] git
 > git fetch --no-tags --progress http://64.227.187.25:5555/dasher-org/shared-libraries +refs/heads/*:refs/remotes/origin/*
 > git checkout -f main
...
[Pipeline] slackSend
Slack Send Pipeline step running, values are – channel: dasher-notifications, color: #47ec05, tokenCredentialId: slack-bot-token, …
These log entries confirm that Jenkins checked out the Shared Library and invoked its slackNotification method (including color logic and messaging).
5. Shared Library Benefits Benefit Description DRY Reuse common pipeline functions across multiple jobs Versioning Control library versions with Git branches or tags Centralized maintenance Update shared logic in one place for all pipelines
Next Steps In upcoming tutorials, we will explore:
Managing multiple library versions with @Library('lib@1.2.3')
Advanced features such as global variables, custom steps, and credentials binding
Best practices for testing Shared Library code
Links and References