

- View default console output
- Enable timestamps for a single job
- Configure global timestamp formats
- Define custom date-time patterns
1. Default Jenkins Console Output
By default, Jenkins provides console logs without timestamps:2. Enable Timestamps Per Job
- Navigate to your job (e.g., npm-version-test) and click Configure.
- Under Build Environment, check Add timestamps to the Console Output.
- Save and run the job.
HH:mm:ss:
If Add timestamps is not available, install or update the Timestamper Plugin via Manage Jenkins → Manage Plugins.
3. Configure Global Timestamp Format
To apply a custom format across all jobs:- Go to Dashboard → Manage Jenkins → Configure System.
- Locate the Timestamper section.
- Edit System clock time format or Elapsed time format.
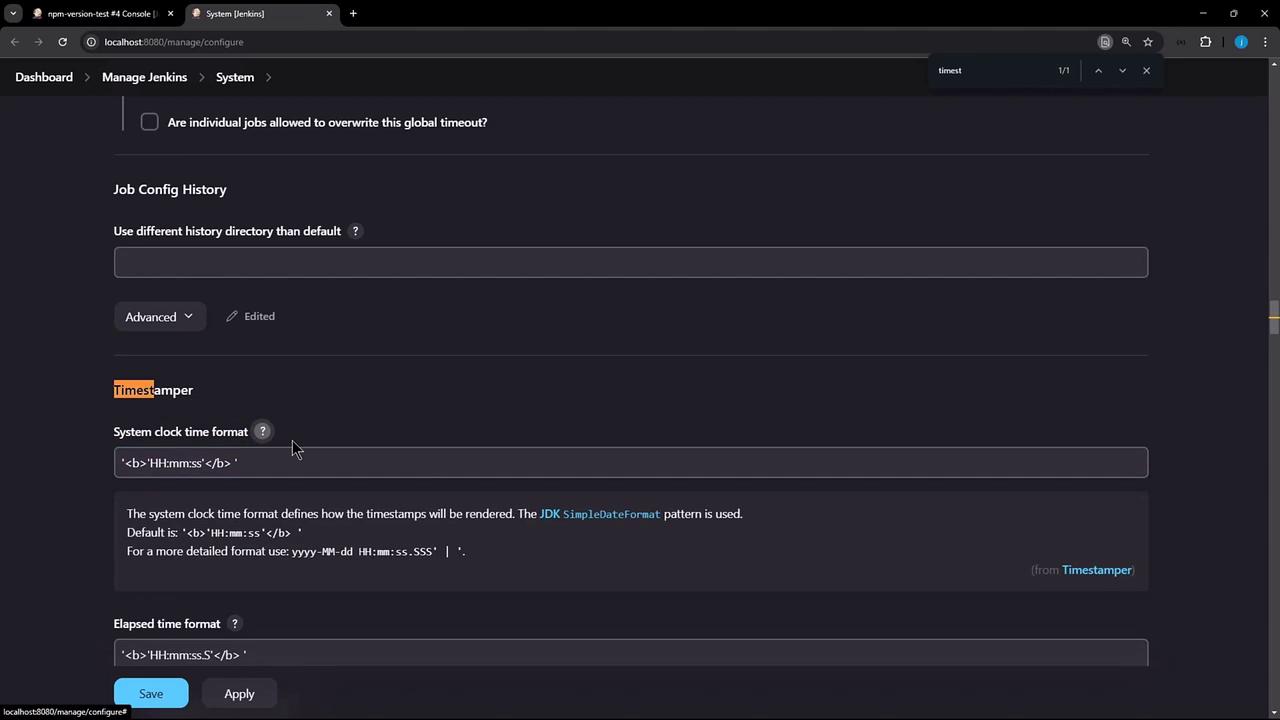
HH:mm:ss, but you can choose Detailed or enter your own using Java’s SimpleDateFormat.
4. Define a Custom Date-Time Pattern
Jenkins uses Java’s SimpleDateFormat. Below is a quick reference: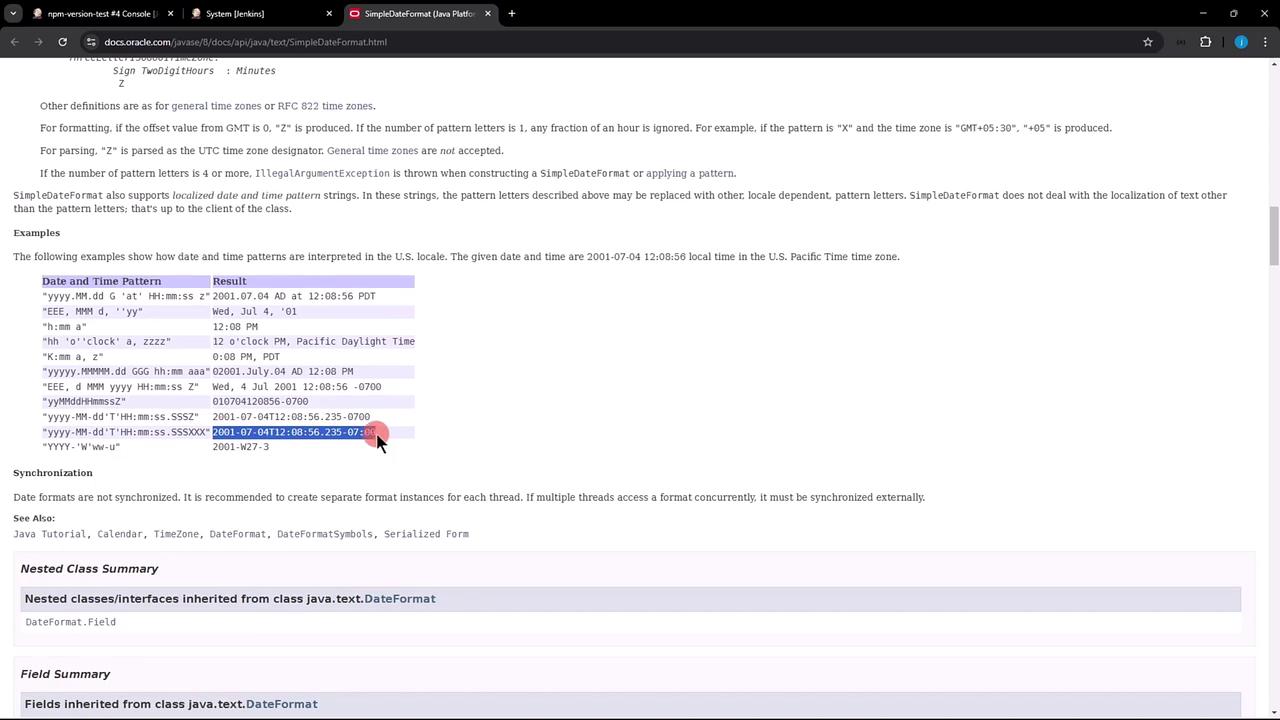
Example Pattern
To include date, time, milliseconds, and timezone:Apply Your Pattern
- Paste the pattern into System clock time format.
- Click Apply and Save.
- Rerun your job to see updated timestamps: