- A GCP project with billing enabled.
- Permissions to create Firestore databases and write to a Google Cloud Storage bucket (or a service account with those permissions).
This guide shows interactive console flows and an example Airflow task to export Firestore to Cloud Storage. Replace project IDs, bucket names, and locations with your own environment values.
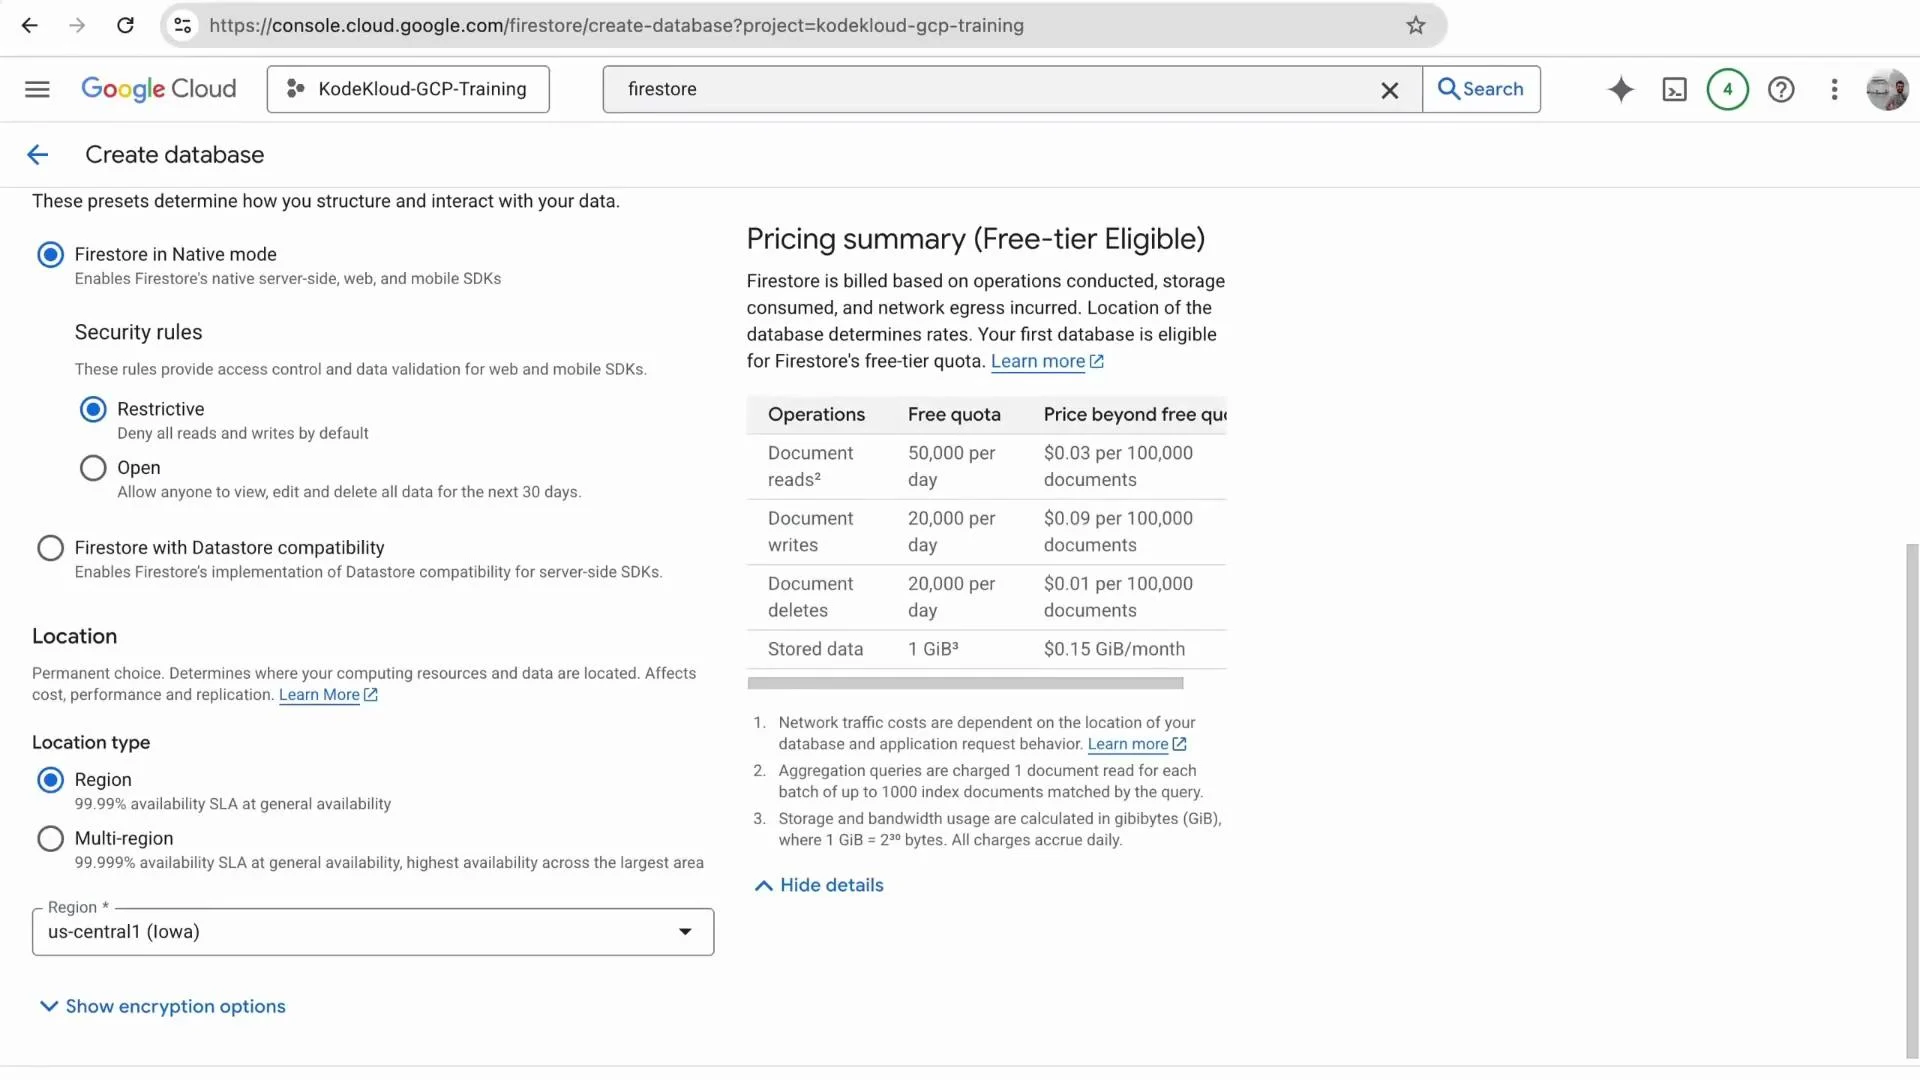
Create a Firestore database
- Open the GCP Console and navigate to Firestore.
- Click “Create a Firestore database”.
- Firestore uses a single database per GCP project (no separate database names).
- Optionally provide a display name.
- Choose the Standard edition (or the appropriate edition for your needs).
- Select “Firestore in Native mode” (unless you require Datastore mode).
- Pick a location (for example,
us-central1) and create the database.
- Firestore stores data as documents.
- Documents are grouped into collections.
- Firestore is schemaless: documents in the same collection can have different fields and types.
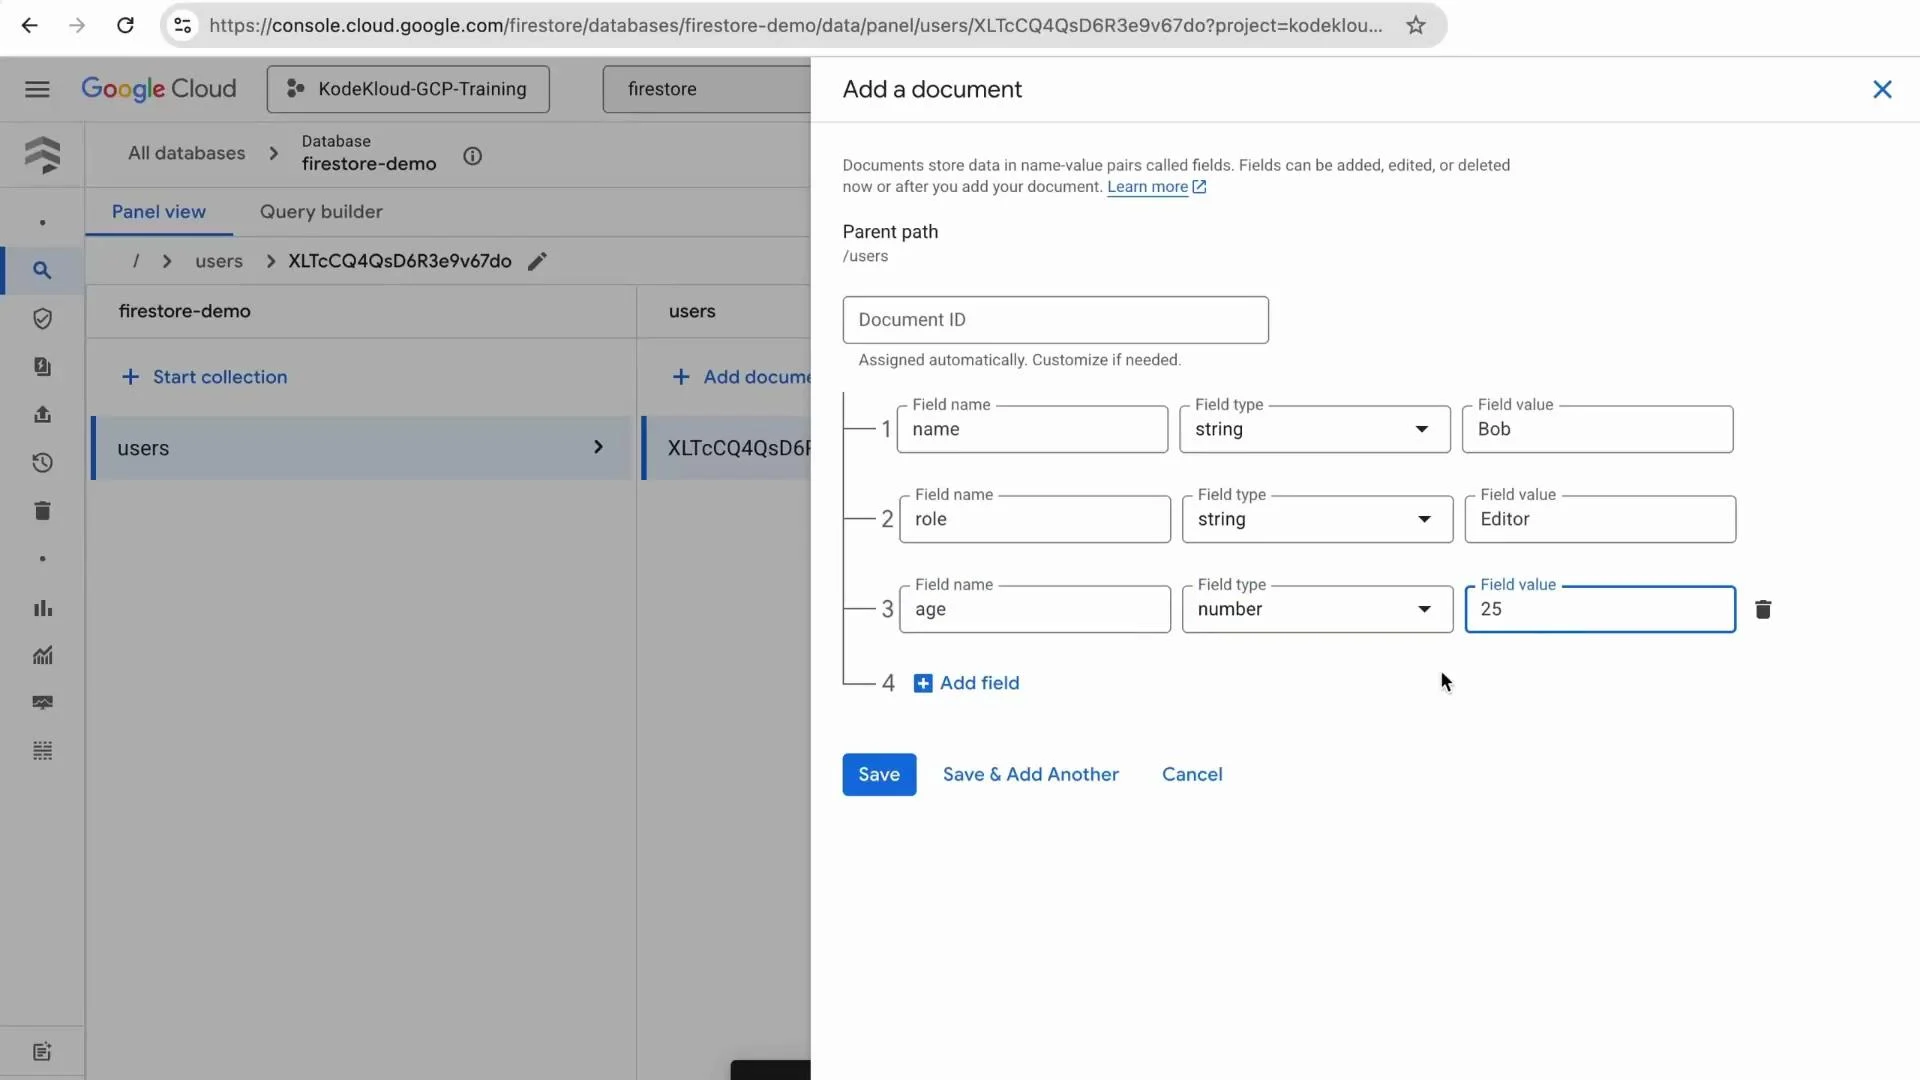
Create a collection and add documents
To add a collection and initial documents from the console:- Click “Start collection”.
- Enter a collection ID, for example
users. - Accept the auto-generated document ID or provide a custom ID.
- Add fields such as
name(string),role(string), andage(number). - Save the document and repeat to add more.
users documents:
When adding Bob as the second document, the console form looks like this:
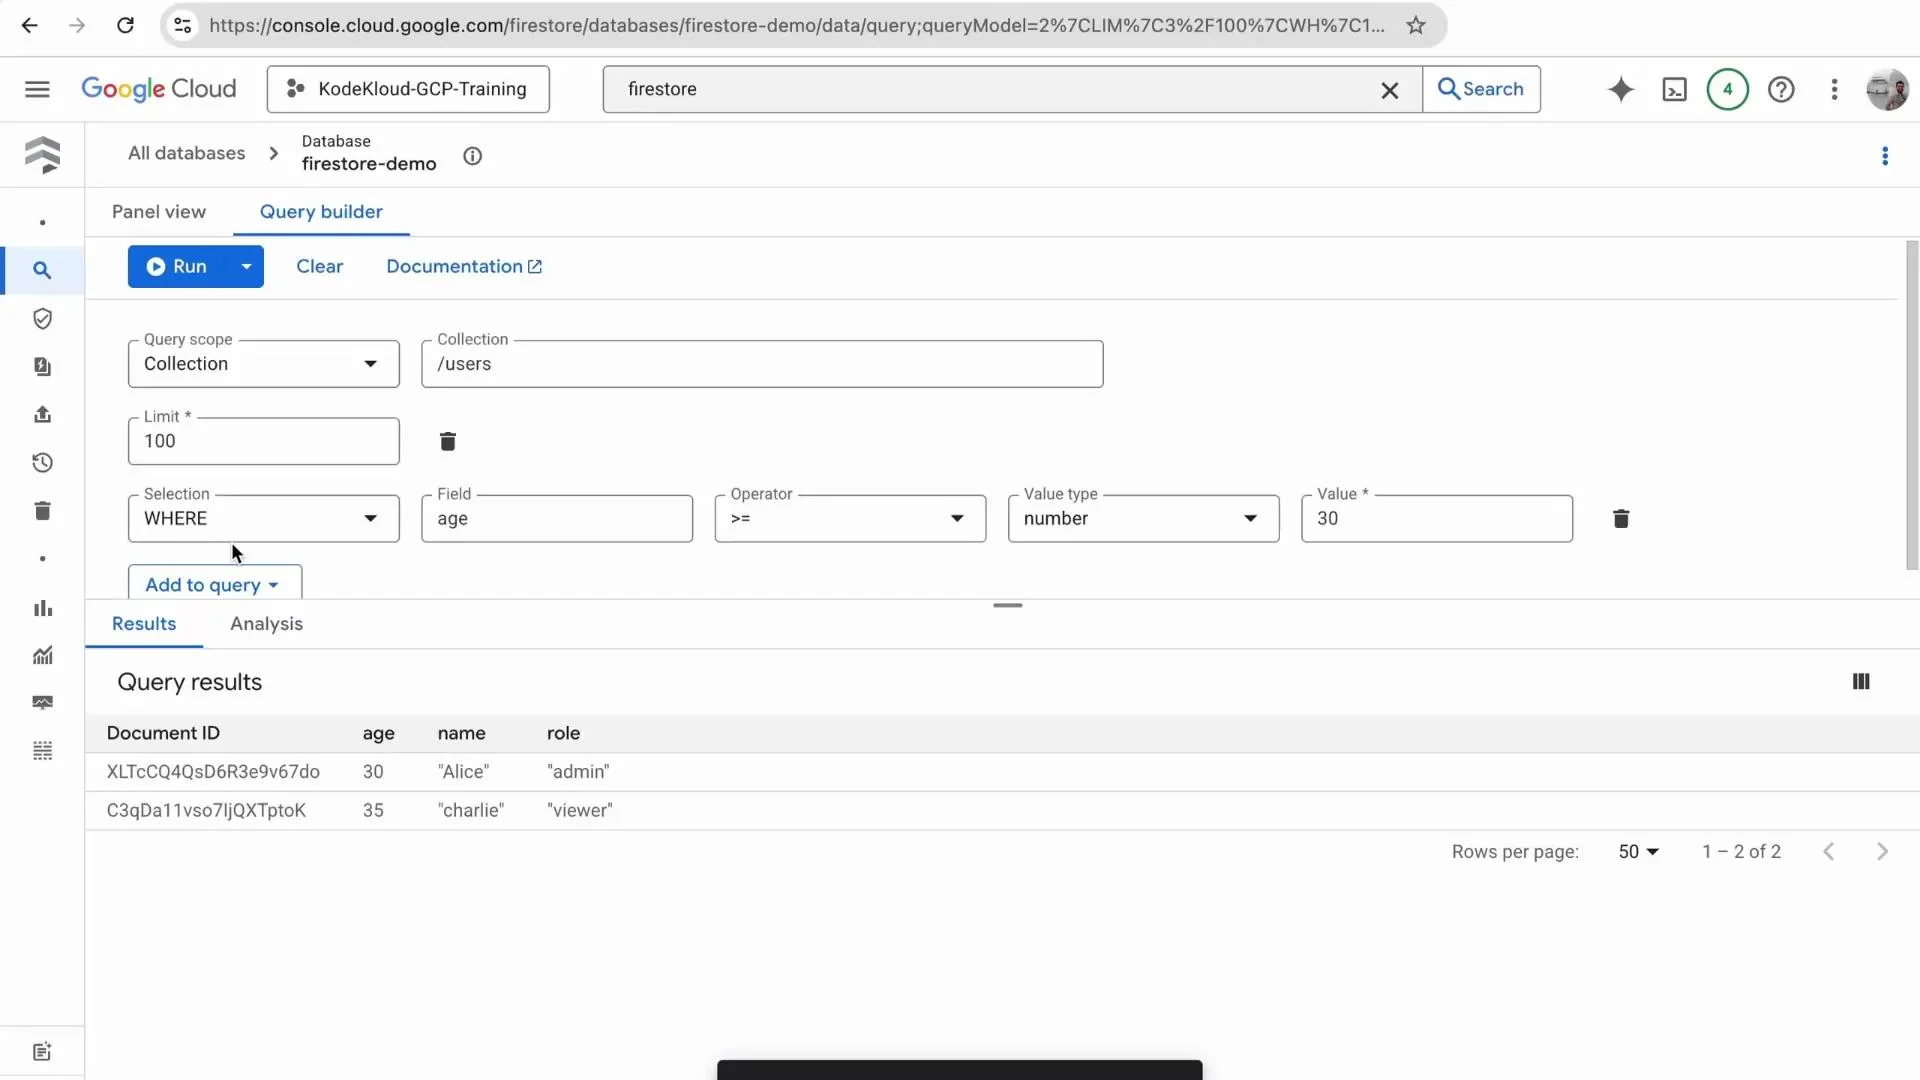
Inspect data and run queries with Query Builder
To explore data interactively, use the Firestore Query Builder:- Click “Query Builder” in the Firestore UI.
- Choose the collection to query (
users). - Add filters (WHERE clauses). Example: to find users aged 30 or older, add a filter on
agewith operator “greater than or equal to” and value30. - Run the query to view matching documents.
age >= 30 (as displayed by the console):
age >= 30 filter looks like this:
Exporting Firestore data for analytics
For analytics workflows (for example, loading into BigQuery), the recommended pattern is:- Export Firestore data to a Google Cloud Storage (GCS) location.
- Transform or normalize exported files to enforce a consistent schema.
- Load the normalized data into BigQuery.
CloudFirestoreExportDatabaseOperator to export Firestore to GCS. Example Airflow DAG task:
- Normalize the records (add missing fields, ensure types are consistent).
- Load into BigQuery using a load job or an operator such as
BigQueryInsertJobOperator.
- Use BigQuery load jobs with an explicitly defined schema to prevent type-mismatch issues.
- Use Dataflow or a transformation job (Python/Beam) to clean and flatten complex/nested documents before loading.
When exporting Firestore for analytics, export to GCS first and apply schema normalization or transformations before loading into BigQuery. This reduces the chance of type mismatches and failed load jobs.
Firestore basics quick reference
Summary
- Firestore is schemaless and stores JSON-like documents in collections.
- Use the Firestore console to create collections, add documents, and run queries with Query Builder to validate data.
- For analytics, export Firestore collections to GCS (manually or via Airflow/Cloud Composer), normalize/transform the exports, and then load into BigQuery.