Hello and welcome back. In this lesson we create a custom IAM role in Google Cloud, attach it to a service account, and verify the permissions. The primary steps are:
  • Create a custom IAM role with specific Cloud Storage read permissions.
  • Create a service account and attach the custom role.
  • Generate and download a service account key (JSON) for external use.
  • Verify access from Cloud Shell or a local client.
This guide demonstrates the Console workflow and provides equivalent gcloud commands so you can automate or repeat the steps. Replace PROJECT_ID, ROLE_ID, SA_NAME, SA_EMAIL, BUCKET, and OBJECT with your actual values.
First, open the GCP Console and go to “IAM & Admin”. You can reach it via the Quick access links or by searching the console search bar. Click the IAM entry to open the IAM page; this view shows principals and their assigned roles. Switch to the Roles tab to view custom and predefined roles.
A screenshot of the Google Cloud Console IAM page showing permissions for the project "KodeKloud-GCP-Training," with tabs to view roles and options to grant or remove access. The roles listed include Cloud Data Fusion Runner, Dataproc Worker, Editor, kodekloud.storage.viewer, and Owner.

1. Create a custom IAM role (Console)

  • In the left-hand panel click Roles, then click Create Role.
  • Enter a descriptive Title (example: KodeKloudStorageViewer), Description (example: KodeKloudCustomRole for viewing storage bucket and object), and an ID (lowercase, URL-safe string such as kodekloudstoragerviewer1) — the console may suggest an ID automatically.
  • Choose the stage (e.g., General Availability) and proceed to add permissions.
When building a read-only storage role, add only the permissions required. For this demo we add these four read permissions:
PermissionPurpose
storage.buckets.listList buckets in a project
storage.buckets.getGet bucket metadata
storage.objects.listList objects in a bucket
storage.objects.getRead object data and metadata
Search for each permission in the permissions selector and click Add for each.
A screenshot of the Google Cloud Console IAM "Create role" page with a custom role named "kodekloud.storage.viewer" being created. The form is populated and shows four selected storage permissions (storage.buckets.get, storage.buckets.list, storage.objects.get, storage.objects.list).
Important: these four permissions are read-only — they do not allow uploading, modifying, or deleting buckets or objects. For write or delete capabilities add 
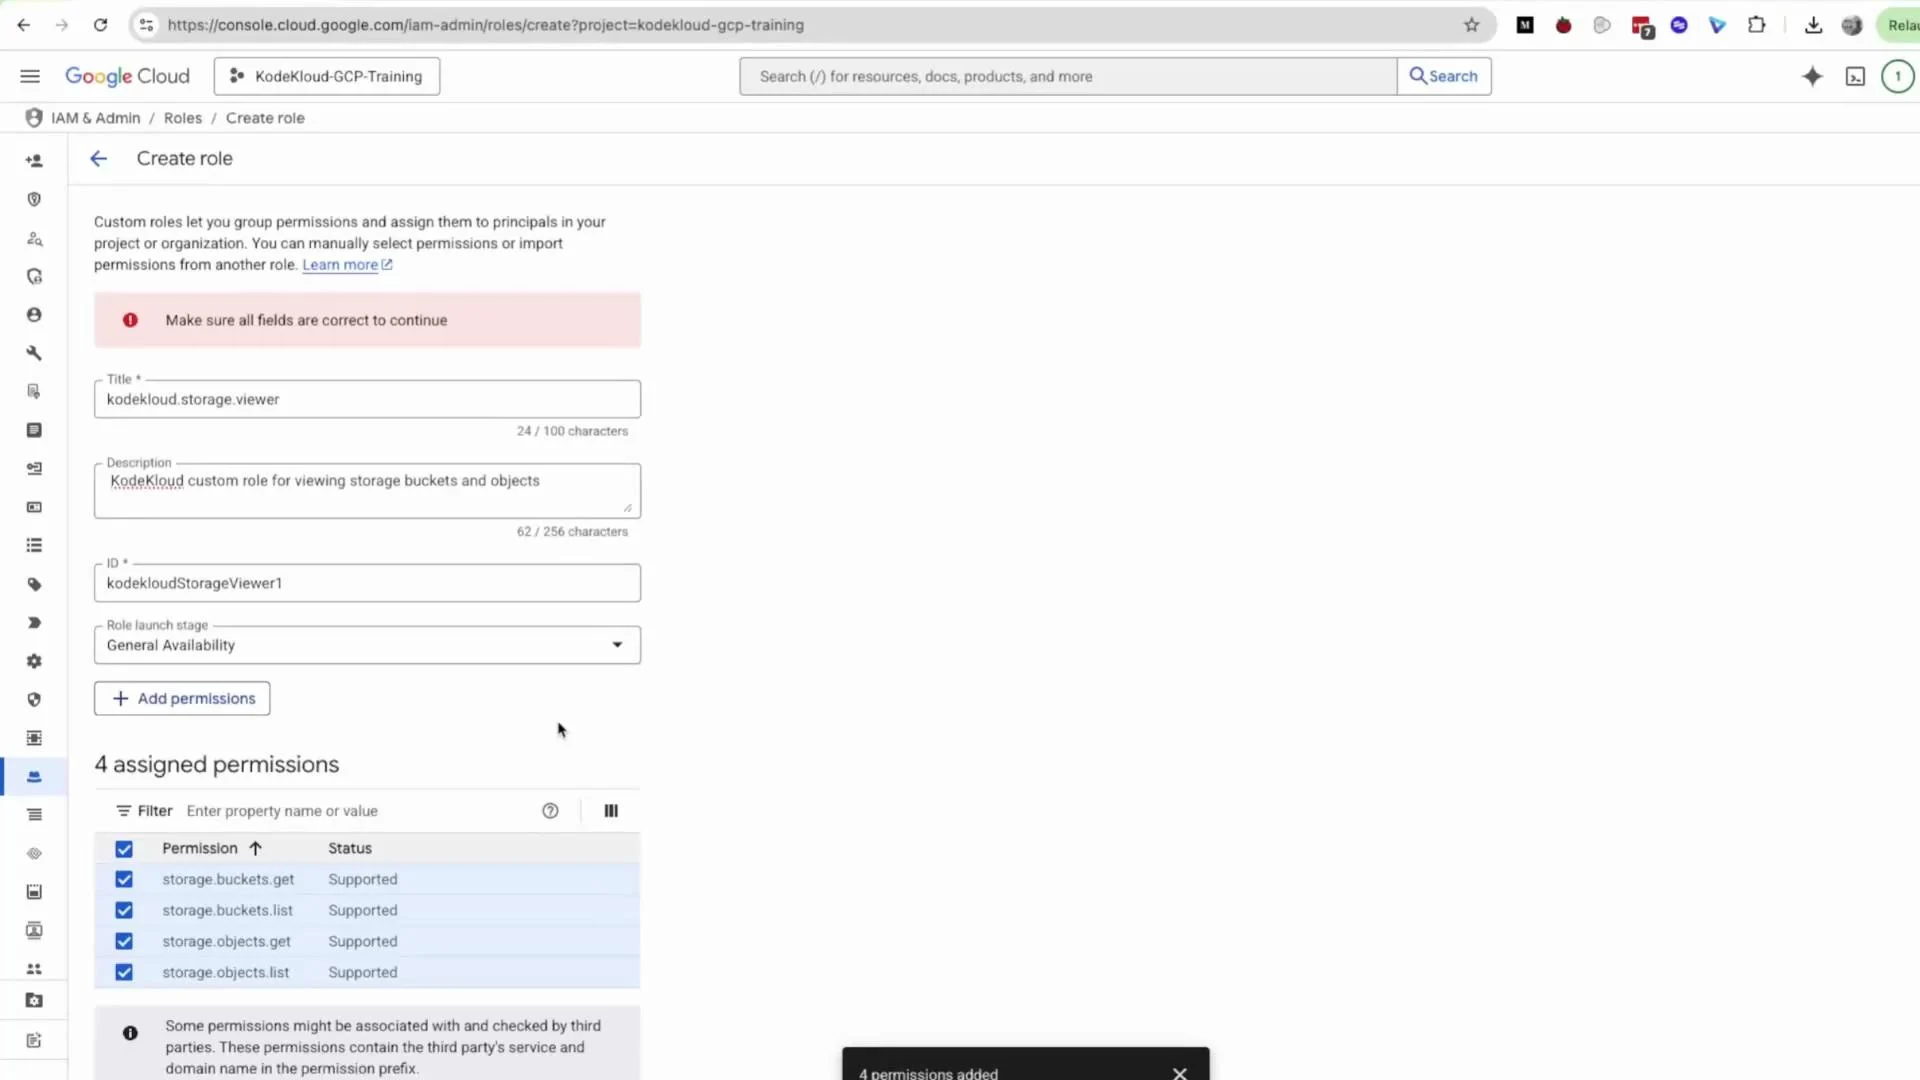
storage.objects.create, storage.objects.delete, or storage.buckets.create as needed, or use a predefined role such as Storage Object Viewer / Storage Object Admin. 
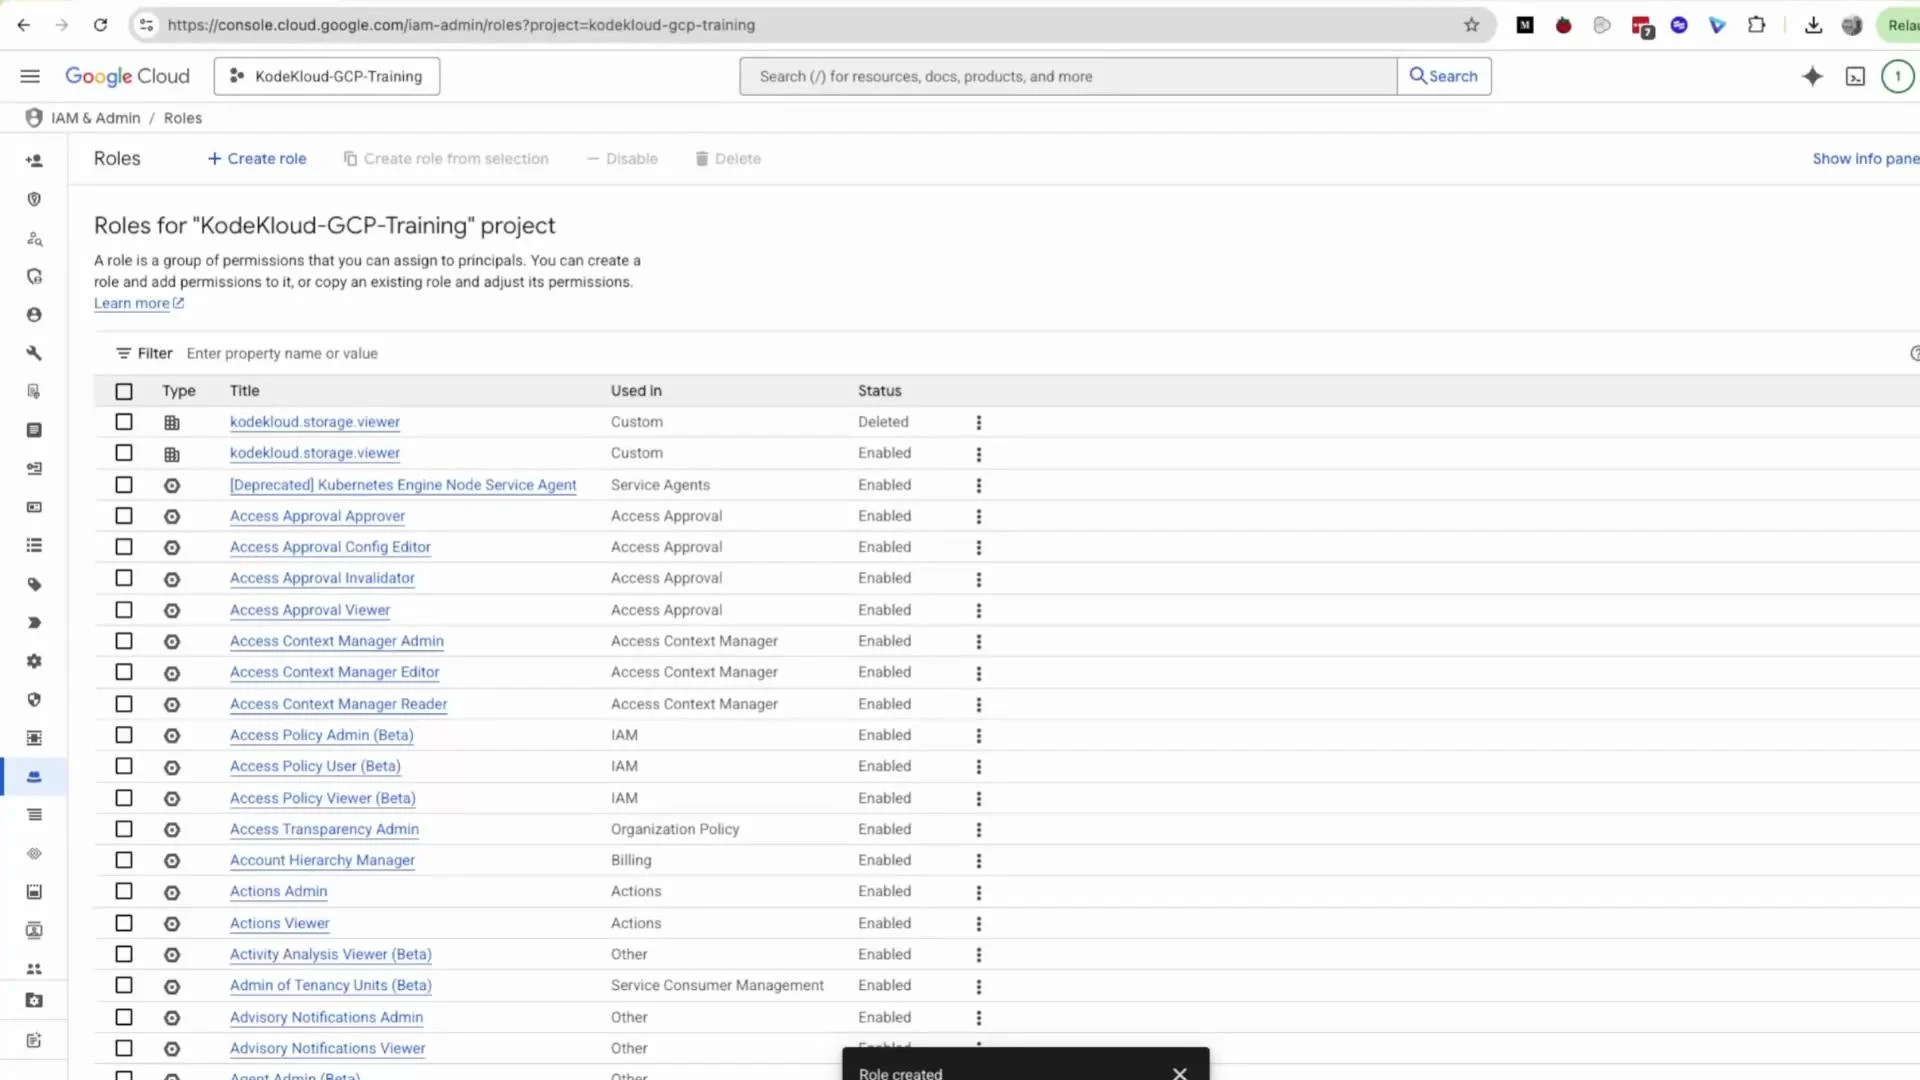
After adding permissions, click Create. If you previously created and deleted a similar role you may see multiple entries; ensure you pick the enabled role and use a unique ID when creating new roles.
A screenshot of the Google Cloud Console showing the IAM & Admin "Roles" page for the "KodeKloud-GCP-Training" project. It lists role names, where they're used, and their status (enabled/deleted) in a table.
Alternative: create the same custom role with gcloud (example)
gcloud iam roles create kodekloudstoragerviewer1 \
  --project=PROJECT_ID \
  --title="KodeKloudStorageViewer" \
  --description="KodeKloudCustomRole for viewing storage bucket and object" \
  --permissions="storage.buckets.list,storage.buckets.get,storage.objects.list,storage.objects.get" \
  --stage=GA

2. Attach the role to a user or service account

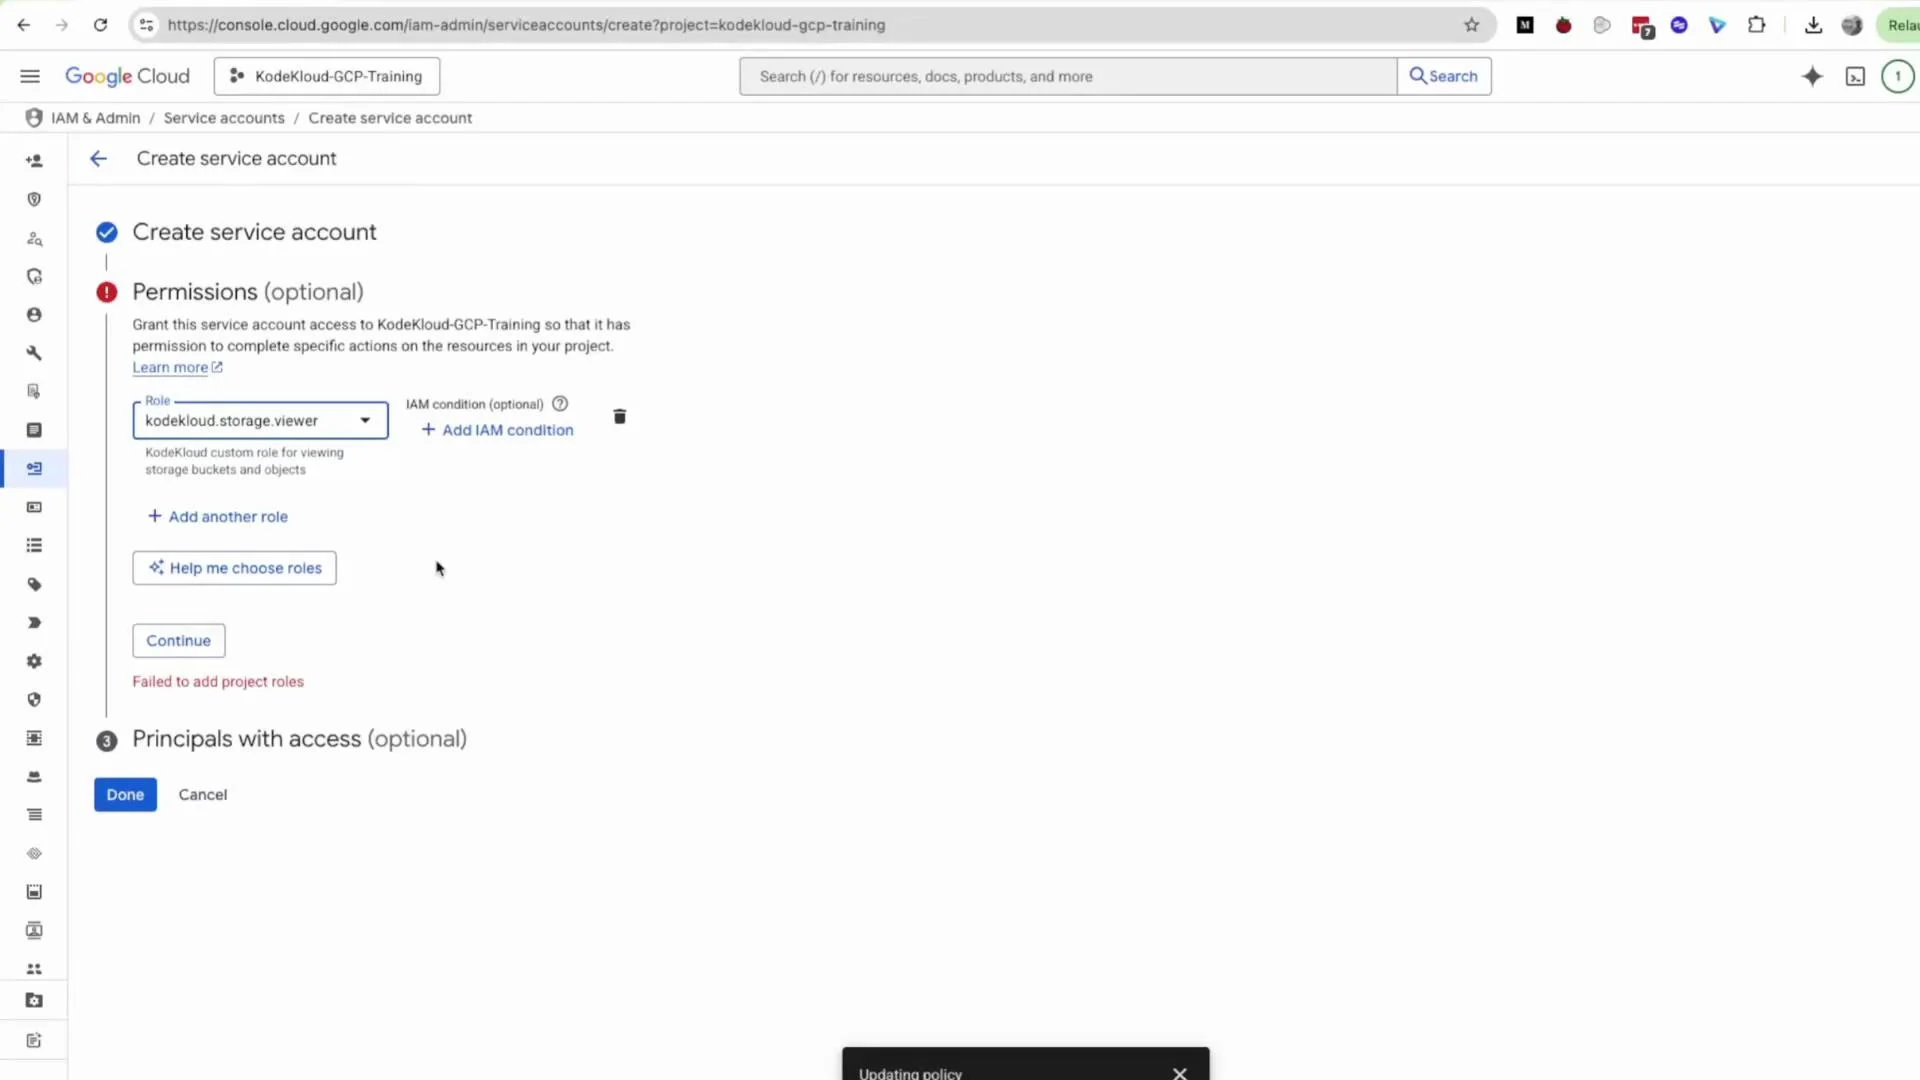
You can attach the custom role to a user via IAM -> Grant Access, or assign it to a service account. This demo creates a service account and assigns the custom role during creation.
  • In the side panel select Service Accounts and click Create Service Account.
  • Provide a Name (example: kodekloud-test-sa) — the Service account ID is auto-generated and editable — add a description, then click Create and Continue.
  • On the Permissions step, search for your custom role (e.g., kodekloud.storage.viewer or your custom role ID) and assign it. If a role appears deleted or disabled you may get an error such as “Failed to add project roles” — choose the enabled version.
A Google Cloud Console screenshot of the "Create service account" IAM page showing the Permissions step with the role "kodekloud.storage.viewer" selected. A red warning reads "Failed to add project roles" and buttons like Continue and Done are visible.
Finish creation and refresh the Service Accounts list — the new service account should now be visible.
A screenshot of the Google Cloud Console showing the IAM & Admin "Service accounts" page for the project "KodeKloud-GCP-Training." It displays a table of service account emails, their statuses (Enabled), names, descriptions, and OAuth2 client IDs.
Equivalent gcloud commands to create the SA and bind the custom role:
# Create a service account
gcloud iam service-accounts create kodekloud-test-sa \
  --display-name="KodeKloud Test Service Account" \
  --project=PROJECT_ID

# Grant the custom role to the service account
gcloud projects add-iam-policy-binding PROJECT_ID \
  --member="serviceAccount:kodekloud-test-sa@PROJECT_ID.iam.gserviceaccount.com" \
  --role="projects/PROJECT_ID/roles/kodekloudstoragerviewer1"

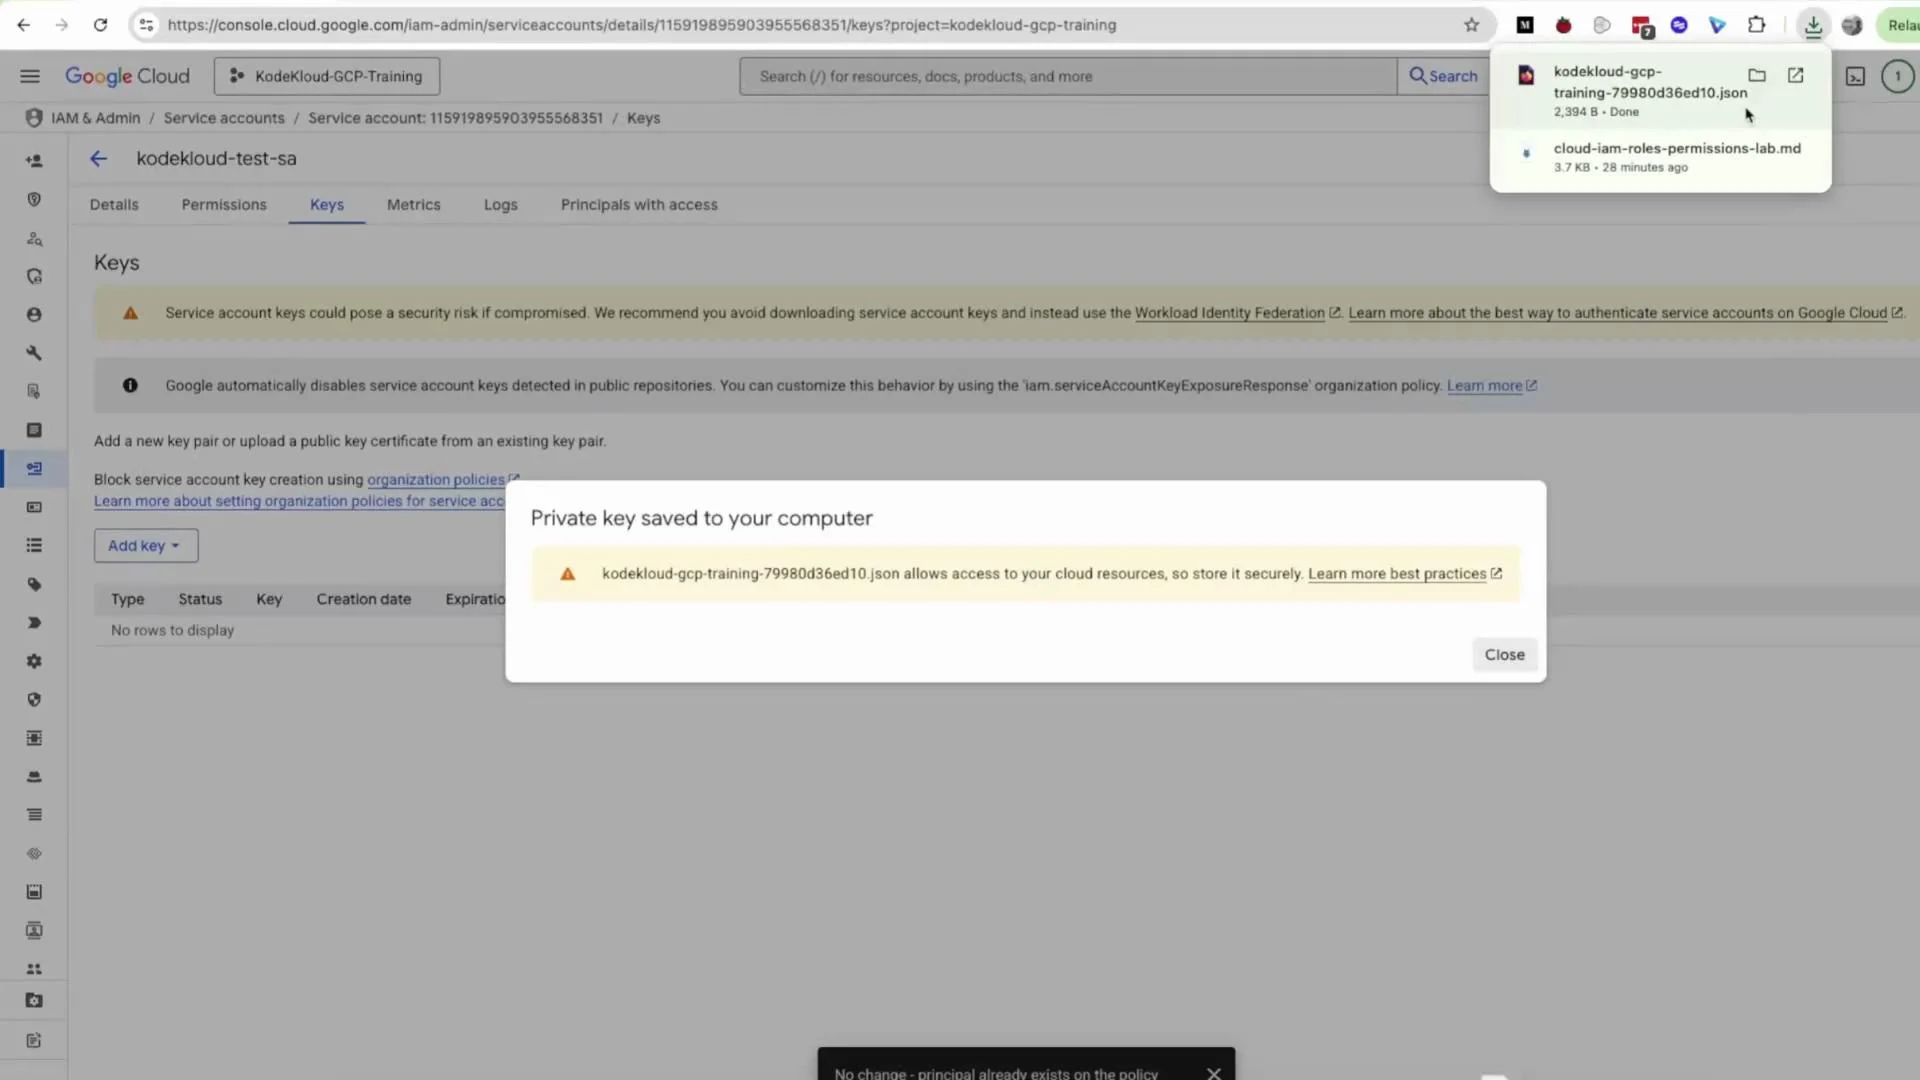
3. Create and download a service account key (JSON)

If you plan to use this service account from outside GCP (for local development, CI, or other systems), generate a key:
  • Click the service account to open its details page.
  • Select the Keys tab, click Add Key -> Create new key, choose JSON, and click Create.
  • The JSON key will be downloaded to your machine.
A Google Cloud Console screenshot showing the IAM & Admin service accounts keys page with a popup saying "Private key saved to your computer" and a downloaded JSON key file. The page warns about security risks of service account keys and provides options to add keys.
You can also create a key using gcloud:
gcloud iam service-accounts keys create key.json \
  --iam-account=kodekloud-test-sa@PROJECT_ID.iam.gserviceaccount.com \
  --project=PROJECT_ID
Service account JSON keys are long-lived credentials that grant access to your project. Treat these files like secrets: store them securely, rotate them regularly, and avoid committing them to source control. When possible prefer Workload Identity (for GKE), Workload Identity Federation, or short-lived tokens instead of downloading keys.

4. Verify permissions (Cloud Shell or local client)

To authenticate using the downloaded JSON key:
# Option A: Activate the service account for gcloud
gcloud auth activate-service-account --key-file=key.json

# Option B: Set GOOGLE_APPLICATION_CREDENTIALS for SDKs and client libraries
export GOOGLE_APPLICATION_CREDENTIALS="/path/to/key.json"
Test read-only access to Cloud Storage (examples):
# List buckets (requires storage.buckets.list)
gsutil ls

# List objects in a bucket (requires storage.objects.list)
gsutil ls gs://BUCKET

# Read an object to stdout (requires storage.objects.get)
gsutil cat gs://BUCKET/OBJECT
If you attempt an action not covered by the custom role (for example, gsutil cp to upload or gsutil rm to delete), you’ll receive an error indicating insufficient permissions. Use this to validate that the role is properly scoped as read-only.

Wrap-up

You now have:
  • A custom read-only Cloud Storage role,
  • A service account with that role attached,
  • A JSON key downloaded for external authentication,
  • Commands to verify permissions locally or in Cloud Shell.
Next: test access in your application or CI environment using the JSON key or adopt Workload Identity / Workload Identity Federation for better security posture.

Watch Video