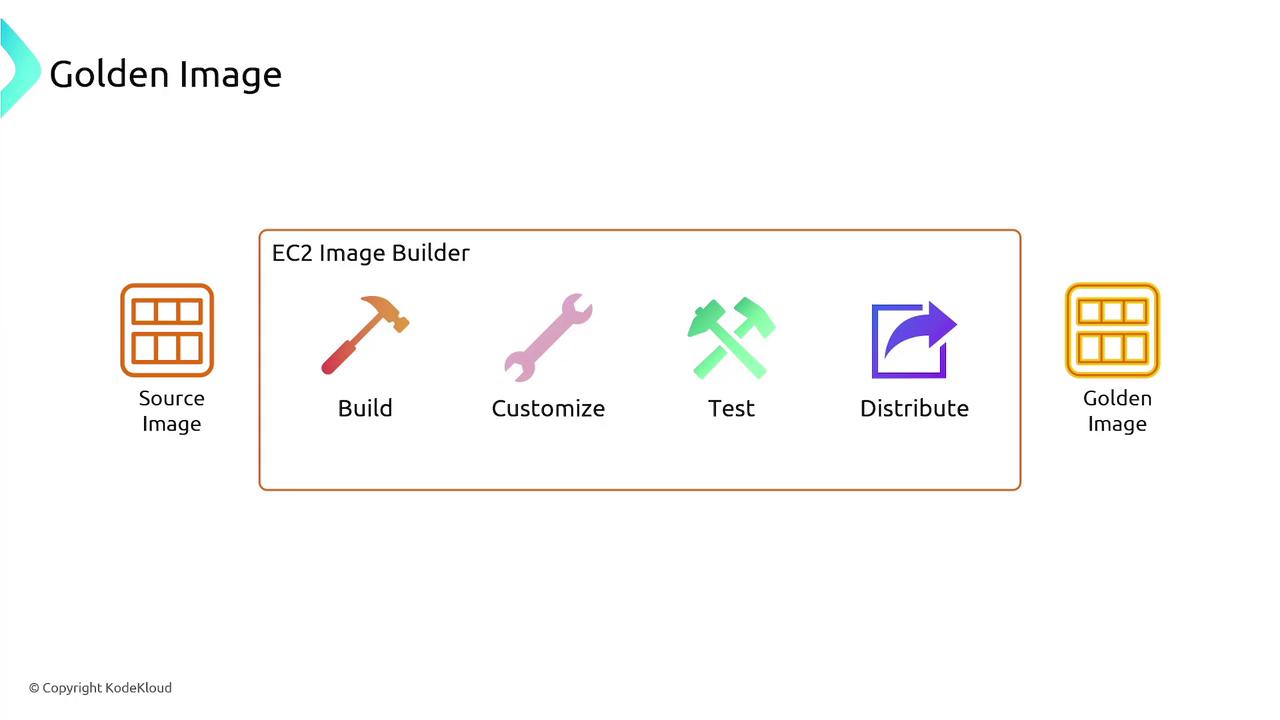
How to Create a Golden Image
Follow these steps to create a golden image with EC2 Image Builder:-
Select a Base Image:
Begin with a clean operating system installation like Ubuntu or macOS. This base image serves as your starting point for further customization. -
Build Phase:
- Install necessary applications and tools.
- Remove any unwanted software packages to maintain a lean image.
-
Customization:
Adjust system and network settings and run any custom scripts to further tailor the image to your requirements. -
Testing Phase:
Execute functional tests or security checks to confirm that the image meets your standards. While AWS offers built-in tests, you can also define custom tests suited to your environment. -
Distribution Phase:
Specify the AWS regions where the image should be available and share it with other AWS accounts if needed.
Deploying the Custom Image
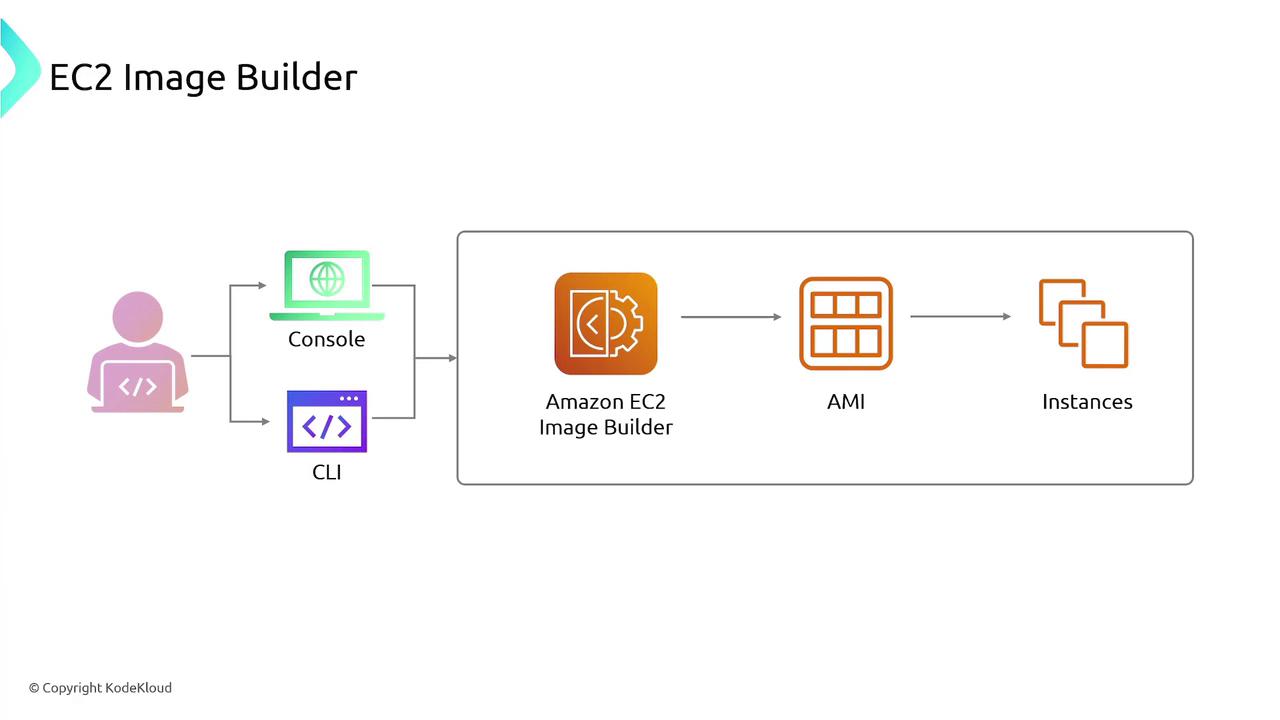
Once your new image is ready, the process advances to the run stage. In this phase, deploy one or more EC2 instances using the custom image. You can manage this deployment seamlessly via the CLI, console, or SDK.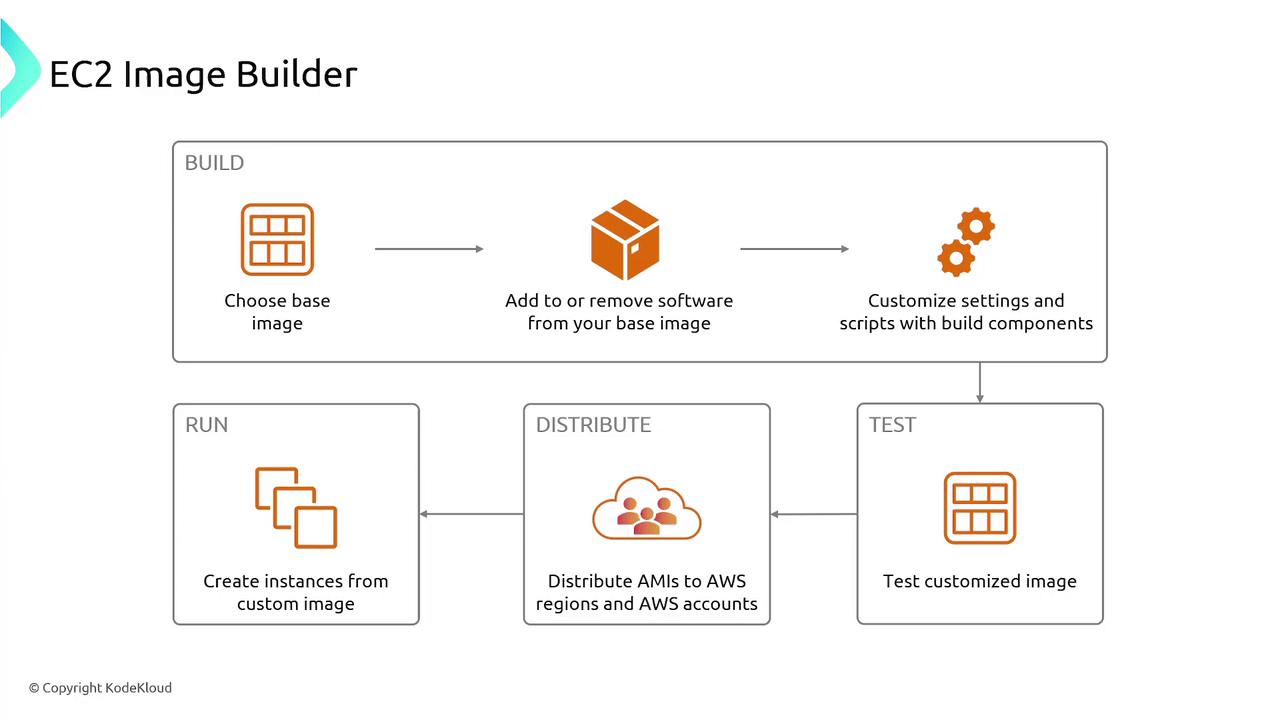
Automating Your Image Creation Pipeline
EC2 Image Builder allows you to automate the entire image creation pipeline. The process starts with specifying a source image and a build component (or “recipe”). Then, you configure the necessary infrastructure settings—such as VPCs, subnets, and security groups—for the build and testing phases. Finally, you set up the distribution configuration, which dictates where and how the image should be shared.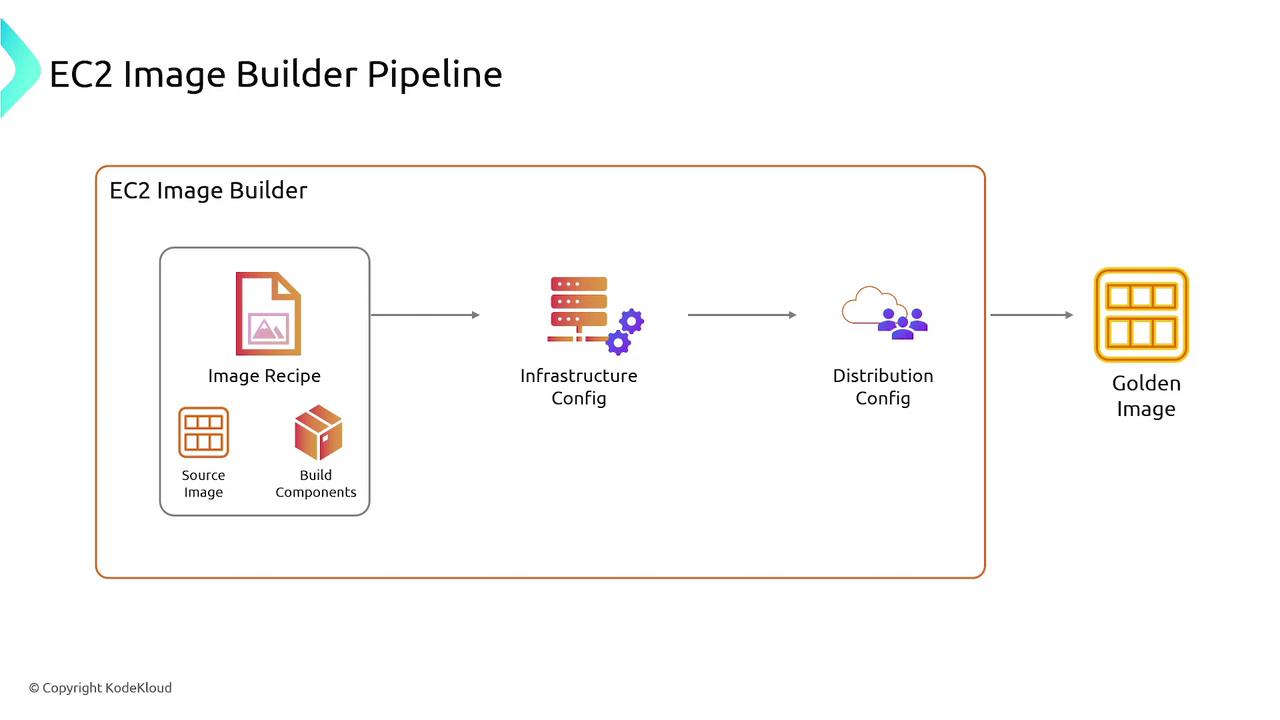
- Automated Image Creation: Eliminates manual steps and minimizes human error.
- Enhanced Security: Automates patch management and applies AWS or custom security policies.
- Consistent Workflows: Ensures standardization across all deployments.
- Simplified Version Management: Easily roll back to previous images if needed.