Learn to use AWS security groups and NACLs for traffic control to AWS resources, including launching an EC2 instance and modifying security group rules.
In this lesson, you’ll learn how to leverage AWS security groups and network ACLs (NACLs) to control traffic to and from your AWS resources. We begin by launching an Amazon Elastic Compute Cloud (EC2) instance and applying security groups to efficiently manage access. This method applies equally to other resources such as load balancers and databases, as they use similar configuration processes.
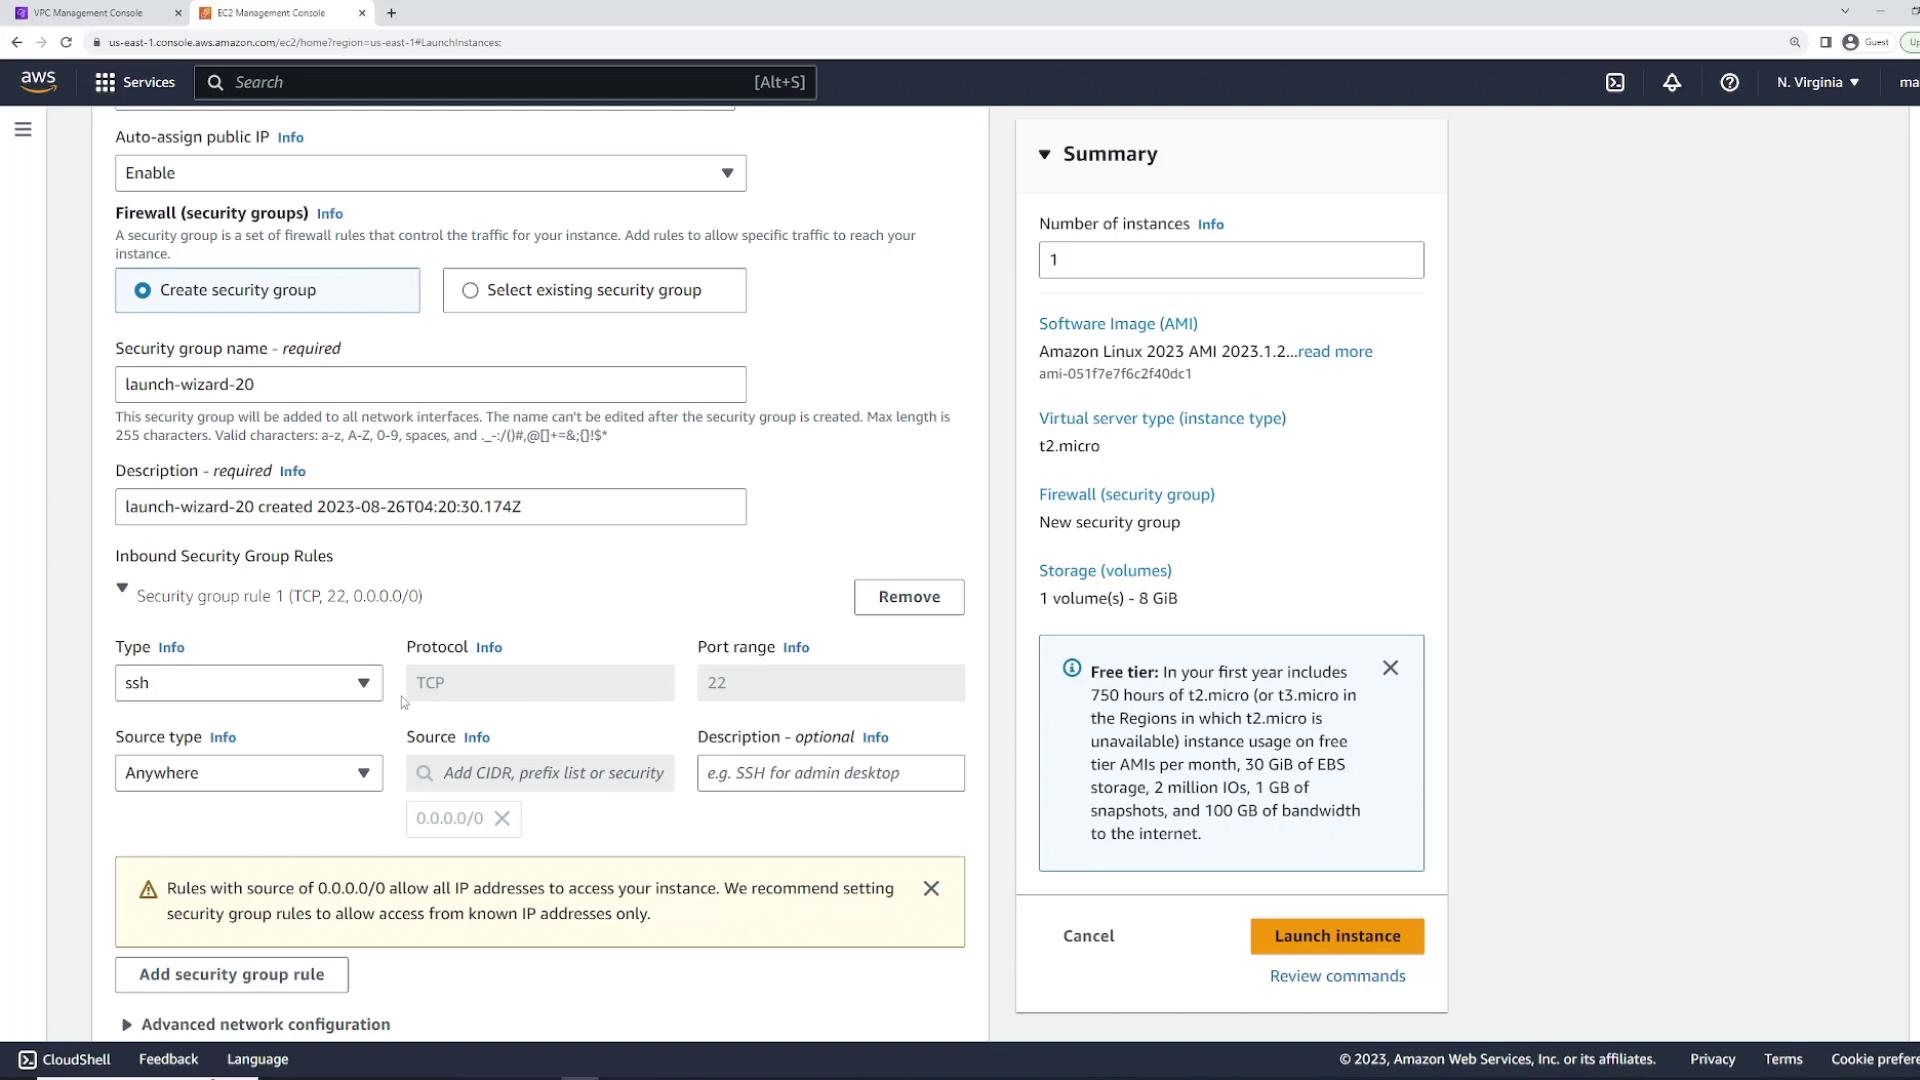
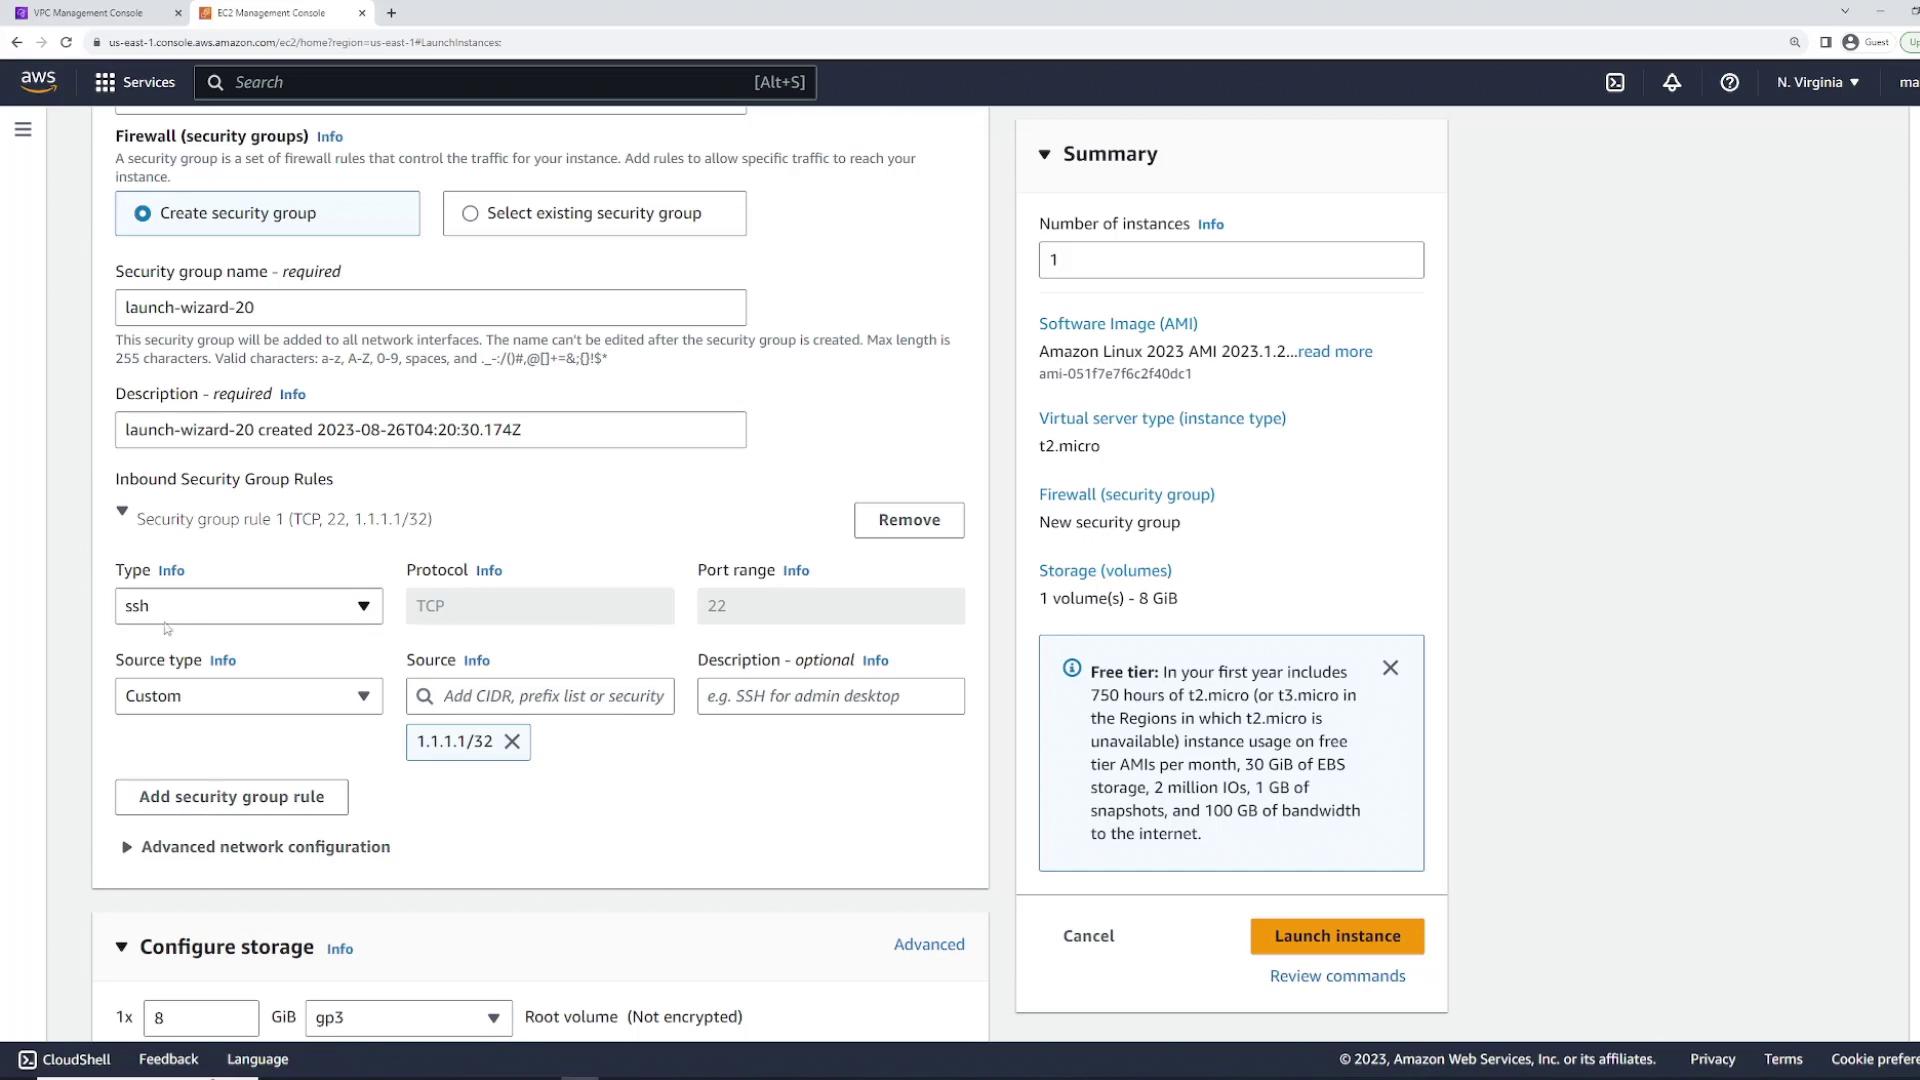
First, create an EC2 instance using the default Linux image. For demonstration, name the instance “server one” and launch it within an existing Virtual Private Cloud (VPC). During setup, you will have the option to configure a security group. If you do not select an existing security group, AWS will automatically create one for you. By default, this security group contains an inbound rule that permits SSH (TCP port 22) access from any IP address (0.0.0.0/0).
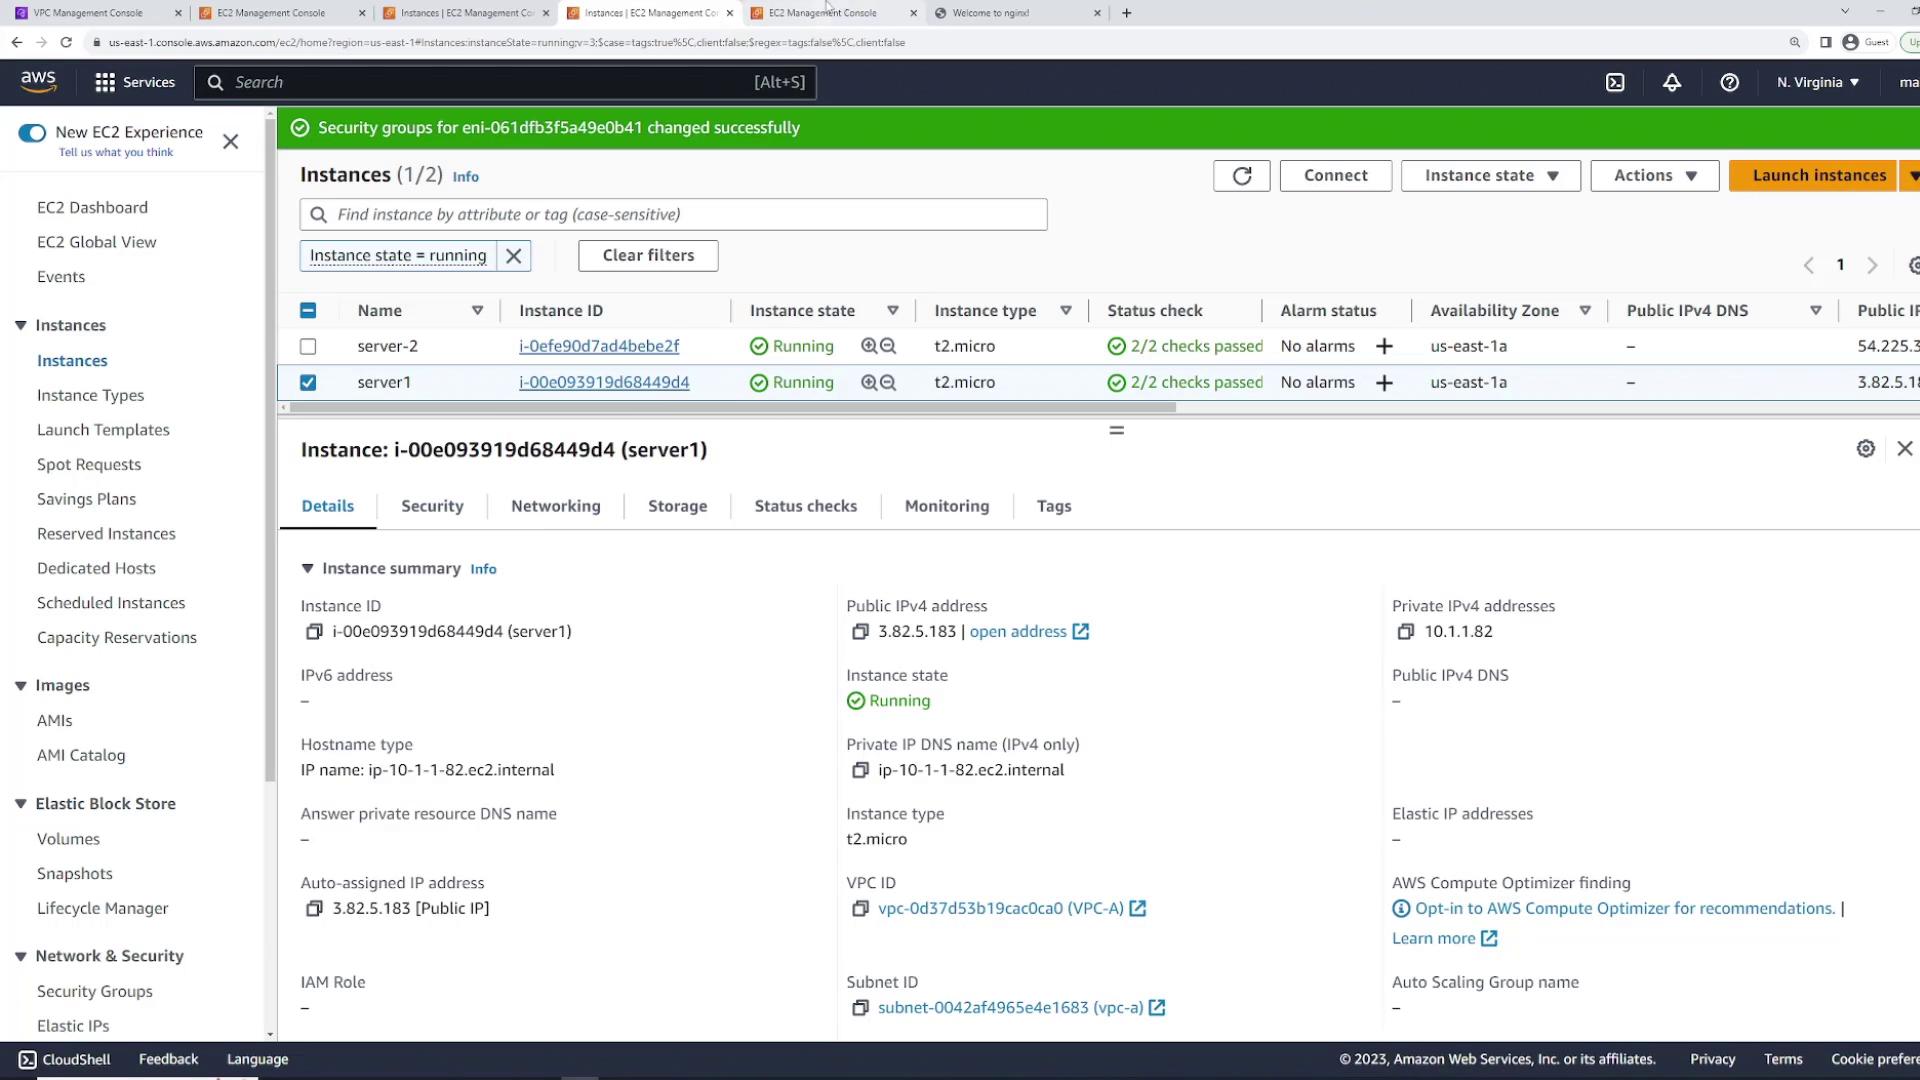
The default rule uses the TCP protocol, essential for SSH connections. However, you can customize this rule to use a different protocol or port, such as HTTP on port 80. For this demo, we keep the default SSH configuration.Once the instance is launched, navigate to it in the EC2 console. Although the status may initially show as “initializing,” it will quickly change to “running.” To verify the security group settings, select the instance and check the “Security” tab. You will see an inbound rule allowing SSH (port 22) and an outbound rule permitting all traffic.
To test connectivity, use the following SSH command:
ssh -i main.pem ec2-user@3.82.5.183
If port 22 is open in the security group, the connection will be successful. Otherwise, the connection attempt will fail.
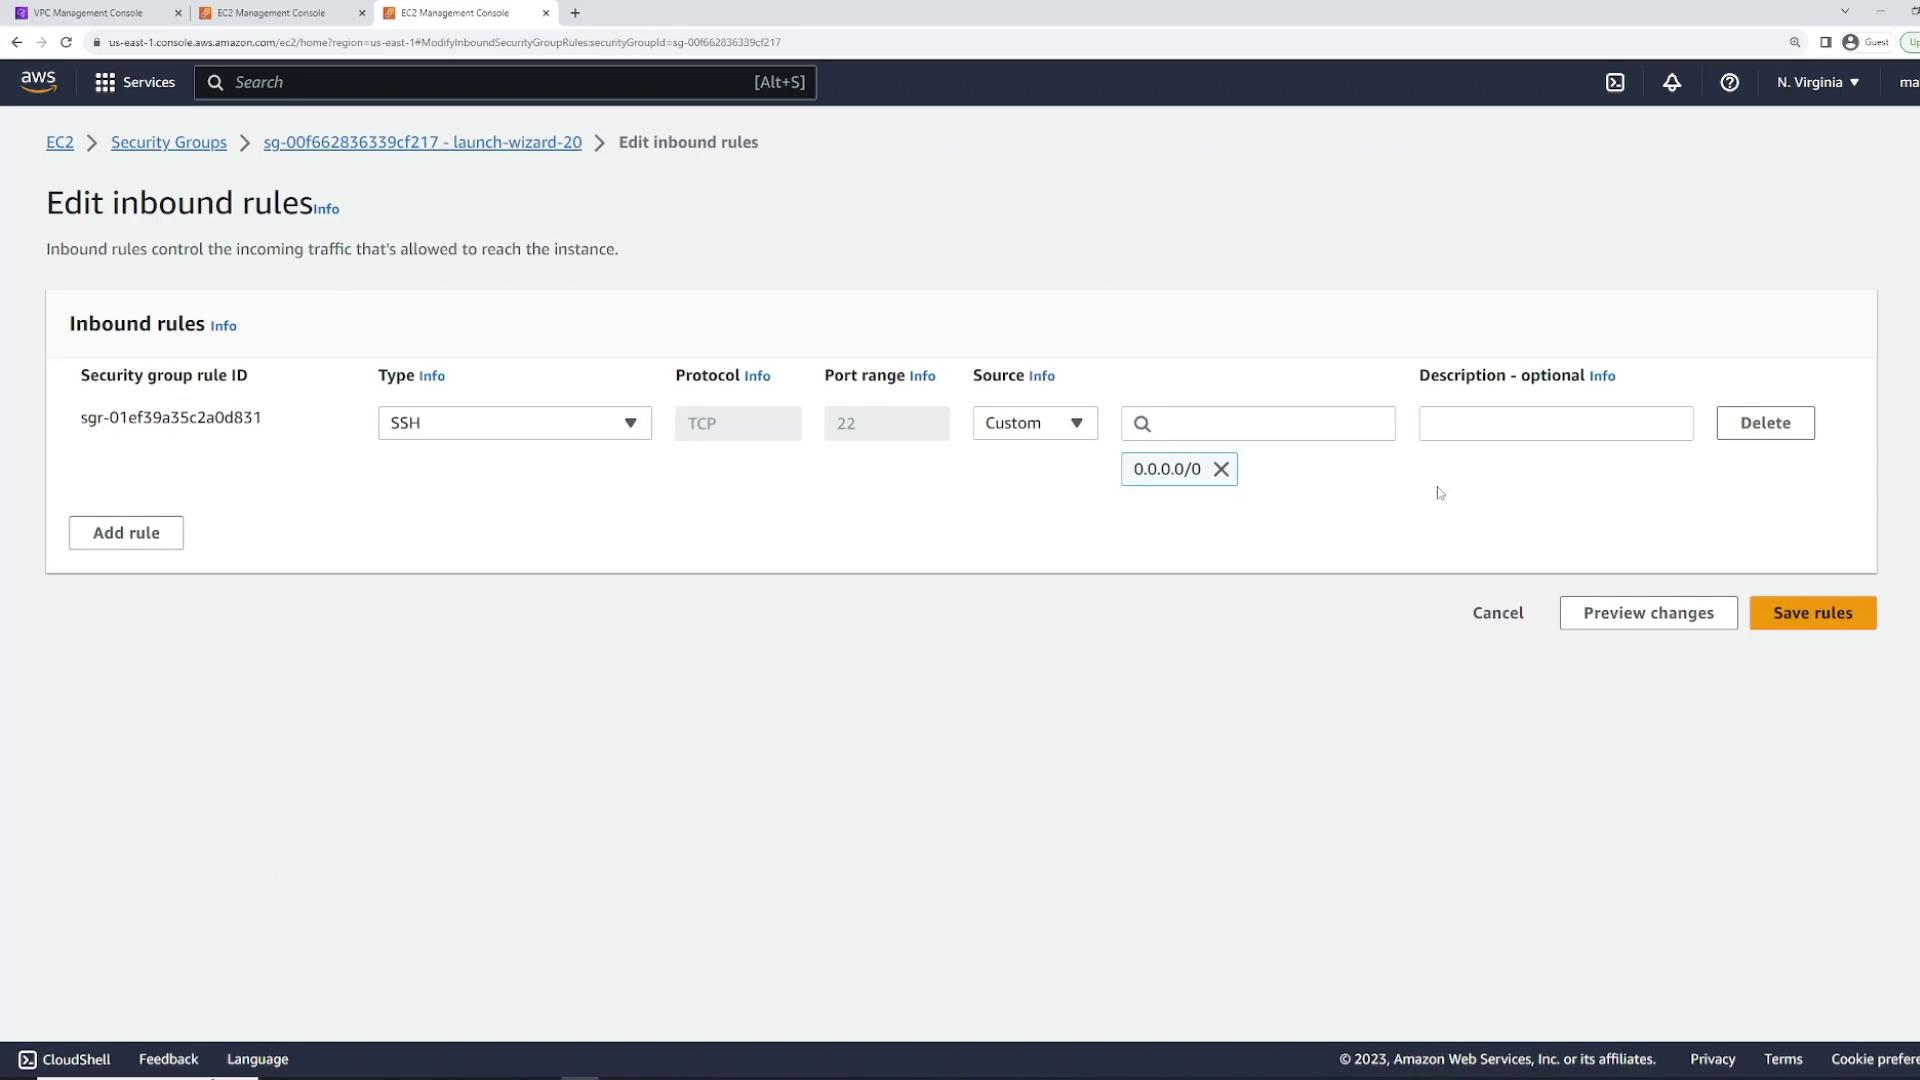
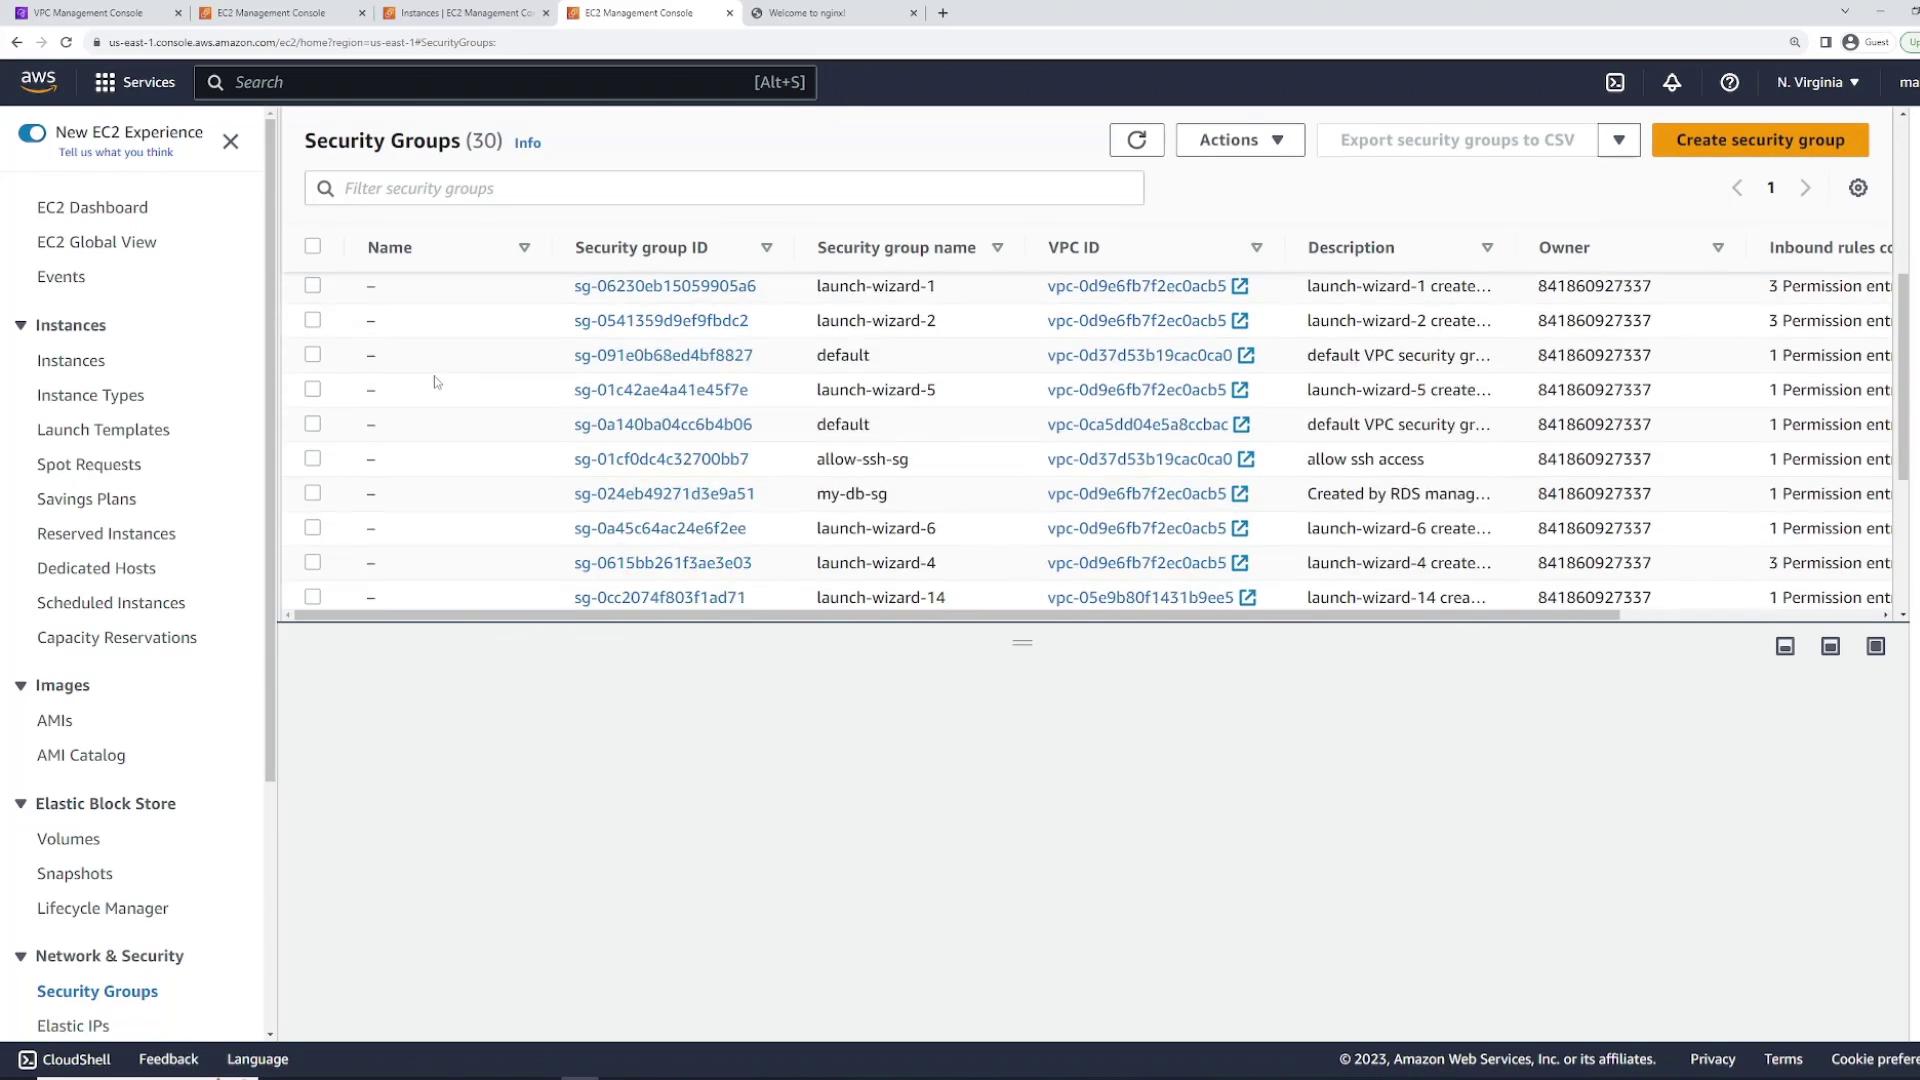
Now, let’s modify the security group rules to restrict access. Open the security group page in a new tab and click “Edit inbound rules.” Remove the existing SSH inbound rule so that the instance has no inbound rules, effectively blocking all traffic.
When you attempt to SSH into the instance again, the connection will hang because no inbound rules permit access:
C:\Users\sanje\Documents\scratch\aws-demo>ssh -i main.pem ec2-user@3.82.5.183 - launch-wizard-20The authenticity of host '3.82.5.183 (3.82.5.183)' can't be established.ECDSA key fingerprint is SHA256:8kdgYdu32+mHW5/8xQ49708P4ChRwRBn+oSeBmM.Are you sure you want to continue connecting (yes/no/[fingerprint])? yesWarning: Permanently added '3.82.5.183' (ECDSA) to the list of known hosts.Amazon Linux 2023
And similarly:
C:\Users\sanje\Documents\scratch\aws-demo>ssh -i main.pem ec2-user@3.82.5.183The authenticity of host '3.82.5.183 (3.82.5.183)' can't be established.ECDSA key fingerprint is SHA256:BDxdgWyu32+mHHW5/8xQ409708P4CHRwRBn+oSeBmM.Are you sure you want to continue connecting (yes/no/[fingerprint])? yesWarning: Permanently added '3.82.5.183' (ECDSA) to the list of known hosts. # ~ ##### ~~~~~ ##### ~~~~~~ ###|# ~~~~~~~~ #/__ ~~~~~~~~~~~ V\'-._ ~~~~~~~~~~~~ _.-' /m/[ec2-user@ip-10-1-1-82 ~]$ client_loop: send disconnect: Connection resetC:\Users\sanje\Documents\scratch\aws-demo>ssh -i main.pem ec2-user@3.82.5.183
Since there are no inbound rules, remote connections cannot be established. Stop this test connection to prevent unintended lockouts.
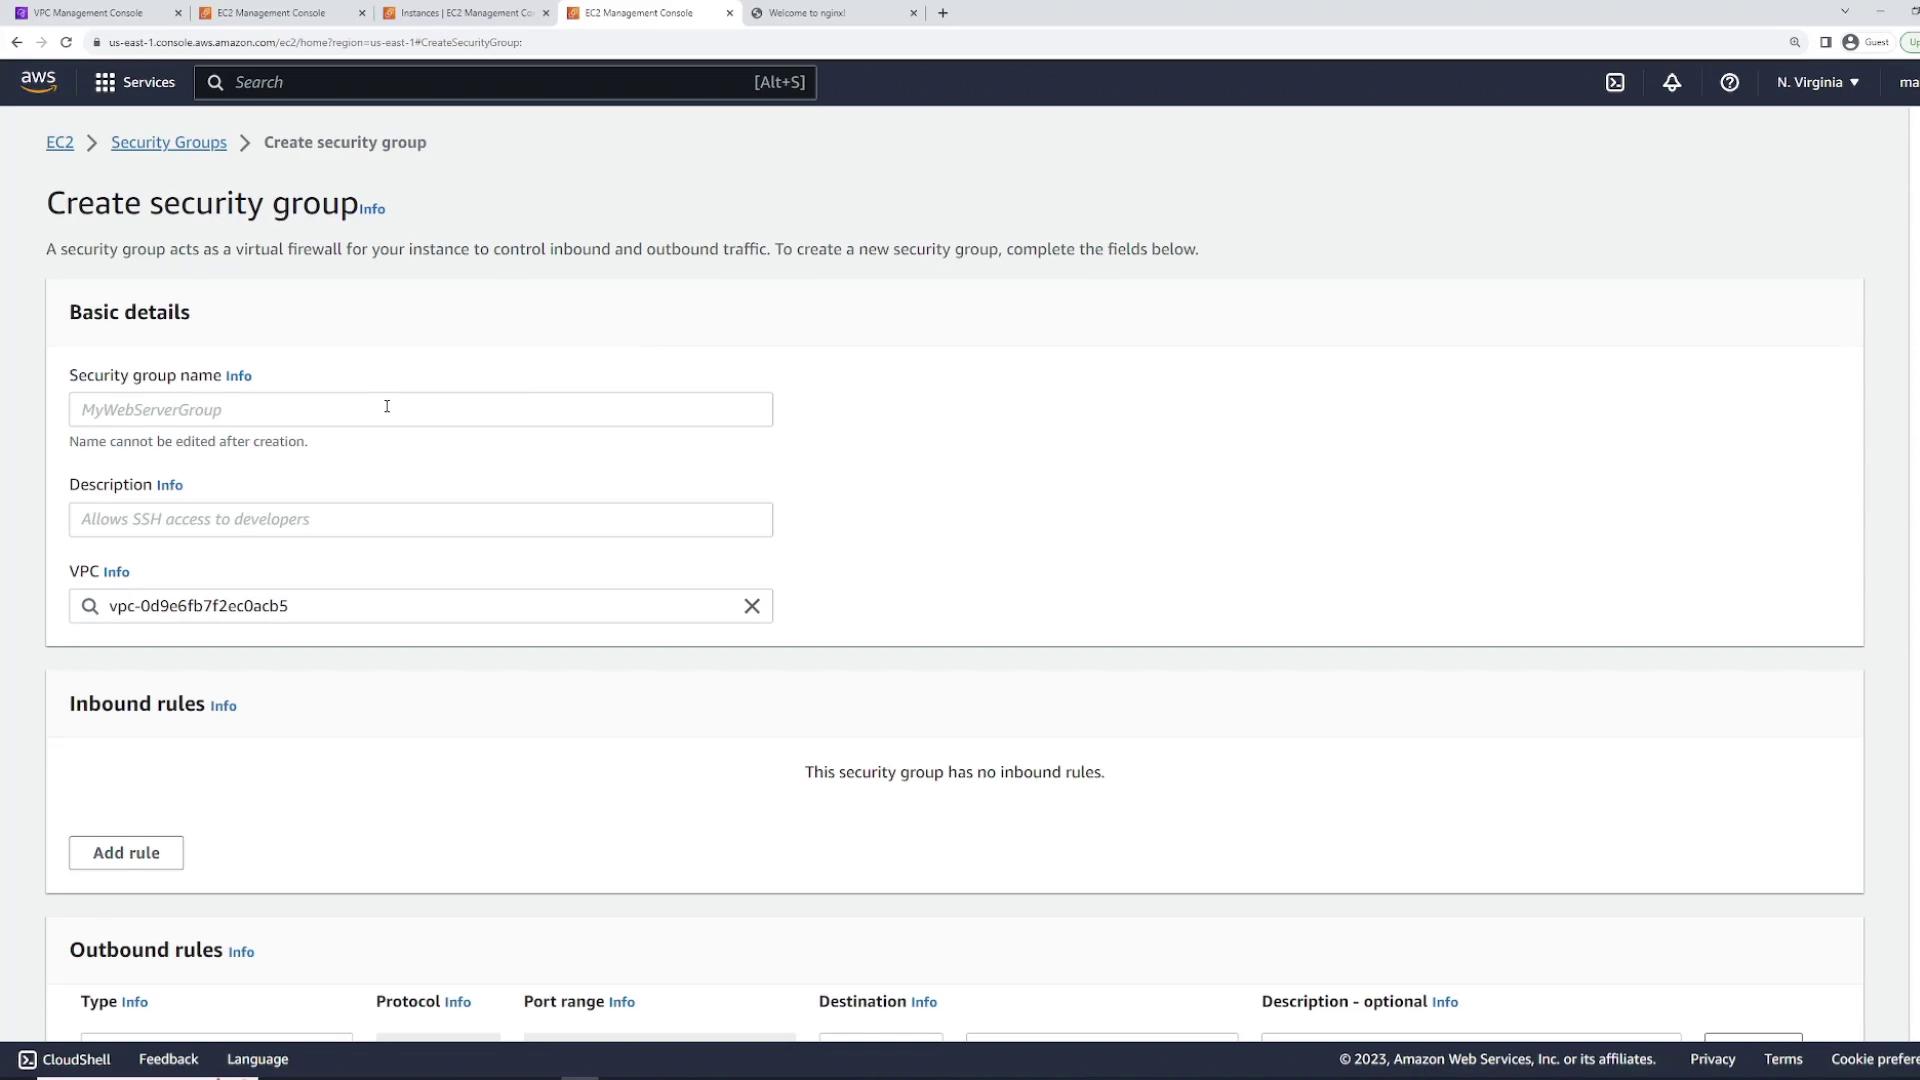
To restore connectivity, create a new security group for the server. Name it “web server security group” (or a similar descriptive name such as “web applications”) and ensure you select the correct VPC where the server exists. Define an inbound rule that allows SSH traffic (port 22) from any IP address (0.0.0.0/0), keeping the outbound rule to allow all traffic.This newly created security group mirrors the initial default rule but is manually set up. After creation, reattach it to your EC2 instance (“server one”):
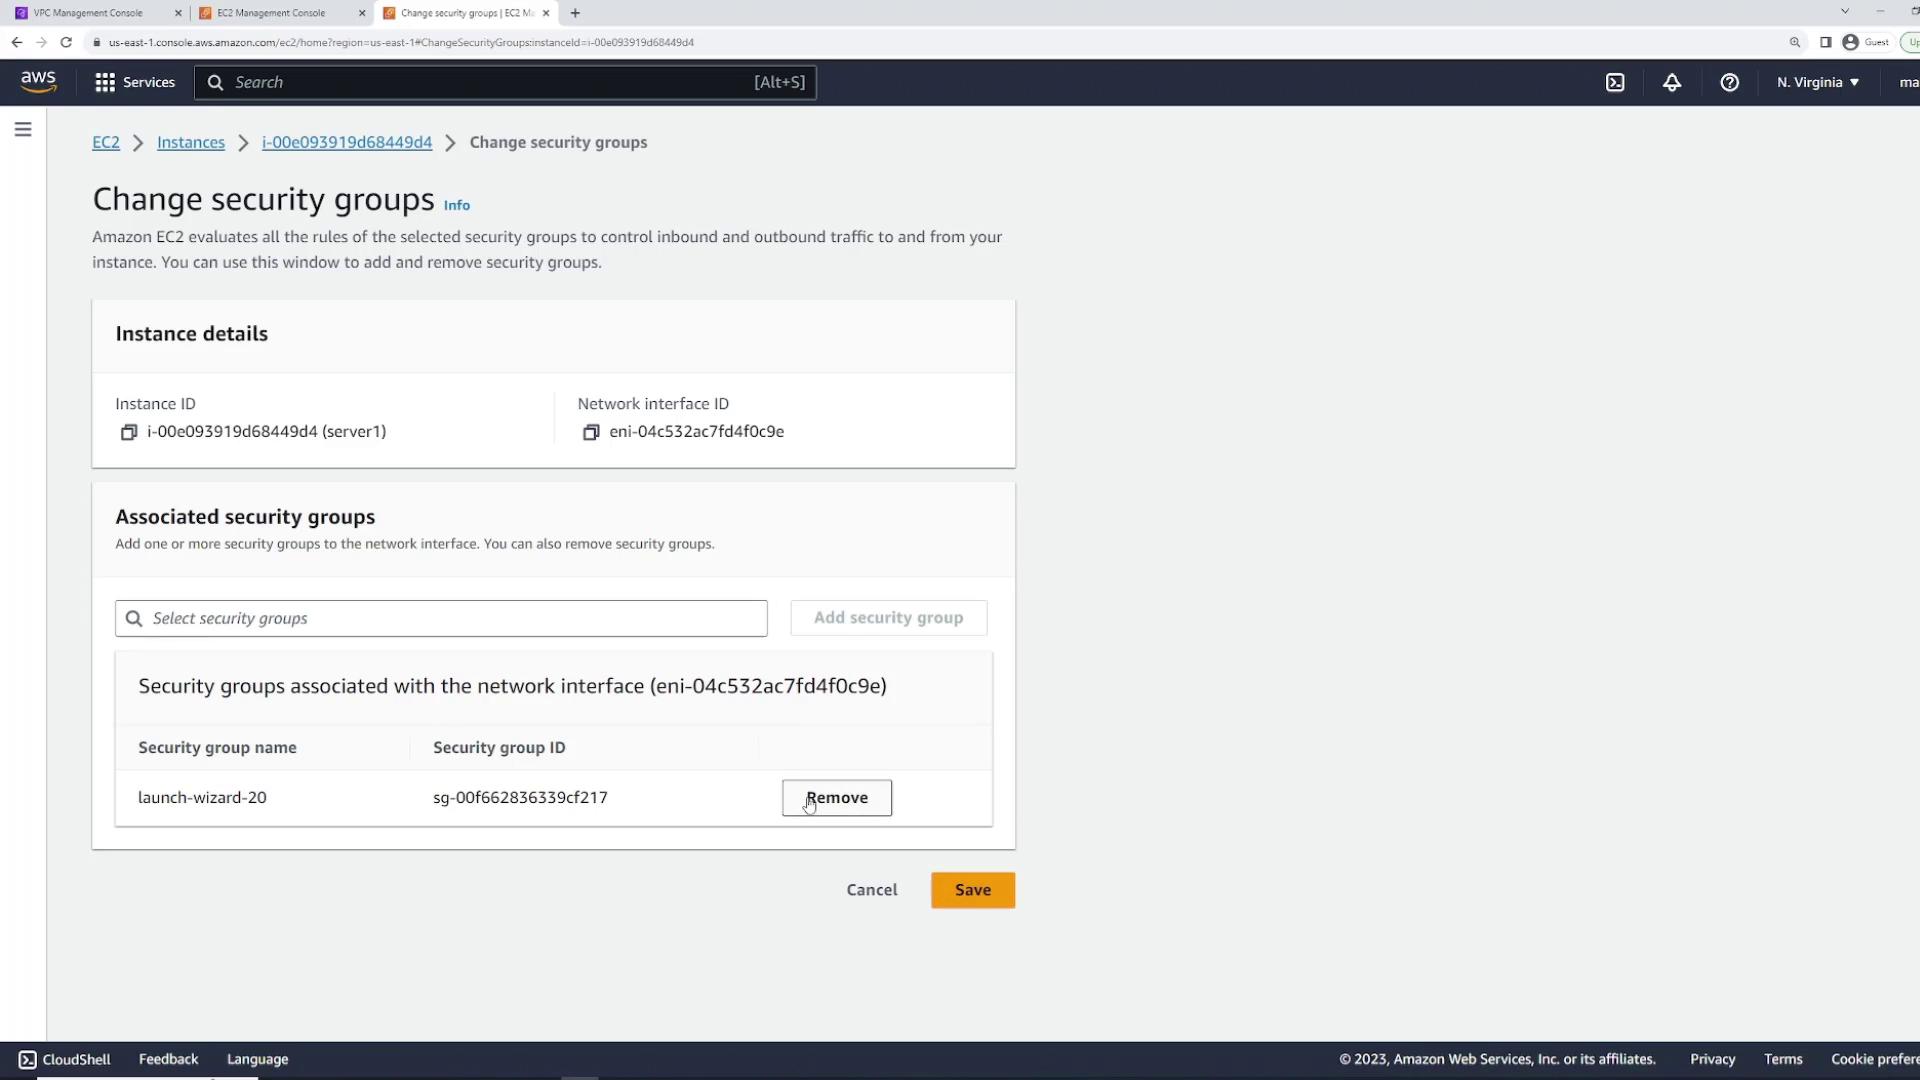
In the EC2 console, select the instance.
Click on “Actions” > “Security” > “Change Security Groups.”
Remove the old security group and add the new “web server security group.”
Click “Add” and then “Save.”
After attaching the correct security group, you should be able to SSH into the instance as it now permits SSH traffic per the new rules.
To verify that nginx is running correctly, execute a local cURL command:
[ec2-user@ip-10-1-1-82 ~]$ curl localhost<!DOCTYPE html><html><head><title>Welcome to nginx!</title><style>html { color-scheme: light dark; }body { width: 35em; margin: 0 auto; font-family: Tahoma, Verdana, Arial, sans-serif; }</style></head><body><h1>Welcome to nginx!</h1><p>If you see this page, the nginx web server is successfully installed and working. Further configuration is required.</p><p>For online documentation and support please refer to <a href="http://nginx.org">nginx.org</a>.<br/> Commercial support is available at <a href="http://nginx.com">nginx.com</a>.</p><p><em>Thank you for using nginx.</em></p></body></html>
Once confirmed, open a browser and navigate to the instance’s public IP address. If the web page fails to load and hangs, it is likely due to the security group allowing only SSH traffic.
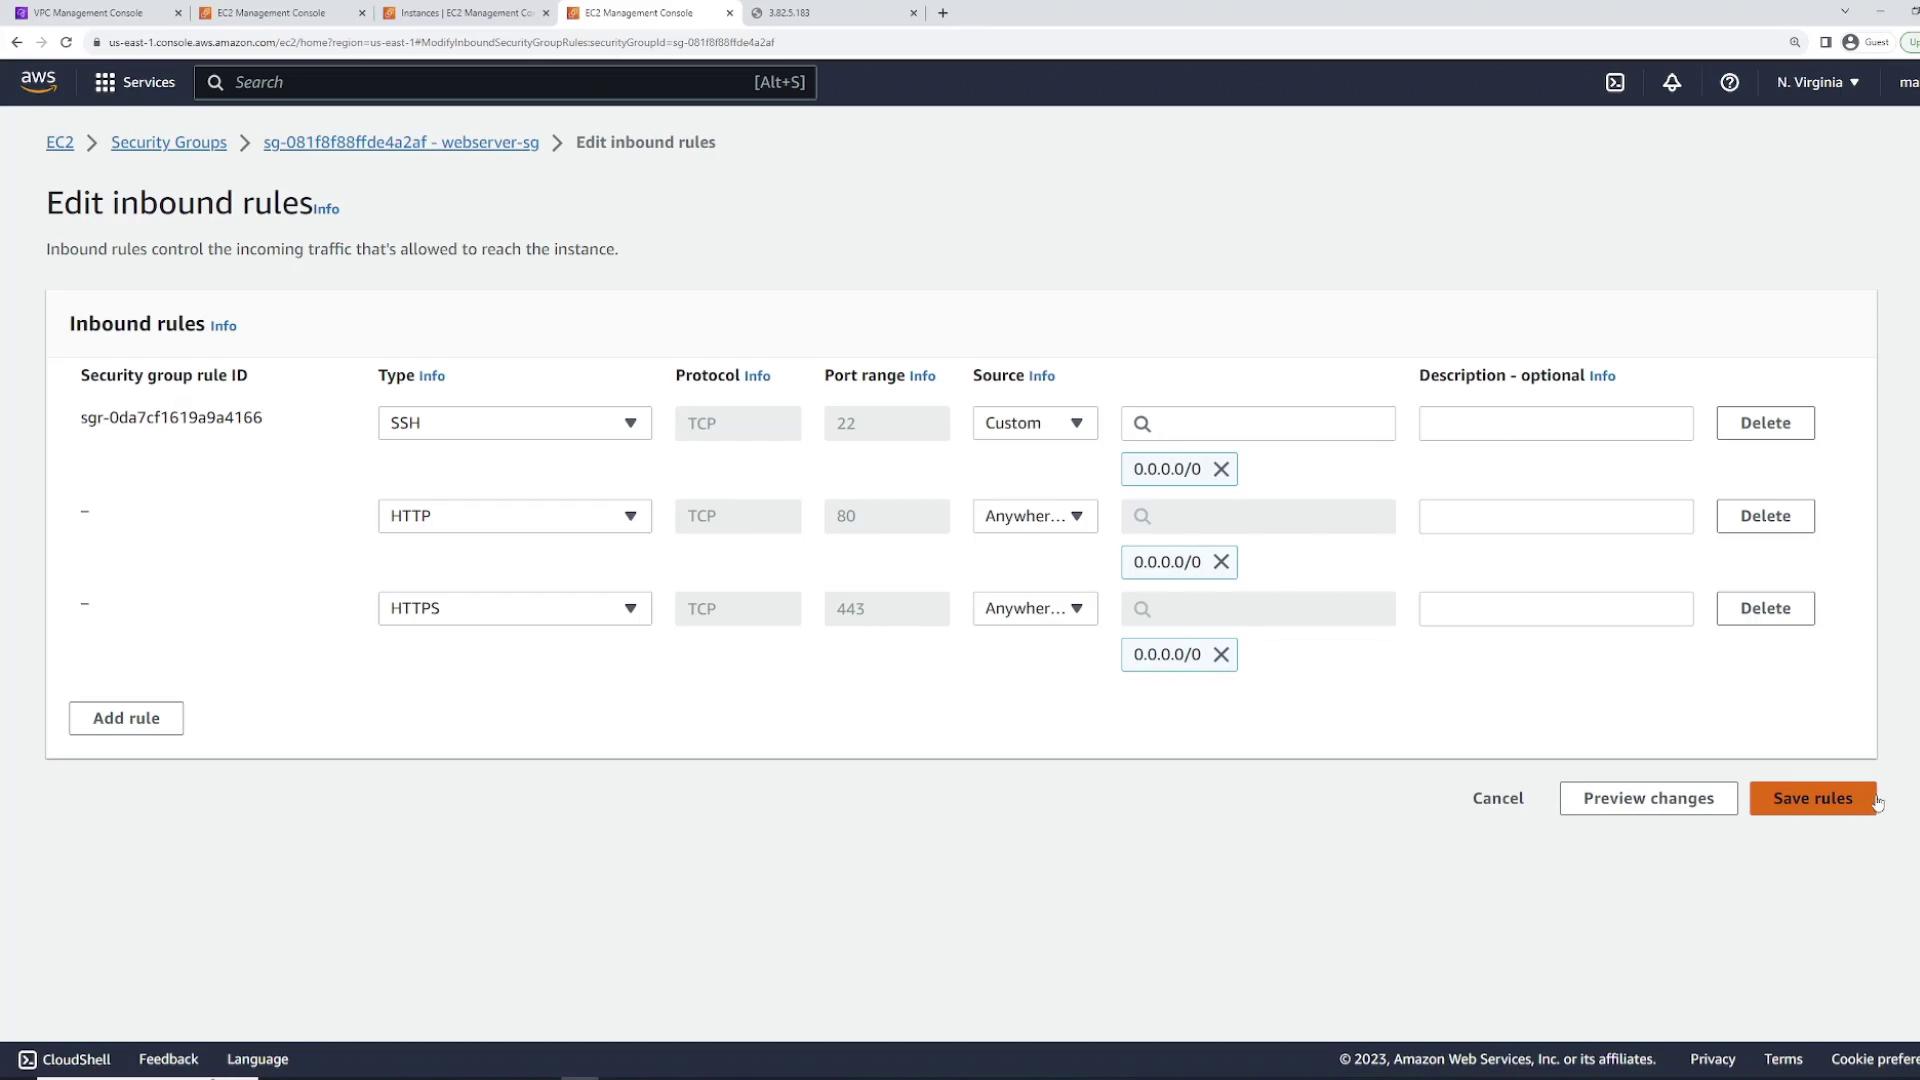
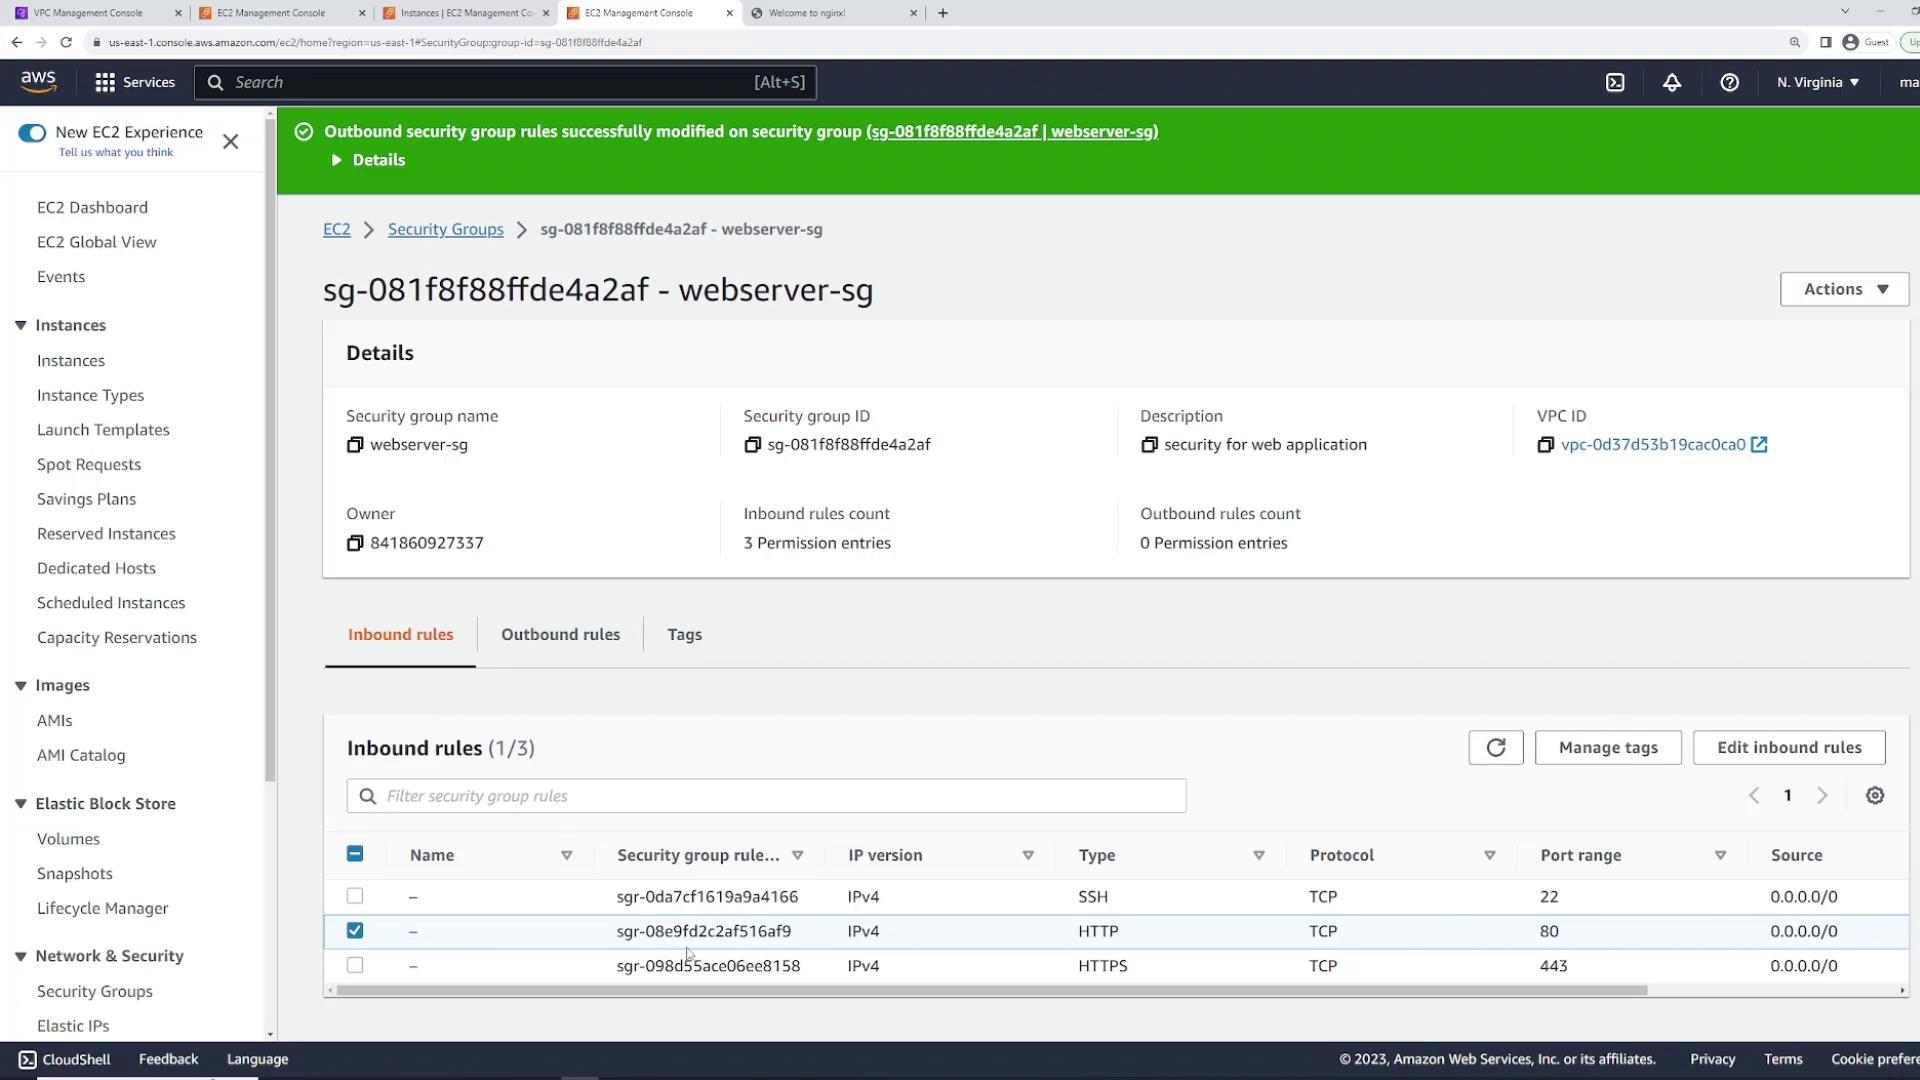
Ensure that you update the “web server security group” to allow HTTP (port 80) and HTTPS (port 443) traffic for full web server functionality.
To add these rules:
Open the security group in the EC2 console.
Click “Edit inbound rules.”
Add an HTTP rule (automatically sets protocol to TCP and port to 80) and an HTTPS rule (TCP port 443).
Set the source to 0.0.0.0/0 for both rules and save your changes.
Now, reloading the public IP in your browser should display the nginx welcome page, confirming that the web server is accessible.
Security groups in AWS are stateful. This means that even if the default outbound rule allows all traffic, AWS automatically permits return traffic for any inbound connection. For example, if an inbound request is received on port 80, the outbound response is allowed even in the absence of an explicit outbound rule.You can test outbound connectivity by pinging an external server:
[ec2-user@ip-10-1-1-82 ~]$ ping 8.8.8.8PING 8.8.8.8 (8.8.8.8) 56(84) bytes of data.64 bytes from 8.8.8.8: icmp_seq=1 ttl=53 time=1.58 ms64 bytes from 8.8.8.8: icmp_seq=2 ttl=53 time=1.61 ms64 bytes from 8.8.8.8: icmp_seq=3 ttl=53 time=1.91 ms64 bytes from 8.8.8.8: icmp_seq=4 ttl=53 time=1.62 ms64 bytes from 8.8.8.8: icmp_seq=5 ttl=53 time=1.65 ms64 bytes from 8.8.8.8: icmp_seq=6 ttl=53 time=1.57 ms--- 8.8.8.8 ping statistics ---7 packets transmitted, 7 received, 0% packet loss, time 601msrtt min/avg/max/mdev = 1.572/1.651/1.909/0.107 ms
If outbound traffic is blocked, the ping test will fail. Reinstate the outbound rule allowing all traffic to enable responses from your EC2 instance.
AWS allows you to attach multiple security groups to a single EC2 instance, providing a modular approach to access control. For demonstration, create the following two security groups:
Allow SSH Security Group – contains an inbound rule for SSH (port 22) from any IP.
Allow HTTP Security Group – contains an inbound rule for HTTP (port 80) from any IP.
After creating these security groups, update the instance (“server one”) by following these steps:
In the EC2 console, select your instance.
Go to “Actions” > “Security” > “Change Security Groups.”
Remove the previous security group.
Attach both the SSH and HTTP security groups.
Save your changes.
The rules of both security groups will merge, allowing both SSH and HTTP traffic. You can verify the updated configuration by checking the instance details in the EC2 instances list:
This modular approach simplifies management across instances. You can apply the same security groups to another instance (e.g., server two) if similar access requirements exist.
Lastly, create a security group specifically for a database. Name it “database security group” and add an inbound rule for your database port (for example, port 5432 for PostgreSQL). Although you could set the source to 0.0.0.0/0 for universal access, it is best practice in production to restrict access to only your web servers.One advanced option is to use the security group of your web servers (e.g., the “Allow HTTP Security Group”) as the source. This ensures that the database only accepts connections from trusted sources, and any changes to web server configurations automatically update the access rules.